


Please Note: This article is part of our historical archive. Because it was published a while ago, some of the information, links, or context may now be outdated.
By default, an EC2 instance comes with just a single public IP. However, there are many scenarios where you need multiple public IPs for your web services to work.
For instance, multi-site WordPress hosting, multiple websites with SSL, high availability fail-over setup for services, network appliances like load balancer, etc. require multiple IPs.
How to setup multiple IPs in EC2
Among the two types of EC2 instances – Classic and VPC, only the latter supports multiple IPs. But adding these IPs isn’t an easy task that can be done in a single click.
To enable multiple IP support in EC2 VPC, first assign private IPs to the instance and then associate Elastic IPs to those private IPs. Today, we’ll see the steps to do that.
Read: What is Amazon EC2 Elastic IP and how to manage them?
1. Add private IPs
In EC2 VPC instances, the private IPs are static. They do not change over each reboot but would stay assigned until the EC2 instance is terminated.
When a new instance is created, a private IP address is assigned to it by default. It is possible to add additional (secondary) private IPs to that instance.
To add a secondary private IP to an EC2 instance, choose the option ‘Actions’ -> ‘Networking’ -> ‘Manage private IP addresses’ for that instance in the AWS console.

Add a private IP to an EC2 instance
2. Add Elastic IPs
A private IP is an internal IP. There is a public IP assigned to each instance but it changes with each restart. This can cause intermittent service downtime due to DNS changes.
That’s why Elastic IPs are relevant. Being static in nature, they don’t incur any DNS downtime. It is also possible to add multiple Elastic IPs to publicly access an EC2.
To add a new EIP to your Amazon account, choose ‘Elastic IPs’ from the AWS console and ‘Allocate New Address’.
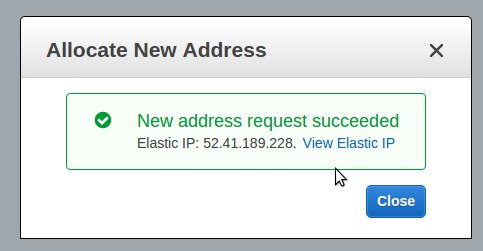
Allocate a new Elastic IP in your Amazon account
3. Assign EIP to private IP
Next step is to assign the Elastic IP to the private IP for that instance. This can be done from the AWS console -> ‘Elastic IPs’ -> ‘Actions’ -> ‘Associate Address’ option.
Choose the instance to which you want to assign the Elastic IP. You can see the private IPs of that instance in the drop down.
Now choose the desired private IP from that drop down and associate the Elastic IP to it. In this instance, we can see two Elastic IPs assigned to two private IPs.

Associate Elastic IP to the private IP of EC2 instance
4. Routing Elastic IP traffic to private IP
Now we have done the mapping between Elastic IP and private IP. But the newly added private IPs wont be listed in the EC2 instance yet.
So we have to manually add the private IPs to the network interface using this command, repeating it for each IP:
sudo ip addr add 172.31.28.197/20 dev eth0
Once the private IPs are added, they would be listed in the server:

List private IPs in the EC2 instance
5. Making IP routing permanent
We could see that this routing configuration stayed permanent in the case of Amazon Linux. But for other RHEL images, after a restart, the private IPs were not listed in the instance.
To keep the changes in effect after reboot, the commands have to be added to the file ‘ /etc/rc.d/rc.local ‘. These commands would be executed whenever the instance starts up.
Now the EC2 instance would be publicly accessible via the two Elastic IPs. The traffic that comes to these IPs would be internally routed to their respective private IPs.
Read: AWS Port 25 block – Why does it happen and how to fix it?
In short..
Today we discussed how to setup multiple IPs in an AWS EC2 instance. Properly planning the IP allocation is vital as AWS sets limits on the number of private IPs and network interfaces.
Unused Elastic IPs must be reassigned or released from the instance, as Amazon puts a charge on unused IPs. Adding proper DNS entries for the Elastic IPs is also required for some services to work.
Read: How to fix Amazon EC2 IP blacklisting in Spamhaus PBL

Thank you so much, it is really helpful! Other articles are just overwhelmed with useless information!
Thank you very much! This is an easy, straightforward approach. The others I tried before this had too much to do and too much information. Many thanks.