


Please Note: This article is part of our historical archive. Because it was published a while ago, some of the information, links, or context may now be outdated.
CloudStack help service providers to deploy cloud solutions on demand. Thus, it is one the popular option among Data Centers.
As the CloudStack installation guide comes with the steps for CentOS 6, it can be confusing while installing CloudStack in CentOS 7.
That’s why, we often get requests from customers to setup CloudStack in CentOS 7 as part of our Infrastructure Management Services.
Today, we’ll see how Bobcares’ Engineers setup CloudStack in CentOS 7 and fix common errors with it.
Why CloudStack ?
Let’s now have a look on why many customers choose CloudStack panel for managing their infrastructure.
CloudStack simply help customers to setup cloud servers using own hardware. Moreover, CloudStack is an open source cloud operating system. It supports a variety of hypervisors including KVM, vSphere and Citrix XenServer.
It gives you control over all your servers via the power web panel. Be it 100 servers or 1000 servers, managing them with CloudStack works like a charm.
Additionally, it gives a real picture of the resource usages in the network. Also, it assists in automating server related tasks.
No wonder, CloudStack is one of the solution that we often suggest to our cloud customers.
Steps to setup CloudStack in CentOS 7
We just saw the benefits of having CloudStack on board. Now, let’s check the exact setup steps.
Usually, customers have an operating system of their choice. And, when coming to a fresh install of CloudStack, our Dedicated Engineers always recommend the install on a latest operating system. We’ll see how we install CloudStack in CentOS 7.
1. Initial setup of CentOS 7
Firstly, we do initial setup on the CentOS 7 server. This involves setting a proper hostname on the server. This hostname should resolve properly in internet. In other words, a proper hostname make the server accessible from any part of the world. We confirm the correct hostname in the file /etc/hosts too.
Now, for proper synchronization, server clock must be working all around the cloud. For this, we set up the Network Time Protocol (NTP) daemon using :
yum install ntp
2. Setup Management server
Secondly, we need to setup the Management server. Let’s now check on how our Support Engineers do this.
As CloudStack only supports official repository, we need to configure it on the server. For this, we create the file /etc/yum.repos.d/cloudstack.repo and add the repo url in it.
Now, we install CloudStack using the command:
yum install cloudstack-management
The management server stores the data in MySQL database. Hence, we need a MySQL server too. To setup this on the same server, we issue the command:
yum install mysql-server
However, CloudStack also supports MariaDB server. Again, the choice depends on the customer requirement too. Further, we customize the MySQL server by tweaking values for max_connections in /etc/my.cnf.
CloudStack needs a way for primary and secondary storage. It supports storage on NFS, Ceph, GlusterFS, etc. For now, we’ll see how our Dedicated Engineers setup NFS for the CloudStack to keep the primary and secondary storage. We setup NFS shares before adding the storage to CloudStack. To install NFS, we use,
yum install nfs-utils
Then, we proceed with the tweaking of configuration files /etc/exports and /etc/sysconfig/nfs.
Finally, to make things working, we restart services like nfs, rpcbind, mysql, etc.
3. Host node setup
Further, we move to the Host node setup.
CloudStack uses libvirt for managing virtual machines. Also, it requires the CloudStack agent that communicates with the Management server and controls all the instances on the host.
For this, our Dedicated Engineers setup KVM and install CloudStack agent using the following commands.
yum install qemu-kvm -y

yum install cloudstack-agent
We finish the configuration by editing the file /etc/sysconfig/libvirtd and restarting the libvirtd service.
Common errors in CloudStack and how we fix it
Usually, the CloudStack setup in CentOS 7 works without ant problem. But, often it can create issues too.
Let’s have look at the real time problems that we see in CloudStack and how we fix them.
1. Unable to create new instance
At times, problems can appear with new instance creation in CloudStack installation.
Recently, one of our customers reported problems with creating new virtual machine on CloudStack. He was receiving the error:
Failed to deploy Vm with Id: 866 on Host with Id: null
In this case, our Dedicated Engineers started troubleshooting by examining the logs and could find that the problem happened due to specific template.
According the error message, the instance did not have enough resource in the server for it’s creation. Here, the template was using higher network bandwidth in the server that the existing limit on the server. Therefore, to fix the problem, we had to edit the template and disable network throttling function.
2. Connectivity issues with VM
Similarly, there can be problems while connecting to the CloudStack VMs too. This can happen due to network connection errors with the management node or internal server problems.
In such cases, our Support Engineers check the instance status from the panel. A VM on stopped status looks as shown below.
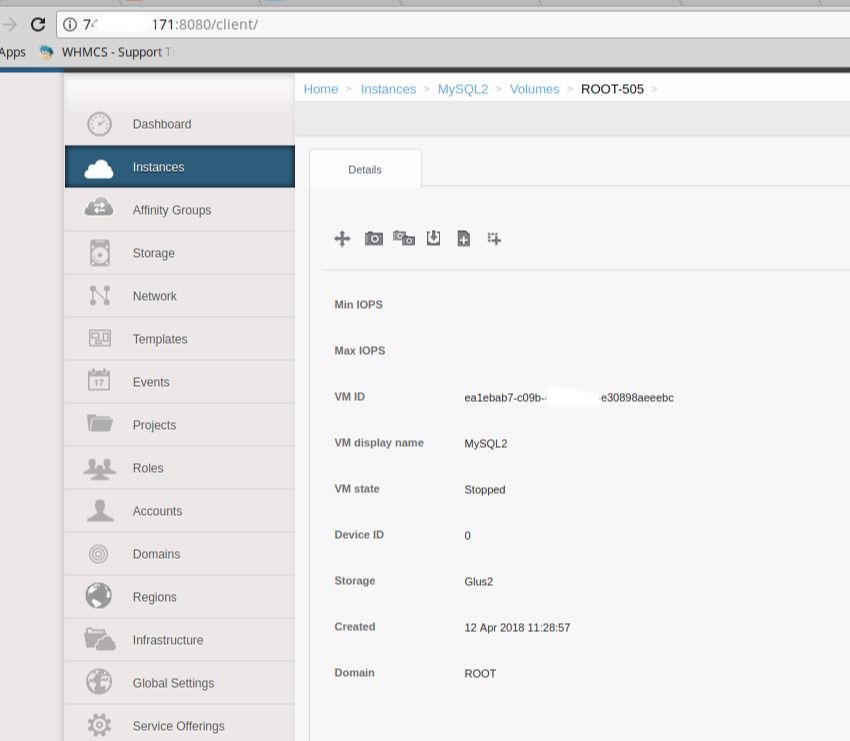
For service related problems, we restart it from the panel and make them running again.
[Need help with CloudStack setup? We can set it for you.]
Conclusion
In short, CloudStack is one of the popular options for service providers offering Infrastructure as a Service. Today, we saw how our Support Engineers setup CloudStack CentOS 7 server and fix common problems with it.
