


Please Note: This article is part of our historical archive. Because it was published a while ago, some of the information, links, or context may now be outdated.
Looking at how to enable leverage browser caching in WordPress?
Caching means storing the static files of a website in the visitor’s browser for faster retrieval.
Most page speed testing tools suggest enabling browser caching.
At Bobcares, we often get requests from our customers to fix the WordPress caching as part of our Server Management Services.
Today, we’ll see how our Support Engineers help our customers regarding WordPress queries.
What is leverage browser caching in WordPress?
Let’s now check the leverage browser caching in detail.
The leverage browser caching stores the static files of a website in the browser. Then it retrieves them from the browser quickly rather than fetching from the server.
In this way, it speeds up each page of a website. The same applies to WordPress too.
If Leverage Browser Caching is enabled, then all statics files will serve from your browser rather than from the server.
Then, this will download only the unique contents of the page.
Also, it saves the bandwidth of the website server and decreases the server load by reducing the number of HTTP requests.
Page speed test results
Most of the time, a page speed test of the website triggers for enabling leverage browser caching.
A website’s speed test results with bad grades for browser caching appear as:
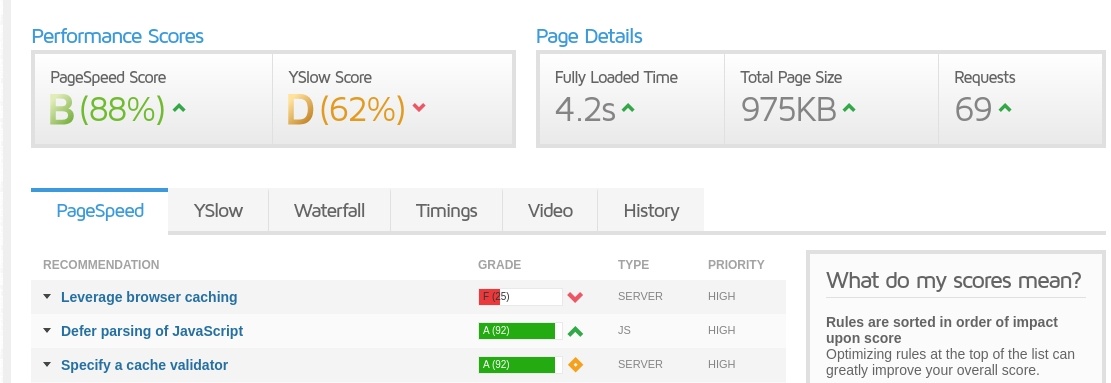
Here, the website does not have the browser caching turned ON.
How we enable leverage browser caching in WordPress?
Now it’s time to see the process to enable browser caching in WordPress. The exact steps to enable it depends on whether it’s an Apache or Nginx based website.
We’ll now take a look at the major steps to enable leverage browser caching manually. They are:
1. Adding Expire Headers
2. Adding Cache-Control Headers and
3. Turning ETags Off.
Via .htaccess file
When the WordPress website lies on an Apache, webserver, our Support Engineers make changes in the .htaccess file.
Next, we are going to discuss in detail on Leverage Browser Caching via .htaccess. That is, enabling this without a plugin.
In the manual method, we usually follow the steps below:
Firstly, we go to WordPress Dashboard of the website and opens the .htaccess file.
And, paste the code given below in .htaccess file of the WordPress site.
#TN - START EXPIRES CACHE
ExpiresActive On
ExpiresByType text/css "access 1 month"
ExpiresByType text/html "access 1 month"
ExpiresByType image/gif "access 1 year"
ExpiresByType image/png "access 1 year"
ExpiresByType image/jpg "access 1 year"
ExpiresByType image/jpeg "access 1 year"
ExpiresByType image/svg "access 1 year"
ExpiresByType image/x-icon "access 1 year"
ExpiresByType application/pdf "access 1 month"
ExpiresByType application/xhtml-xml "access 1 month"
ExpiresByType application/javascript "access 1 month"
ExpiresByType text/x-javascript "access 1 month"
ExpiresByType application/x-shockwave-flash "access 1 month"
ExpiresDefault "access 1 month"
# TN - END EXPIRES CACHE
Then we add Cache-Control Headers below the Expire Headers code in .htaccess file.
# TN - BEGIN Cache-Control Headers
<ifModule mod_headers.c>
<filesMatch "\.(ico|jpeg|jpg|png|gif|swf|pdf|svg)$">
Header set Cache-Control "public"
</filesMatch>
<filesMatch "\.(css)$">
Header set Cache-Control "public"
</filesMatch>
<filesMatch "\.(js)$">
Header set Cache-Control "private"
</filesMatch>
<filesMatch "\.(x?html?|php)$">
Header set Cache-Control "private, must-revalidate"
</filesMatch>
</ifModule>
# TN - END Cache-Control Headers
Finally, we Turn ETags Off as shown below:
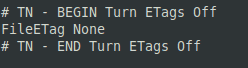
Save changes and that’s it. We test the site with PageSpeed tools again to see the changes.
On Nginx webserver
However, when the WordPress site exists on the Nginx web server, the steps differ.
As the first step, our Dedicated Engineers open the Nginx config file for the website at /etc/nginx/sites-available/sitexxx.conf
We add the cache-control headers.
location ~* \.(js|css|png|jpg|jpeg|gif|svg|ico)$ {
expires 30d;
add_header Cache-Control "public, no-transform";
}
Further, we also include the expires header too.
location ~* \.(jpg|jpeg|gif|png|svg)$ {
expires 365d;
}

location ~* \.(pdf|css|html|js|swf)$ {
expires 2d;
}
Finally, we check the Nginx configuration by the command:
nginx -t
And, restart Nginx webserver.
This way we help our customers with the request to enable leverage browser caching in WordPress.
Additionally, there are readily available plugins that enable browser side caching right away.
[Looking for enabling leverage browser caching in WordPress? We are available 24×7 to help you.]
Conclusion
In short, we discussed in detail on how to enable leverage browser caching in WordPress and saw the way our Support Engineers do it for our customers.
