


Please Note: This article is part of our historical archive. Because it was published a while ago, some of the information, links, or context may now be outdated.
Would you like to sync your data using lsyncd on CentOS? We will help you.
In the internet industry, having an additional backup set will be useful in data recovery.
Here at Bobcares, we often receive requests related to syncing data and also to install daemons like lsyncd as a part of our Server Management Services.
Today, let’s see how our Support Engineers install the lsyncd and fix its common errors.
Explore more about Lsyncd CentOS
Lsyncd is abbreviated as “Live Syncing Daemon“.
It is a rsync and SSH-based tool. And it mainly monitors the changes to local files and directories, then syncs those changes to a specified destination.
We use this simple way to keep the local directory automatically synchronized with the servers.
How we install Lsyncd CentOS?
Let’s now go through the steps of how our Support Engineers install lsyncd in CentOS.
1. Install EPEL via yum
Initially, we install the EPEL repository using the command
yum install epel-release
2. Update the package
Then, we ensure that the packages are updated. So we run the below command to run an update if any packages are not updated.
yum -y update
3. Installing and configuring Lsyncd CentOS
Now, we install the lsyncd by running the command
yum -y install lsyncd
After installing it, we modify the configuration file from the path /etc/lsyncd.conf as below.
----
-- User configuration file for lsyncd.
--
-- Simple example for default rsync.
--
settings {
statusFile = "/tmp/lsyncd.stat",
statusInterval = 1,
}

sync {
default.rsync,
source="/var/www/html",
target="192.168.1.14:/var/www/html",
rsync={rsh ="/usr/bin/ssh -l root -i /root/.ssh/id_rsa",}
}
And then we enable and start the lsyncd through below commands:
systemctl enable lsyncd

systemctl start lsyncd
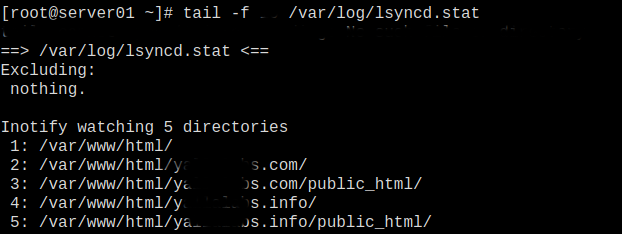
5. Checking the status
Finally, we check the lsyncd status Report as below.
Common errors with Lsyncd CentOS
Let’s have a look into a few common errors that we came across and find our how our Support Engineers fix it.
Unable to restart lsyncd
Recently, one of our customers had approached us telling that he was not able to start the lsyncd and received the below error.
lsyncd.service - Live Syncing (Mirror) Daemon
Loaded: loaded (/usr/lib/systemd/system/lsyncd.service; disabled; vendor preset: disabled)
Active: inactive (dead)

Aug 3 19:22:19 backupsteve systemd: Started Live Syncing (Mirror)
Daemon.
Aug 3 19:22:19 backupsteve systemd: Starting Live Syncing (Mirror) Daemon...
Aug 3 19:22:19 backupsteve sh: Error: failure getting absolute path of [/usr/local/cherbles/archive/plause/backups/dr551-prod/sftpdrop2/latestbackup/]
Aug 3 19:22:19 backupsteve sh: Error: Cannot access source directory: /usr/local/cherbles/archive/plause/backups/dr551-prod/sftpdrop2/latestbackup/
Our Support Engineers investigated this problem and found the error with the configuration file. We saw that there was an error in the cod.
And finally, we fixed this by updating the configuration file.
[Need any further assistance with lsycnd? We’ll help you]
Conclusion
In short, the lsyncd keeps monitoring the directories for any updates, then it syncs all the changes to the specified destination. Today, we saw how our Support Engineers install the Lsyncd and fix its common errors.
