


Learn how to customize your WooCommerce Checkout Page with Elementor to improve design, enhance usability, and boost conversions easily. Build a faster, more reliable eCommerce platform tailored to your business. Explore our ecommerce solutions.
A well-designed checkout page can make a big difference in how many visitors complete their purchase. Elementor Pro makes it easy to customize every part of your WooCommerce checkout page. Using the Checkout widget, you can easily design layouts, adjust colors and typography, and personalize each section to match your brand.
This guide walks you through the entire process of customizing the WooCommerce checkout page using Elementor, step by step.
Overview
1. Edit the Default Checkout Page in Elementor
When WooCommerce is installed, it automatically creates a default checkout page that uses a simple shortcode: `[woocommerce_checkout]`. This shortcode displays the default checkout layout, which looks basic and limited.
To create a more customized version:
- Log in to your WordPress dashboard.
- Then, navigate to Pages → All Pages and locate the page labeled Checkout Page.
- Click Edit to open it in the WordPress editor.
- Next, click Edit With Elementor to open the page in Elementor’s editor.
Elementor will now launch with the default WooCommerce checkout displayed through a shortcode block.
2. Replace the WooCommerce Shortcode
Once inside Elementor, you’ll likely see a minimal design containing only a text widget with the `[woocommerce_checkout]` shortcode. To gain full control over the layout:
- Delete the text widget containing the shortcode.
- Search for Checkout in the Elementor widget panel.
- Drag and drop the Checkout widget onto the page.
After adding the widget, you’ll immediately see a live preview of your checkout page inside Elementor. To test how it looks with actual products, add a few items to your cart from the frontend of your store. Then refresh the Elementor editor to display your active cart items in the checkout preview.
3. Customize General Settings of the Checkout Widget
Once your checkout is visible, open the Checkout widget settings in the Elementor sidebar. Under the Content tab, you’ll find several sections to control the structure and behavior of your checkout page.
Layout Options
You can choose between a one-column or two-column layout.
- A one-column layout stacks everything vertically.
- A two-column layout splits the form and order summary into separate columns.
If you select two columns, you can make the right-hand column sticky so it remains visible as customers scroll. This helps users quickly review their order details before placing it.
Billing and Shipping Details
In this section, you can manage form labels, placeholders, and section titles.
If your WooCommerce settings combine billing and shipping addresses, the form will appear as a single section. Otherwise, both sections will appear separately.
Each field can be customized individually. This is ideal for renaming fields or simplifying labels to improve the user experience.
Additional Information Section
This section typically includes the Order Notes field, where customers can leave special instructions. You can edit the title, alignment, or hide the entire section if your store doesn’t require it.
Your Order Section
This area displays the order summary. In a two-column layout, it appears in the right column; in a one-column layout, it appears below the forms.
You can change the alignment, adjust the title, and tweak how products, quantities, and totals appear.
Coupon Section
This section lets you customize the coupon area’s title and the text used for the “Apply Coupon” link. Simple language and good placement can improve usability for customers applying discount codes.
Payment Section
The Payment section lets you modify the Purchase button alignment and Terms and Conditions text and link.
You can quickly link your existing Terms & Conditions page through Site Settings → WooCommerce → Terms & Conditions within Elementor.
Returning Customer Section
If guest checkout is allowed, you’ll see a “Returning Customer” section. You can edit the login message to make it more engaging or helpful, encouraging repeat customers to sign in before completing their purchase.
4. Style and Design Your Checkout Page
Once your layout and content are set, move to the Style tab in the Checkout widget to refine your design. These settings determine how the checkout page looks.
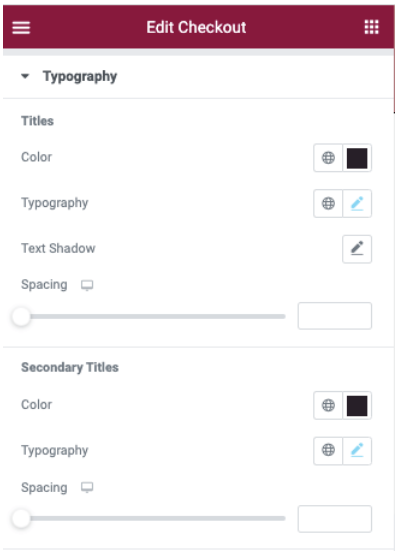
- Sections – global appearance for all sections of the checkout page.
- Typography – allows customization of text across various elements.
- Forms – design the form better to make checkout faster and more visually appealing.
5. Optimize the Checkout Page for Mobile Devices
A growing number of customers shop using mobile devices, so optimizing the checkout for smaller screens is crucial. Elementor automatically makes your designs responsive, but you can fine-tune the layout in Responsive Mode.
Click the device icon in Elementor’s bottom panel to switch between Desktop, Tablet, and Mobile views. You can adjust font sizes, modify padding and margins, reorder columns, hide or show specific sections
For example, reducing padding or font size for smaller screens ensures that the checkout remains user-friendly and doesn’t require excessive scrolling.
6. Manage WooCommerce Page Assignments in Site Settings
If you created a new custom checkout page instead of editing the default one, update WooCommerce to use it. You can manage these settings easily through Elementor.
- Click the three horizontal lines in the upper-left corner of Elementor.
- Select Site Settings → WooCommerce.
- Under Page Settings, assign your newly designed checkout page to the Checkout Page field.
This ensures WooCommerce recognizes your custom checkout layout during the purchase process.
7. Preview and Test Your New Checkout Page
Before publishing, preview your design to confirm that every element works as expected. Test these key points:
- Are all form fields functional and labeled correctly?
- Does the layout look clean across desktop, tablet, and mobile devices?
- Are the coupon and payment sections displaying properly?
- Is the purchase button visible and prominent?
You can complete a few test transactions using WooCommerce’s sandbox or test payment options to ensure checkout runs smoothly.
8. Publish and Go Live
Once you’re satisfied with the design and testing, click Publish to make your new checkout page live. Your WooCommerce store now has a custom-designed checkout page that aligns with your brand and improves the customer experience. Improving your checkout experience can directly impact conversions. Our guide on top eCommerce platforms for every business in 2025 explains broader considerations for choosing the right store framework.
Want a conversion-ready checkout design?

Tips for Designing a Better Checkout Page
Here are a few practical tips to make your WooCommerce checkout even more effective:
- Simplify the form by asking only for essential information to reduce friction.
- Maintain brand consistency by using your brand’s color palette and typography for trust and familiarity.
- Add secure payment icons, SSL badges, or short trust messages near the purchase button.
- Keep button text direct with phrases like “Complete Order” or “Place Secure Order” work well.
- Regularly check the page’s performance and usability after updates or plugin changes.
Conclusion
Customizing the WooCommerce checkout page using Elementor gives you complete control over the final purchase. You can design a layout that reflects your brand, simplifies the buying process, and increases conversions. The Elementor Checkout widget provides flexibility for layout, styling, and responsiveness, all within an intuitive drag-and-drop interface.
Your WooCommerce checkout page can deliver a professional shopping experience that encourages customers to complete their purchase and return again.
