


Wondering how to install Red Hat Enterprise Linux 7.3? We can help you.
As part of our Server Management Services, we assist our customers with several Linux queries.
Today, let us see the step by step process to install Red Hat Enterprise Linux 7.3 on our virtual machine.
How to install Red Hat Enterprise Linux 7.3?
Red Hat Enterprise Linux (RHEL) is an Open Source Linux operating system by Red Hat. RHEL is the most popular operating system in today’s world for major deployments.
Moving ahead, let us see how to install Red Hat Enterprise Linux 7.3, an effective method our Support Engineers follow.
-
Install VMware Workstation
VMware workstation is the industry standard for running multiple operating systems as virtual machines on a single PC.
The first task is to install a VMware workstation on the PC or laptop post downloading it from the VMware website.
Once we install the VMware workstation on the system, we can see the VMware workstation shortcut icon on the desktop.
-
Create a Linux Virtual Machine
As we create a Linux machine we should have the correct setup file of RedHat Linux. Copy the RedHat Linux setup file to the machine and if we do not have this setup file we can download it from RedHat Website.
We make sure to download RHEL binary DVD ISO file. If we download some other file we might face issues during installation.
Now we have the VMware workstation and the Linux setup file. The next step is to create a Linux virtual machine.
Double click on the VMware workstation shortcut icon which is created on the desktop during installation to launch it.

Here we click on the “Create a New Virtual Machine” option.
We will get a welcome window, “New Virtual Machine Wizard” to proceed. There are two configuration options on this page. We go with the default option which is “Typical”.

Click on next to proceed.
The next window is for choosing the operating system for this Linux machine. Here we will select the Linux setup ISO file.
We should select the identified operating system setup file here if we want to install some other operating system. We can click on the browse button to choose the correct path.
Since we have the setup file of RHEL, we will choose and proceed with the second option. Once we select the setup file click on the next button to proceed.

The next screen is to configure the name of the new virtual machine and the location where we want to save or create this machine.
We choose a name as per convenience and browse the location to create this machine on the local system. We make sure to have enough disk space where we are creating this virtual machine.

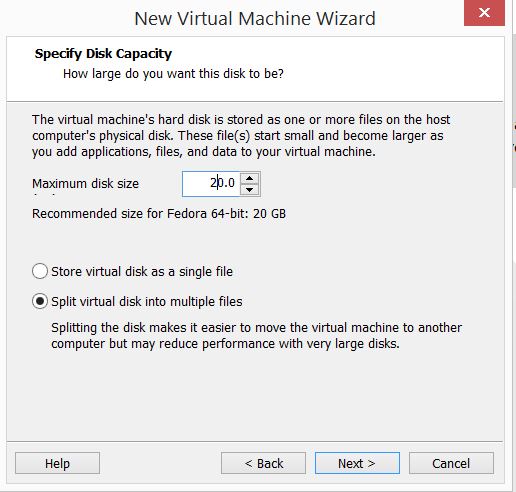
Once we configure the name and location of this virtual machine, the next step is to specify the disk size. We make sure to have at least 20 GB on the drive where we create this virtual machine.
The next window will be the final screen of this setup. Here we can verify the details we use to create the Linux virtual machine.
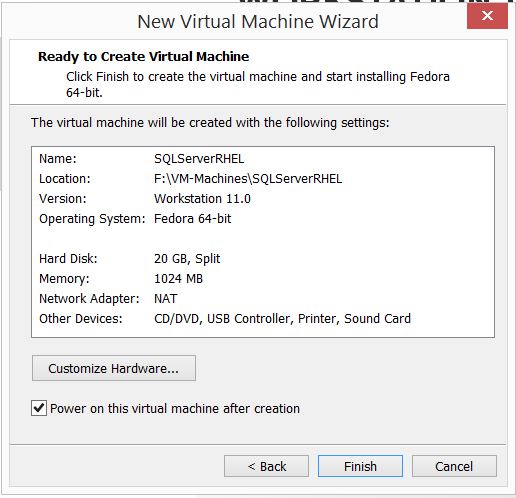
Only 1GB of memory is allocated to this machine. If we want to change such configuration before we create the Linux virtual machine then click on “Customize Hardware…”. We can make the alteration here. Click close once done.
Now memory shows the new value. Click on the “Finish…” button to create the Linux virtual machine and Linux installation will proceed.
[Need help to set up a Virtual Machine? We’d be happy to assist]
-
Install Red Hat Enterprise Linux 7.3
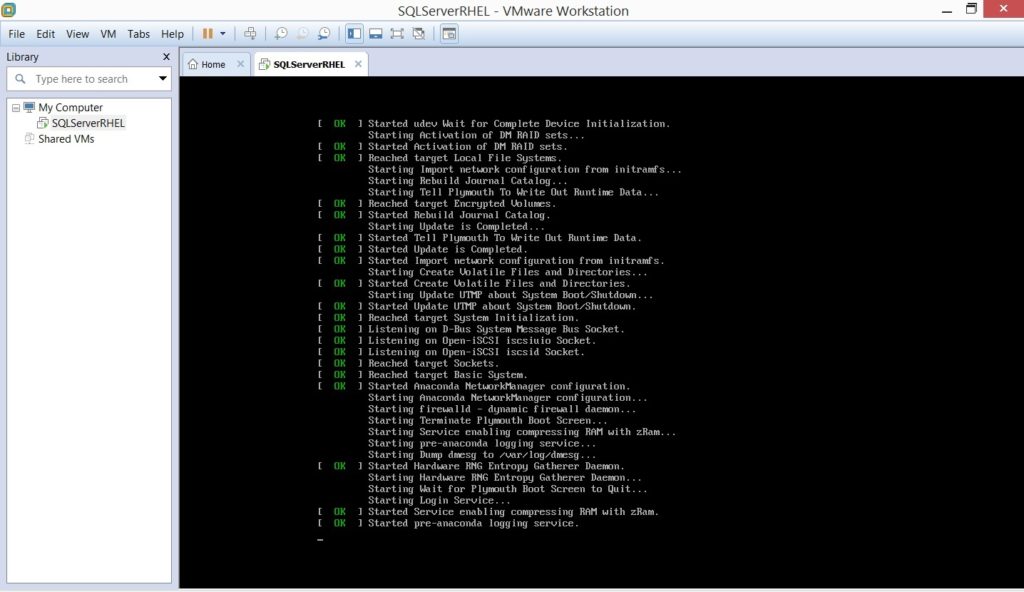
Once we create the virtual machine with RHEL 7.3 setup, installation media will automatically detect and let us proceed with the installation.
This is because we have already selected RHEL 7.3 ISO during virtual machine creation.
Now let us proceed with the installation.
To begin, press Enter on the first option “Install Red Hat Enterprise Linux 7.3” to proceed with the installation. If not, the setup will start automatically after 1 minute.
We will get another screen that says to press enter again. Once we press enter, a series of updates will process on the screen.
Then, we will get a screen to choose the language. Here we choose the language in which installation texts will proceed and click on the “Continue”.
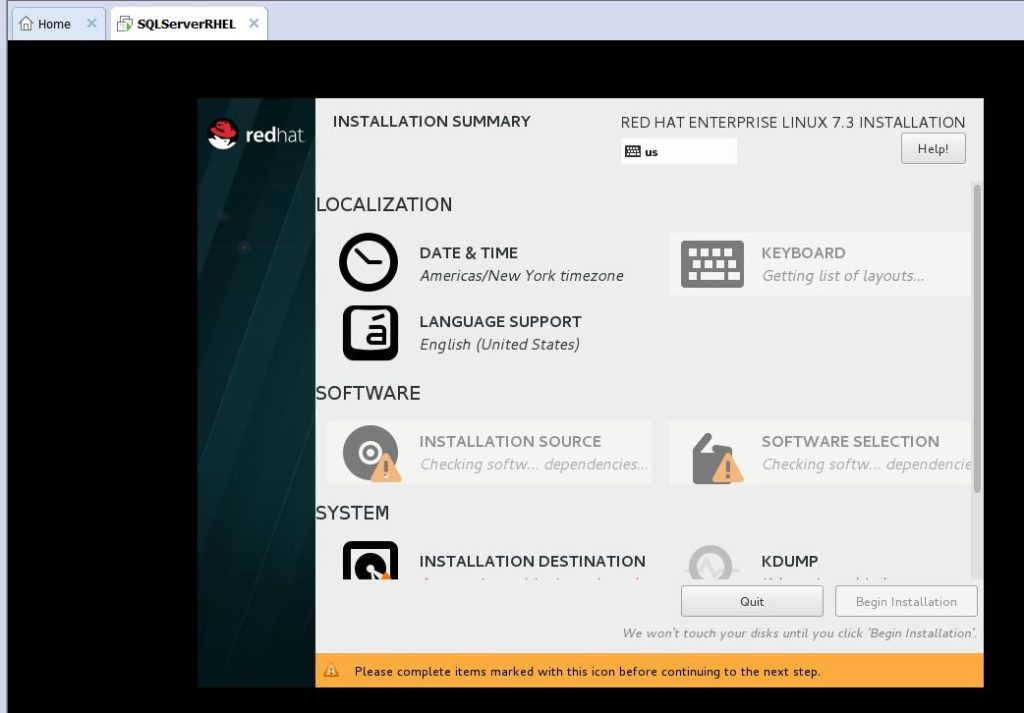
The next window will be the “Installation Summary” window from where we will configure all configurations for this installation.
However, we can see the “Begin Installation” button is disabled on this window. It will enable the moment we configure all parameters.
Let us start the configuration one by one.
First, we click on the “Date & Time” option to set the server clock according to the time zone. Once set, click on the done button given top left side.
Now click on the “Keyboard” option to set the keyboard option as English (US). Click Done to apply this change for the installation.
Then we click on the “Language Support” option to set the language for this installation. Choose the language and click Done to proceed.
The next option is to select the correct installation media. There is no need for making any changes because it is already set as local media, downloaded from the Red Hat website.
Now click on “Software Selection” to choose what type of installation we want to proceed with. We select minimal install to proceed.
If we want to install the GUI-based Linux server operating system, we can choose the last option of the screen. Once we make a selection click Done to proceed.

Then we will configure the “Installation Destination” option. There is also an option to configure storage partitioning. If we want to add some other disk we can do that as well from this page.
Come to the storage partitioning section which is at bottom of the screen, select “Automatically configure partitioning“. Setup will configure all the partitions automatically during installation.

Then click Done to proceed.
Next, click on the KDUMP option. Kdump is a mechanism that captures information from the system during a system crash that can be invaluable in determining the cause of the crash. Enable this option. Click Done to proceed.
Moving ahead, click the “Network & Host Name” option. We will get the screen to configure it.

Here we click the on/off button on the top right side. It will automatically assign the IP address, subnet mask address to make the connection.
Enable it and we can see all addresses on the screen. Write the server name in the hostname section and click, Apply.
Similarly, if we want to assign the IP address, subnet mask address, and other details manually we should click on the configure button. Click Done to proceed.
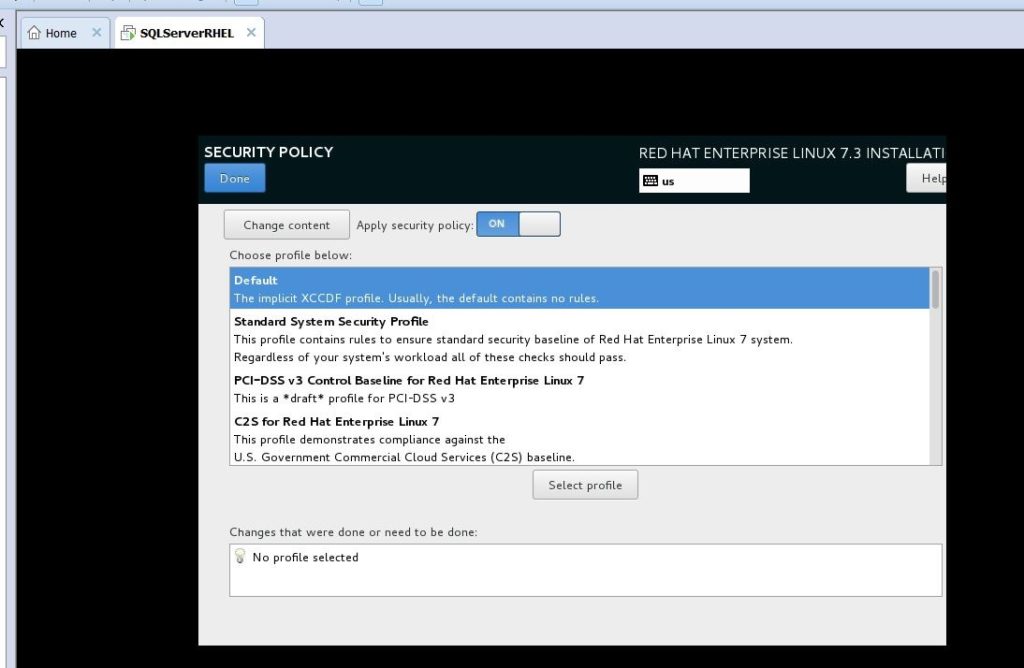
The final option is to select the appropriate Security Policy. We choose the default option.
Now we will click on “Begin Installation” to start the installation.
Once the installation begins, we will get a progress status bar along with options to set Root Password and User Creation.

Click, Root Password to set the root password and Done.
Now click on the User Creation option to create a user. We create a user named bob. Click Done to proceed.
However, installation is still in the process.
Once the installation will be completed, a screen will come that will say that the installation of the Linux 7.3 operating system is completed.

Finally, Reboot to restart the server. The Linux installation is complete here.
Then, we will validate the installation by running a few commands. Once the server will come online post-reboot, it will give a prompt to enter the login credentials.
Enter the user name created during installation.
We can check the hostname and RHEL version installed on this machine by executing:
$ hostname
SQLServerRHEL
$ cat /etc/redhat-release
Red Hat Enterprise Linux Server release 7.3 (Maipo)
Now we can see the output which says hostname as SQLServerRHEL and its version RHEL 7.3 in the above output.
[Failed with the installation? We are available 24*7]
Conclusion
To conclude, in order to install Red Hat Enterprise Linux 7.3 we need to complete the “Installation Summary” window along with the installation of VMware Workstation and creation of a virtual machine. Today, we saw a few methods our Support Engineers follow to complete the process.
