


Please Note: This article is part of our historical archive. Because it was published a while ago, some of the information, links, or context may now be outdated.
Are you looking for the steps to install free SSL using Certify the web? We can help you with it.
Certify the web helps to install and manage the Let’s Encrypt certificates for secure connections.
At Bobcares, we often get requests to install Let’s Encrypt, as a part of our Server Management Services.
Today, let’s see a brief guide on how our Support Engineers install Let’s Encrypt SSL using Certify the web.
What is Certify the Web?
Certify the web provides free https certificates for the Windows IIS server. Moreover, it acts as a GUI for Let’s Encrypt and make certificate management easy.
We can easily install and auto-renew free SSL/TLS Let’s Encrypt certificates for our websites in IIS/Windows servers.
This tool is free for a limited number of websites on a server. However, for a large number of domains, there are options to upgrade.
How to install Certify the Web?
Let’s now see how to install the Certify the Web on the server.
Initially, we download the install files of Certify the Web from the official site. Then we follow the below steps to install and configure the Certify the Web.
1. We run the installer as an Administrator.
2. Then we accept the license agreement and click the Next button.
3. Also, we leave the default installation path and click the Next button.
4. In the Install page, we click the Install button and on the next page click the Finish button.
5. Then we get a message regarding the registration and we click Ok for the message.
6. Finally, we enter our email address and click the REGISTER CONTACT button.
Now the Certify the Web is installed and we can install Let’s Encrypt SSL to our website.
Install Let’s Encrypt certificate on a domain
Then we follow the below steps to add Let’s Encrypt SSL to a domain by Certify The Web.
1. In the Certify the Web user interface, we click the New Certificate button.
2. Then in the Certificate Domains Page, we select Website from the drop-down list or add the fully qualified domain name in the Add domains to certificate text box.
3. Then we click the ADD DOMAINS button.
Clicking the ADD DOMAINS button adds a new row. In this, we can add subdomains too.
4. After that, we click the Authorization button.
For Domain Authorization, we need the website root directory. To get the root directory we open the IIS, then select the site and click on the Basic Settings option in the right Actions pane. Here from the Edit Site window, we copy the text in the Physical Path.
5. Then in the Certify the Web interface we go to the Authorization Page.
- In the Domain Match text box, we type the domain name.
- Then we set the Challenge Type to http-01. When Let’s Encrypt performs domain validation over Http we set it to http-01.
- Then we paste the copied text from the Physical path into the Website Root Directory text box.
6. Then we click the Deployment button. In the deployment page, we perform the following operations.
- We change the Deployment Mode to Single Site from the drop-down list.
- Keep the Binding Add/Update as Add or Update https bindings as required.
- In the Matching any of section we tick the Binding hostname not specified (IP only or All Unassigned) option.
- Next in the IIS Bindings Settings we select the Auto create/update IIS bindings (uses SNI) option.
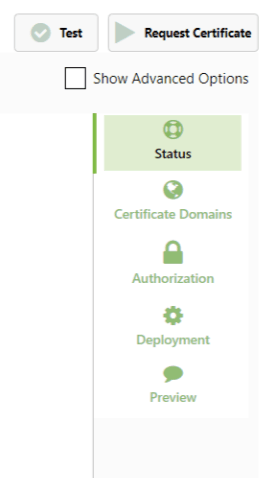
7. Next, we click the Show Advanced Options checkbox and click the Test button.
8. On a successful test, we proceed by clicking the Request Certificate button.
Finally, In Progress tab, it shows the status of Success.
Verify the Certificate Installation
In the next step, we verify the presence of Let’s Encrypt Certificate by following the below steps.
1. For that, we open the IIS and check the bindings of the site. Bindings are on the right side under the Actions pane.
2. In the Site Bindings window, we select the row of https where the port number shows as 443. Then we click the Edit button.
3. In the Edit site bindings, we can see our certificate. Otherwise, we select our certificate from the drop-down list and click Ok.
4. We can view the certificate details from the View option in the Edit site binding window.
From the certificate details, we can understand the expiry date, issuing authority, certificate path, etc. The Let’s Encrypt certificate expires in 90 days but the Certify the Web will renew the certificate every 14 days by default.
Also, we can view the certificate details from the browser by clicking the lock icon near to the URL.
[Need assistance with Certify the Web – We can help you fix it]
Conclusion
In short, we discussed the steps to install Let’s Encrypt SSL using Certify the web and saw how our Support Engineers do it for our customers.
