


Guide to install and configure Laravel on Ubuntu 24.04 for secure web apps. Our Laravel Support team is ready to assist you.
Install and Configure on Ubuntu 24.04
Laravel is a powerful PHP framework that makes building secure, scalable web apps easier with its clean syntax and built-in tools. This guide shows how to install and configure Laravel on Ubuntu 24.04, from setup to running your application.
Advantages of Laravel
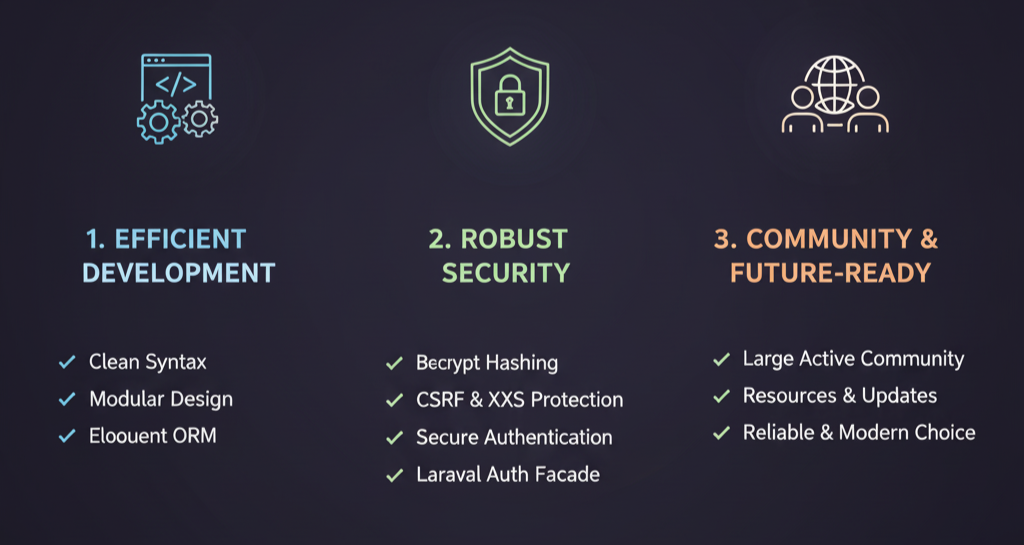
Laravel, a leading PHP framework, streamlines web development with its clean syntax, modular design, and powerful Eloquent ORM for easy database management. These features simplify coding, reduce redundancy, and enhance collaboration among developers.
It also ensures strong security with built-in protections like bcrypt hashing, CSRF and XSS safeguards, secure authentication, and the Laravel Auth Facade for handling user access. Backed by a large, active community offering resources and updates, Laravel remains a reliable and future-ready choice for building modern web applications.
Prerequisites
Before installing and configuring Laravel on Ubuntu 24.04, ensure you have the following:
- Ubuntu 24.04 server access – A running Ubuntu 24.04 instance with SSH access and user credentials, ideally with sudo privileges to execute administrative commands. Previous experience, such as knowing how to deploy Laravel using Nginx on Ubuntu 16.04, can also be helpful when setting up.
- Domain A record – A registered domain name (e.g., example.com) with an A record in your DNS settings pointing to the public IP address of your server. This enables users to access the Laravel application via your domain name instead of the raw IP and is essential for proper web access and SSL setup.
System Preparation
To prepare your Ubuntu 24.04 system for Laravel installation, start by updating packages and installing Curl.
- Update and Upgrade System Packages
Run the following command to refresh package lists and upgrade installed packages to their latest versions. The -y flag automatically confirms prompts:
sudo apt update && sudo apt upgrade -y- Install Curl Package
Next, install the Curl package, which is required for downloading and managing dependencies such as Composer:
sudo apt install curl -yInstall PHP and Required Extensions
To set up PHP for Laravel on Ubuntu 24.04, install the necessary packages and verify the installation.
- Install PHP and Common Extensions
Update package lists and install PHP along with commonly used extensions:
sudo apt update

sudo apt install php-cli php-fpm php-mysql php-zip php-gd php-mbstring php-curl php-xml php-bcmath php-json php-tokenizer openssl -y
Note: The installed PHP version depends on your system’s repositories. To install a specific version (e.g., PHP 8.1), you may need to add a PPA or use another method.
- Install Additional Laravel-Specific Extensions (if needed)
Depending on your project requirements, you may need more extensions:
sudo apt install php-fileinfo php-pdo -y- Verify PHP Installation
Check the installed PHP version:
php -v- Verify PHP Extensions
List all loaded PHP modules and confirm specific ones:
php -m | grep <extension_name>Replace <extension_name> with the extension you want to check (e.g., mbstring, curl).
Install and Verify Composer
Windows
- Download and run Composer-Setup.exe from getcomposer.org.
- Select your PHP executable and check “Add to PATH.”
- Complete setup (restart may be required).
Linux/macOS
php -r "copy('https://getcomposer.org/installer', 'composer-setup.php');"

HASH="$(wget -q -O - https://composer.github.io/installer.sig)"

php -r "if (hash_file('SHA384', 'composer-setup.php')==='$HASH'){echo 'Installer verified';} else {echo 'Installer corrupt'; unlink('composer-setup.php');} echo PHP_EOL;"

sudo php composer-setup.php --install-dir=/usr/local/bin --filename=composer

php -r "unlink('composer-setup.php');"
Verify Installation
composer –version
Install Laravel on Ubuntu 24.04
- Create Project Directory
sudo mkdir -p /var/www/your_project_name- Set Ownership for Apache
sudo chown -R www-data:www-data /var/www/your_project_name- Create Laravel Project with Composer
cd /var/www/your_project_name

sudo -u www-data composer create-project laravel/laravel .- Configure Database in .env
Edit .env and update:
DB_CONNECTION=mysql

DB_HOST=127.0.0.1

DB_PORT=3306

DB_DATABASE=your_database_name

DB_USERNAME=your_username

DB_PASSWORD=your_password- Run Database Migrations
cd /var/www/your_project_name

php artisan migrate
Configure Apache for Laravel
- Enable mod_rewrite module
sudo a2enmod rewrite- Create and edit Virtual Host file
sudo nano /etc/apache2/sites-available/laravelapp.confAdd:
<VirtualHost *:80>

ServerName laravelapp.example.com

DocumentRoot /var/www/laravelapp/public

<Directory /var/www/laravelapp>

AllowOverride All

</Directory>

</VirtualHost>- Enable site & disable default
sudo a2ensite laravelapp.conf

sudo a2dissite 000-default.conf- Test config & restart Apache
sudo apachectl configtest

sudo systemctl restart apache2
Access Laravel Application
- Using Laravel’s Built-in Server
From your project root, run:
php artisan serveYour app will be available at http://localhost:8000.
- Using Apache/Nginx
Ensure your web server is running and configured with the Laravel project’s public directory as the DocumentRoot (via Virtual Host/Server Block). - Open in Browser
Visit your configured domain (e.g., http://laravelapp.example.com or http://localhost:8000).
[Need assistance with a different issue? Our team is available 24/7.]
Conclusion
By following these steps, you can successfully install and configure Laravel on Ubuntu 24.04, ensuring a secure and efficient environment for developing modern web applications.
In brief, our Support Experts demonstrated how to fix the “554 5.7.1 : Relay access denied” error.
