


Please Note: This article is part of our historical archive. Because it was published a while ago, some of the information, links, or context may now be outdated.
IPv6 gradually replaces IPv4, because of it’s scalability and capability.
And, that’s why most server owners provide IPv6 support on their server.
At Bobcares, we help server owners setup IPv6 on their SolusVM as part of our Server Management Services.
Today, let’s see how we setup IPv6 on SolusVM node.
What’s IPv6? Why it’s needed?
IPv6 is the advanced version of IPv4 and this Ipv6 format was created to enable millions of IP addresses. As a result, this addresses the problem of exhaustion of IPv4 addresses. Now let’s see the main benefits of IPv6.
- Provides more address space.
- Also, it enables large data packets to be sent simultaneously conserving bandwidth.
- Improves security using IPSec.
How to enable IPv6 on SolusVM?
Now, let’ see how our Dedicated Engineers enable IPv6 support on SolusVM system.
1) Modify the kernel parameters
Firstly, our Support Engineers ensure that IPv6 forwarding is enabled in the kernel, so that it forwards IPv6 packets. For that, we modify the following parameters in the file /etc/sysctl.conf.
net.ipv4.ip_forward = 1
net.ipv6.conf.default.forwarding = 1
net.ipv6.conf.all.forwarding = 1
net.ipv4.conf.default.proxy_arp = 0
net.ipv6.conf.eth0.forwarding = 1
net.ipv6.conf.all.proxy_ndp = 1
kernel.sysrq = 1
Most importantly, we always recommend to backup this file before making any changes. Because, these are critical parameters and a single wrong step can break your server.
2) Update Network configuration
Secondly, our Server Experts do some tweaks in the network configuration file, so that the IPv6 address becomes usable. In other words, we update the following parameters in the file /etc/sysconfig/network.
NETWORKING_IPV6=yes
IPV6FORWARDING=yes
IPV6_DEFAULTDEV=eth0
IPV6_DEFAULTGW=3001:f11d0:100:1000::1
IPV6_AUTOCONF=no
Further, we change the interface settings accordingly. For example, we change the below IPv6 parameters in the interface file /etc/sysconfig/network-scripts/ifcfg-eth0.
DEVICE=eth0
ONBOOT=yes
IPV6INIT=yes
IPV6ADDR=ac00:ac21:100:1000::2
IPV6_AUTOCONF=no
On the other hand, if VPS servers are connected to a bridge network, we edit the network settings of this bridge interface as well. For example, we add the following parameters in the bridge interface /etc/sysconfig/network-scripts/ifcfg-br0.
IPV6INIT=yes
IPV6_AUTOCONF=no
NETWORKING_IPV6=yes
IPV6FORWARDING=yes
Most importantly, we enable IPv6 forwarding parameter to forward the /64 addresses assigned to individual VPS servers out to the VLAN and vice-versa.
Finally, we restart the network service for these changes to take effect. For example, on CentOS 7, we restart the network using the below command.
systemctl restart network
Alternatively, our Support Engineers restart individual network interfaces using ifup and ifdown command.
ifdown eth0
ifup eth0
3) Firewall modifications
Most importantly, our Server Experts make necessary changes in the server firewall to allow services to listen on IPv6 addresses. Also, we allow incoming and outgoing connections from this IPv6 address. After that, we verify the IPv6 connectivity using the ping6 command.
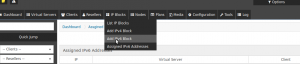
4) Add IPv6 block
Further, our Support Engineers add a new IPv6 block to SolusVM using the below steps.
- Go to SolusVM admin control panel > Ip Blocks > Add IPv6 blocks.
- Further, in the Gateway Assignment option, we define either SoluVM uses the main blocks gateways, the first IP of the assigned subnet or the last IP of the assigned subnet.
- After that, we add the Subnets to this IPv6 block.
How to add IPv6 block in SolusVM?
Similarly, we add IPv6 addresses to the VPS from Virtual Servers > List Virtual Servers > Select the server > IP’s > Add additional IPv6.

How to add IPv6 to a VPS?
Conclusion
In short, enabling IPv6 on SolusVM requires a series of steps and this should be done carefully. Today, we’ve discussed how our Dedicated Engineers enable IPv6 on SolusVM.

Shouldn’t br0 be set as forwarding device?
Hello John,
Yes, when your server has Bridge configuration for KVM slave.