


Please Note: This article is part of our historical archive. Because it was published a while ago, some of the information, links, or context may now be outdated.
Enabling private IP address is one of the good strategies to secure your Vultr instances.
But, setting up private networks on your Vultr Cloud Compute is not so easy. We need to manually configure the IP address on the network interface.
Also, handling network configuration on your Vultr instance is really critical. Because, a single mistake can make your server totally unavailable.
At Bobcares, we help server owners to safely add private IP address on their Vultr instance as part of our Managed Cloud Services.
Today, we’ll see how our Engineers add a private IP on the Vultr instance and common problems that we faced during this process.
Why you need a Private IP in Vultr?
A private network adds a second interface with a private IP address to your server. This private IP address is not accessible to the public. And, users can communicate with their Vultr instances in the same region using this private network.
In addition to that, users can assign any IP range on the private network. But, we recommend to use the ranges 10.0.0.0/8, 172.16.0.0/12, or 192.168.0.0/16.
Now, let’s see why a private IP becomes important in your business.
- It offers a seamless and secure way of transferring data between your Vultr instances, because no data can enter or exit the network.
- As there is no public access, it is tough for the malware or virus to enter this network. This ensures security.
- Private network traffic will not be measured.
How to add Private IP in Vultr?
Now, let’s see how our Dedicated Support Engineers add private IP address on Vultr instances.
We can enable the private IP from Vultr account control panel using the below steps.
Click on the Vultr server > Settings > Enable Private Network.
This automatically assigns one private IP address to the Vultr Cloud Compute. And, users can see the details of private IP address as shown in the image below.
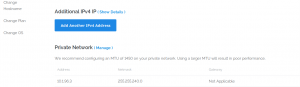
How to add private IP in Vultr?
Most importantly, the server must be restarted to enable the private IP address. After that, our Support Experts manually setup the private IP address on the new interface. The steps to configure private IP address just depends on the operating system of the Vultr instance.
For example on CentOS 7 servers, we create a new network interface like /etc/sysconfig/network-scripts/ifcfg-eth1 and configure the private IP address as given below.
DEVICE=eth1
ONBOOT=yes
NM_CONTROLLED=no
BOOTPROTO=static
IPADDR=10.1.96.3
NETMASK=255.255.240.0
IPV6INIT=no
MTU=1450
On the other hand on Debian or Ubuntu servers, we add the following lines to the file /etc/network/interfaces.
auto eth1
iface eth1 inet static
address 10.1.96.3
netmask 255.255.240.0
mtu 1450
Further, we start the new interface and confirm it from the server backend.
[root@vultrcloud ~]# ip a | grep 10.1
inet 10.1.96.3/20 brd 10.1.111.255 scope global eth1
[root@vultrcloud ~]#
In addition to that, we test this by pinging the private IP address from another Vultr instance. This instance should be in the same region with private networking enabled.
ping 10.1.96.3
[Need help adding private IP address on your Vultr server? One of our experienced Server Experts can help you here.]
How to ensure privacy of Public network?
Although private network isn’t open to the public, other users still have access to it. So, we can’t cut down the chances of unwanted traffic hitting the private network.
Here, our Support Engineers configure proper firewall rules for the private IP address. For example, we configure iptables rules on CentOS servers to ensure that SSH access is restricted to the server and from unknown private IP addresses.
Similarly, for database server on a private network, we must restrict the connections from limited IP addresses. In such cases, we allow only the required IP address in the firewall to access the database server.
Vultr Private IP – Common problems noted
Adding private IP to the Vultr server looks pretty straightforward. However, this won’t go well all the time. We’ve seen instances where users report problems after adding private IP. Let’ see some of the common problems.
1) Private IP address doesn’t ping
One of the common problems is that the private IP address doesn’t respond to ping requests. Such problems usually occur when there’s an error in the network configuration.
In such cases, our Hosting Engineers ensure that the network parameters of the server such as IP address, netmask, etc. are correctly set.
Similarly, some configurations such as Ubuntu 17.10, Ubuntu 18, etc. require the MAC address to be specified in the interface configuration file. Here, we backup the network configuration file and update the MAC address to fix the issue.
[New private IP address not pinging? Click here and one of our Server Experts will fix it for you.]
2) Private IP address not displayed on the server
Another common problem that customers report is that the new private IP address doesn’t show on the server.
In such cases, we ensure that customer has added the private IP address in the correct network configuration file. Because, the network configuration files differs according to the operating system used.
For example on Ubuntu and Debian servers, customers must add the private IP in the file /etc/network/interfaces. Similarly on CoreOS, the private IP should be added in the file /etc/systemd/network/static.network. In addition to that, the permission of this file should be 644. Otherwise, the private IP won’t show in the server.
Conclusion
In short, adding private IP in Vultr can be quickly done. However, a single mistake can bring down your entire server. Today, we’ve discussed how our Support Experts setup private IP in Vultr server and solve the common problems with this setup.
