


Please Note: This article is part of our historical archive. Because it was published a while ago, some of the information, links, or context may now be outdated.
Connect to a Plesk server via RDP with available credentials with this handy guide by the experts at Bobcares.
At Bobcares, we offer solutions for every query, big and small, as a part of our Server Management Services.
Let’s take a look at how our Support Team is ready to help customers connect to a Plesk server via RDP with available credentials.
How to connect to a Plesk server via RDP with available credentials
Our Support Team is here with a handy guide to connect to a Plesk server through the RDP with the accurate credentials. However, if we do not have access to the RDP credentials, our Support Techs suggest contacting the Hosting Provider.
From Windows:
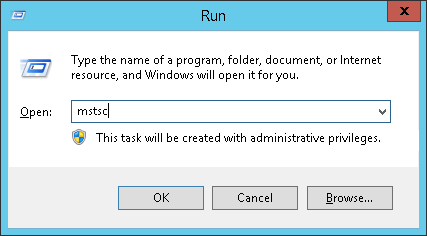
- First, we have to press “Windows+R” buttons and click Run.
- Next, enter mstsc in the Run window and click Ok.
- Then, specify the IP of the server in the next window.
- After that, enter the credentials of a user with administrator privileges and click ok.
- Finally, click Yes when the following message appears:

From Linux:
- First, head to Terminal Console under Applications >Terminal.
- Next, execute the following command to install the xfreedp utility:
- For Debian based systems (Ubuntu/Debian):
# apt-get install freerdp-x11 -y
- For RHEL based systems (CentOS/CloudLinux):
# yum install freerdp -y
- For Debian based systems (Ubuntu/Debian):
- Then, run the following command to start the RDP connection:
#xfreerdp -g 1920x1080 -u username 203.0.13.2
- Finally, type Y and click Enter when the following message appears:
Do you trust the above certificates? (Y/T/N)
From MacOS:
- First, head to the App Store.
- Then locate and install Microsoft Remote Desktop 10 software.
- Next, open Microsoft Remote Desktop 10 and click the Add PC button.
- After that enter the server’s IP address or hostname in the PC name field and click Add.
- Next, click the added connection from the step above.
- Now, it is time to enter the RDP login credentials and click Continue.
- Click Continue when a message similar to the one below appears:
You are connecting to the RDP host “203.0.3.12”. The certificate couldn’t be verified back to a root certificate. Your connection may not be secure. Do you want to continue?
[Looking for a solution to another query? We are just a click away.]
Conclusion
To sum up, our skilled Support Engineers at Bobcares demonstrated how to connect to a Plesk server via RDP.
PREVENT YOUR SERVER FROM CRASHING!
Never again lose customers to poor server speed! Let us help you.
Our server experts will monitor & maintain your server 24/7 so that it remains lightning fast and secure.
