


Please Note: This article is part of our historical archive. Because it was published a while ago, some of the information, links, or context may now be outdated.
1. Docker installed – Check.
2. Get image – Check.
3. Deploy container – Check.
With Docker, deployment is as easy as that. Sysadmins and developers have moved away from the VPS days, and have settled into the easy lives of getting deployments done in minutes rather than hours. But now we’ve grown more ambitious – How do we manage multiple Docker containers more efficiently? Enter the Cockpit project from Red Hat.
Cockpit as a Docker Management UI
Cockpit is a browser based server manager, which allows sysadmins to carry out simple server management functions like resource allocation, container deployment, image download, etc. through an intuitive UI. The Fedora package of Cockpit has a built-in Docker integration which makes Docker container management over multiple servers quite easy.
Cockpit is available out of the box with Docker integration in Fedora Server, CentOS Atomic, Fedora Atomic, Red Hat Enterprise 7.1+ extras repo, and Arch Linux User repo. Fedora 22 server comes pre-loaded with Cockpit and Docker, but even if your server doesn’t have it, its a straight forward install with the following commands:
# dnf update

# dnf install docker

# dnf install cockpit
Start the Cockpit server by using the below commands:
# systemctl enable cockpit.socket

# systemctl start cockpit

# firewall-cmd --add-service=cockpit

# setenforce 0
In the default configuration, Cockpit should be available in port 9090. So, you can access Cockpit management console with the URL https://[YOUR-SERVER-IP]:9090. Login with your admin login details. You can see your server resource statistics, and control functions.

Cockpit login screen
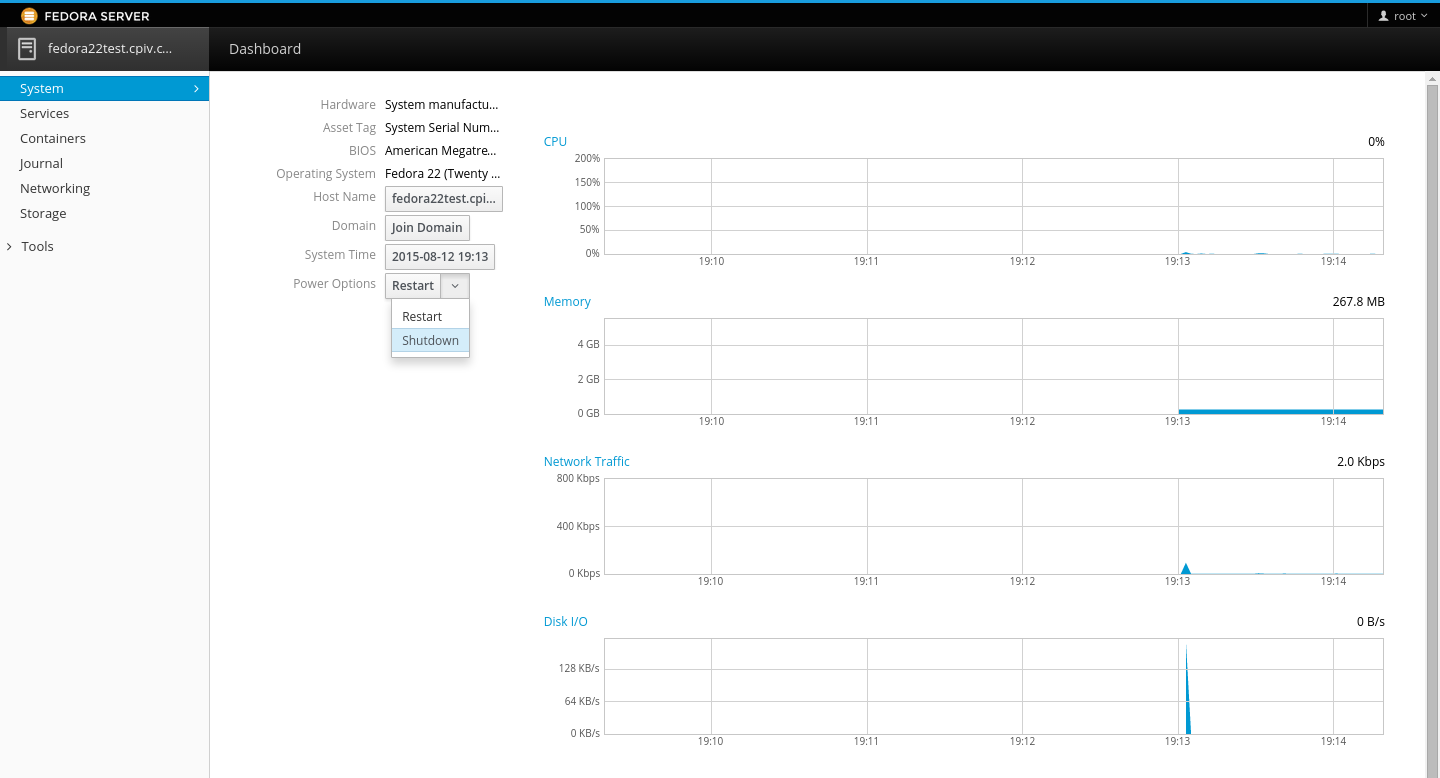
Cockpit system management screen
Docker management with Cockpit
Docker integration is pre-built with Cockpit in Fedora. So, when you login to Cockpit, you’ll see the “Containers” link on the left pane visible. Clicking on it will lead you to the Docker management console, where you can start Docker server, get new images, start new containers, manage resources and manage instances.
Getting (Pulling) Docker images
Under the “Images” section, you have the option to “Get new image”. This launches an “Image search” window where you can see all published images in Docker Hub. I pulled the Tutum WordPress container, which looked like this:
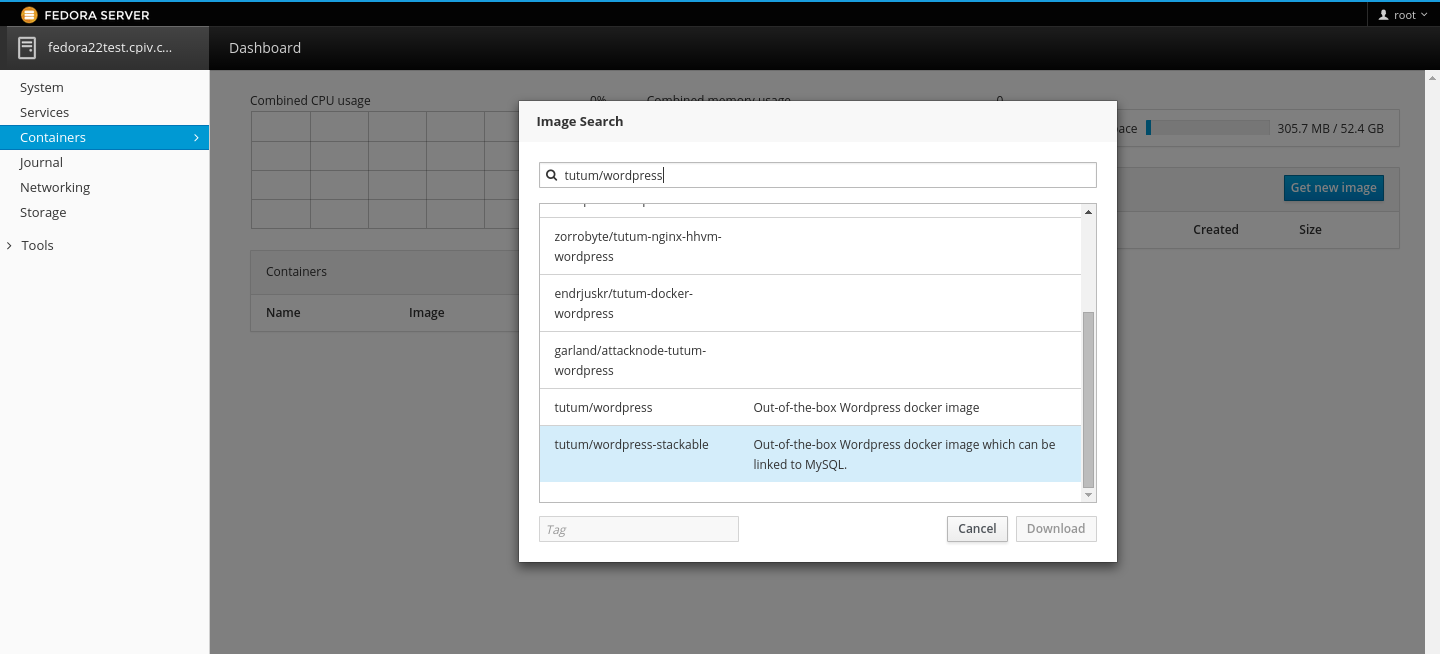
Pulling new Docker images from Cockpit UI
Starting a Docker container
Once you have the image, just click the run icon in the “Images” section, and a “Run Image” dialog pops up to configure the container resource allocation and port assignment. For each container, you can bind their service ports to the host server ports as shown below. This allows you to run multiple Docker containers for different apps on different ports, and then link them all to a single load balancer front end. Click “Run” and your container comes to life.

Running Docker container from Cockpit
Resource usage monitoring
You can see the resources used by your Docker containers by going to the Container management screen. A snapshot is shown below:

Docker container management UI in Cockpit
Resource management
If you notice the CPU or memory usage of a container causing instability to the host server, you can change its resource allocation. Click on the container to show its management console.

Docker container management screen
Click on “Change resource limits” to adjust the resource allocation of the container.

Docker container resource management
The container management screen also gives you the options to Stop, Restart and Delete the container. For Docker images enabled with terminals, you get an option to issue terminal commands via this management screen.
Go ahead and try out Cockpit today. As we’ve seen in a previous post, Cockpit can save you time in configuration management, and help you optimize deployment, monitoring, and a range of other DevOps activities.
Bobcares server administrators routinely help webmasters and service providers configure their infrastructure and keep their servers secure and responsive. Our server management services cover 24/7 monitoring, emergency administration, periodic security hardening, periodic performance tuning and server updates.
SEE HOW YOU CAN SETUP A RELIABLE SERVER INFRASTRUCTURE


Hi, what do you mean by?
#dnf update
I tried running that on server it results:
# -bash: dnf: command not found
Hi M Sonah,
Are you using Fedora 22?
DNF is the replacement to Yum.
In older systems, use Yum.