


Secure your store using the process to enable automatic backup on Magento 2. Our Magento Support team is ready to assist you.
Process to Enable Automatic Backup on Magento 2
Running an online store in Magento 2 means handling customer information, orders, products, and other valuable data every day. Any unexpected issue such as a server crash, human mistake, or security attack can cause the loss of this data and disrupt business operations. Automatic backups provide a reliable way to protect the store by saving copies of important files and databases at regular intervals. They make it easier to restore the site quickly, reduce downtime, and keep the business running smoothly without unnecessary risks.
Why Automatic Backups Matter for Magento 2 Stores
Automatic backups are essential for Magento 2 stores because they protect valuable business data and reduce risks during unexpected events. An e-commerce site handles sensitive customer information, order details, and inventory records daily. Losing this data due to server crashes, human errors, or cyberattacks can severely impact sales and customer trust.
Tip: For Magento 2 stores using customized workflows, ensure that features like Magento 2 Buyer Login Redirect to Dashboard are compatible with automated backup schedules. This prevents unexpected disruptions in customer access during backup operations.
Backups act as a safety net by allowing store owners to restore the system quickly and continue operations with minimal downtime. They are especially useful when installing extensions, upgrading the store, or performing server migrations. A reliable backup strategy not only ensures data recovery but also strengthens compliance, business continuity, and customer confidence.
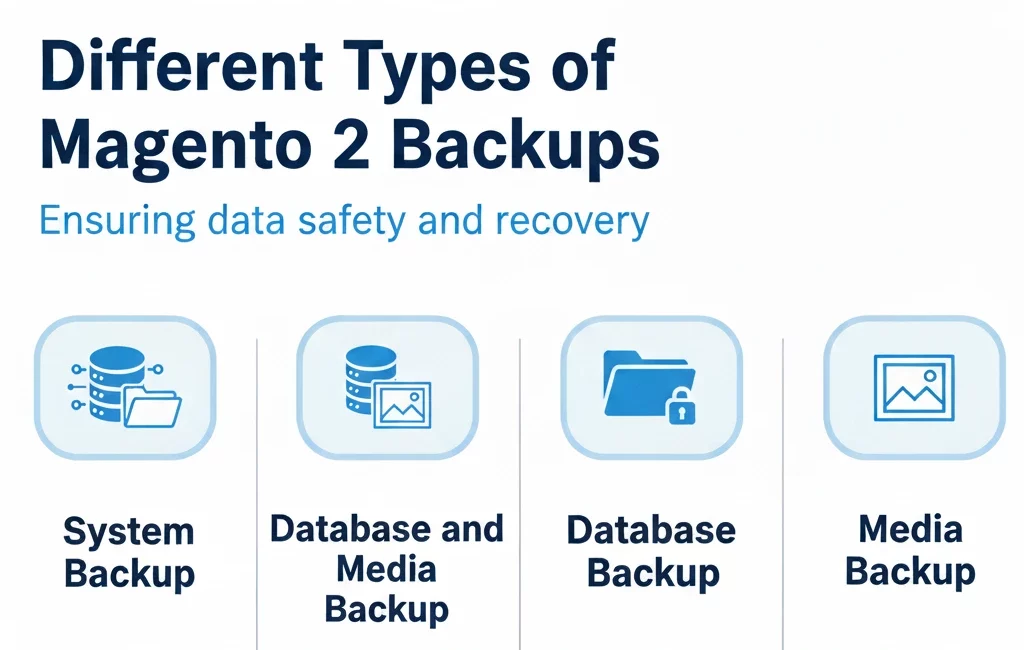
Different Types of Magento 2 Backups
Magento 2 provides flexible backup options depending on business requirements:
- System Backup: Creates a complete copy of code, database, and media files. Store owners can exclude media to reduce file size.
- Database and Media Backup: Backs up the database along with product images and other media files.
- Database Backup: Saves only the database, making it a quick and lightweight option.
- Media Backup: Stores only media files such as product images and banners.
Having multiple backup types ensures that you can choose the right option depending on whether you need a quick recovery of data or a full system restore.
How to Enable Automatic Backups in Magento 2
Magento 2 allows backups to be scheduled directly from the admin panel. Follow these steps:
- Log into the Magento Admin Dashboard.
- Open the Stores menu, choose Settings, and then select Configuration.
- Expand the Advanced section and select System.
- In Backup Settings, set Enable Backup to “Yes”.
- Enable Scheduled Backup and configure the details:
- Backup Type: Choose between Database, Database and Media, System, or System without Media.
- Start Time: Select the exact time for the backup.
- Frequency: Set backups to run daily, weekly, or monthly.
- Maintenance Mode: Choose “Yes” to enable maintenance mode during the process.
- Save the configuration to apply the settings.
With these steps, Magento 2 will automatically back up your store on the schedule you set, helping reduce manual effort.
Setting Up Magento 2 Cloud Backups
For added security, many store owners prefer storing backups in the cloud. Magento 2 supports cloud backups using third-party extensions. Services like Google Drive and Dropbox provide reliable storage that protects against local hardware failures.
To set up cloud backups:
- Install a trusted Magento 2 cloud backup extension.
- Connect your Google Drive or Dropbox account by entering the required API credentials.
- Configure backup frequency, start time, and the type of data to store.
- Test the integration to ensure backups are uploaded successfully.
Cloud backups give store owners peace of mind, knowing their files are securely stored offsite and can be restored from anywhere.
Backup Using Command Line and Manual Methods
Apart from the admin panel, Magento 2 also supports creating backups through the command line. This method is faster and preferred by developers.
- Database Backup:
php bin/magento setup:backup --db - Media Backup:
php bin/magento setup:backup --media - Full Backup (code, media, and database):
php bin/magento setup:backup --code --db --media
These backups are stored in the var/backups directory and can be restored when required. Developers often combine this approach with other maintenance tasks, such as applying patches. For instance, running the Magento 2 Apply Patch File command ensures that code updates are safely integrated while backups are in place, minimizing risks during updates.
Manual backups are another option. This involves downloading files from the Magento root directory and exporting the database through phpMyAdmin or using mysqldump. While manual backups take more time, they can be useful as an extra layer of security.
Best Practices for Managing and Restoring Magento 2 Backups
Managing backups properly ensures smooth recovery in case of emergencies. Some proven practices include:
- Follow the 3-2-1 Rule: Keep three copies of your data, in two different formats, with one stored offsite.
- Test Backups Regularly: Periodically restore backups on a staging site to verify they work correctly.
- Secure Your Backups: Use encryption and access controls to prevent unauthorized use.
- Monitor Backup Jobs: Regularly check scheduled backups to ensure they complete without errors.
- Restore Safely: Always enable maintenance mode before restoring and clear the cache afterward to avoid data conflicts.
By following these practices, Magento 2 store owners can reduce risks, ensure uninterrupted operations, and recover faster when issues arise.
[Need assistance with a different issue? Our team is available 24/7.]
Conclusion
Following the process to enable automatic backup on Magento 2 ensures your store’s data is always protected. With scheduled backups in place, you can recover quickly from errors, secure customer information, and maintain smooth business operations.
In brief, our Support Experts demonstrated how to fix the “554 5.7.1 : Relay access denied” error.
