


Implement a Headless CMS with React using expert guidance from our Headless CMS Support team and build modern, high-speed websites.
Build Faster Websites: How React Works with a Headless CMS
Modern websites need speed, flexibility, and simple content updates. React and a headless CMS deliver exactly that. React handles how your site looks and responds, while the headless CMS stores and manages content in the background. Together, they help brands build fast, user-friendly experiences that stay consistent across all devices. Stay with this guide to learn how React connects with a headless CMS and how to set it up for your site.
What is React
React is a JavaScript library created by Facebook, now called Meta. Brands and developers use it to build web pages that feel quick, smooth to use, and easy to interact with. Many popular websites rely on React because it helps them offer a clean and enjoyable browsing experience to their users.
React works with small blocks called components. Each block handles a specific part of the page, like a button, a product card, or a menu. These blocks come together to form complete websites. This way of building makes websites simple to update and keeps everything organized.
React stands out because of its smart speed. Instead of refreshing the whole page, it updates only the part that changes. For example, when someone adds a product to their cart, the cart updates instantly without reloading the entire screen. This saves time and keeps the experience smooth for the user.
Developers also like React because it lets them write code in a way that feels close to writing normal page content. It keeps data moving in one clear direction, which makes the website easier to maintain. React Hooks add helpful features without making the code complicated.
Want expert guidance for your project?

Why React Gains Attention

Readers and businesses prefer React for the following reasons
- Simple component-based structure
- Fast updates with a virtual DOM
- Clear data flow
- Works smoothly with modern CMS tools like Strapi
React continues to stay popular among developers who want flexibility, strong performance, and control over their web projects.
What is a Headless CMS
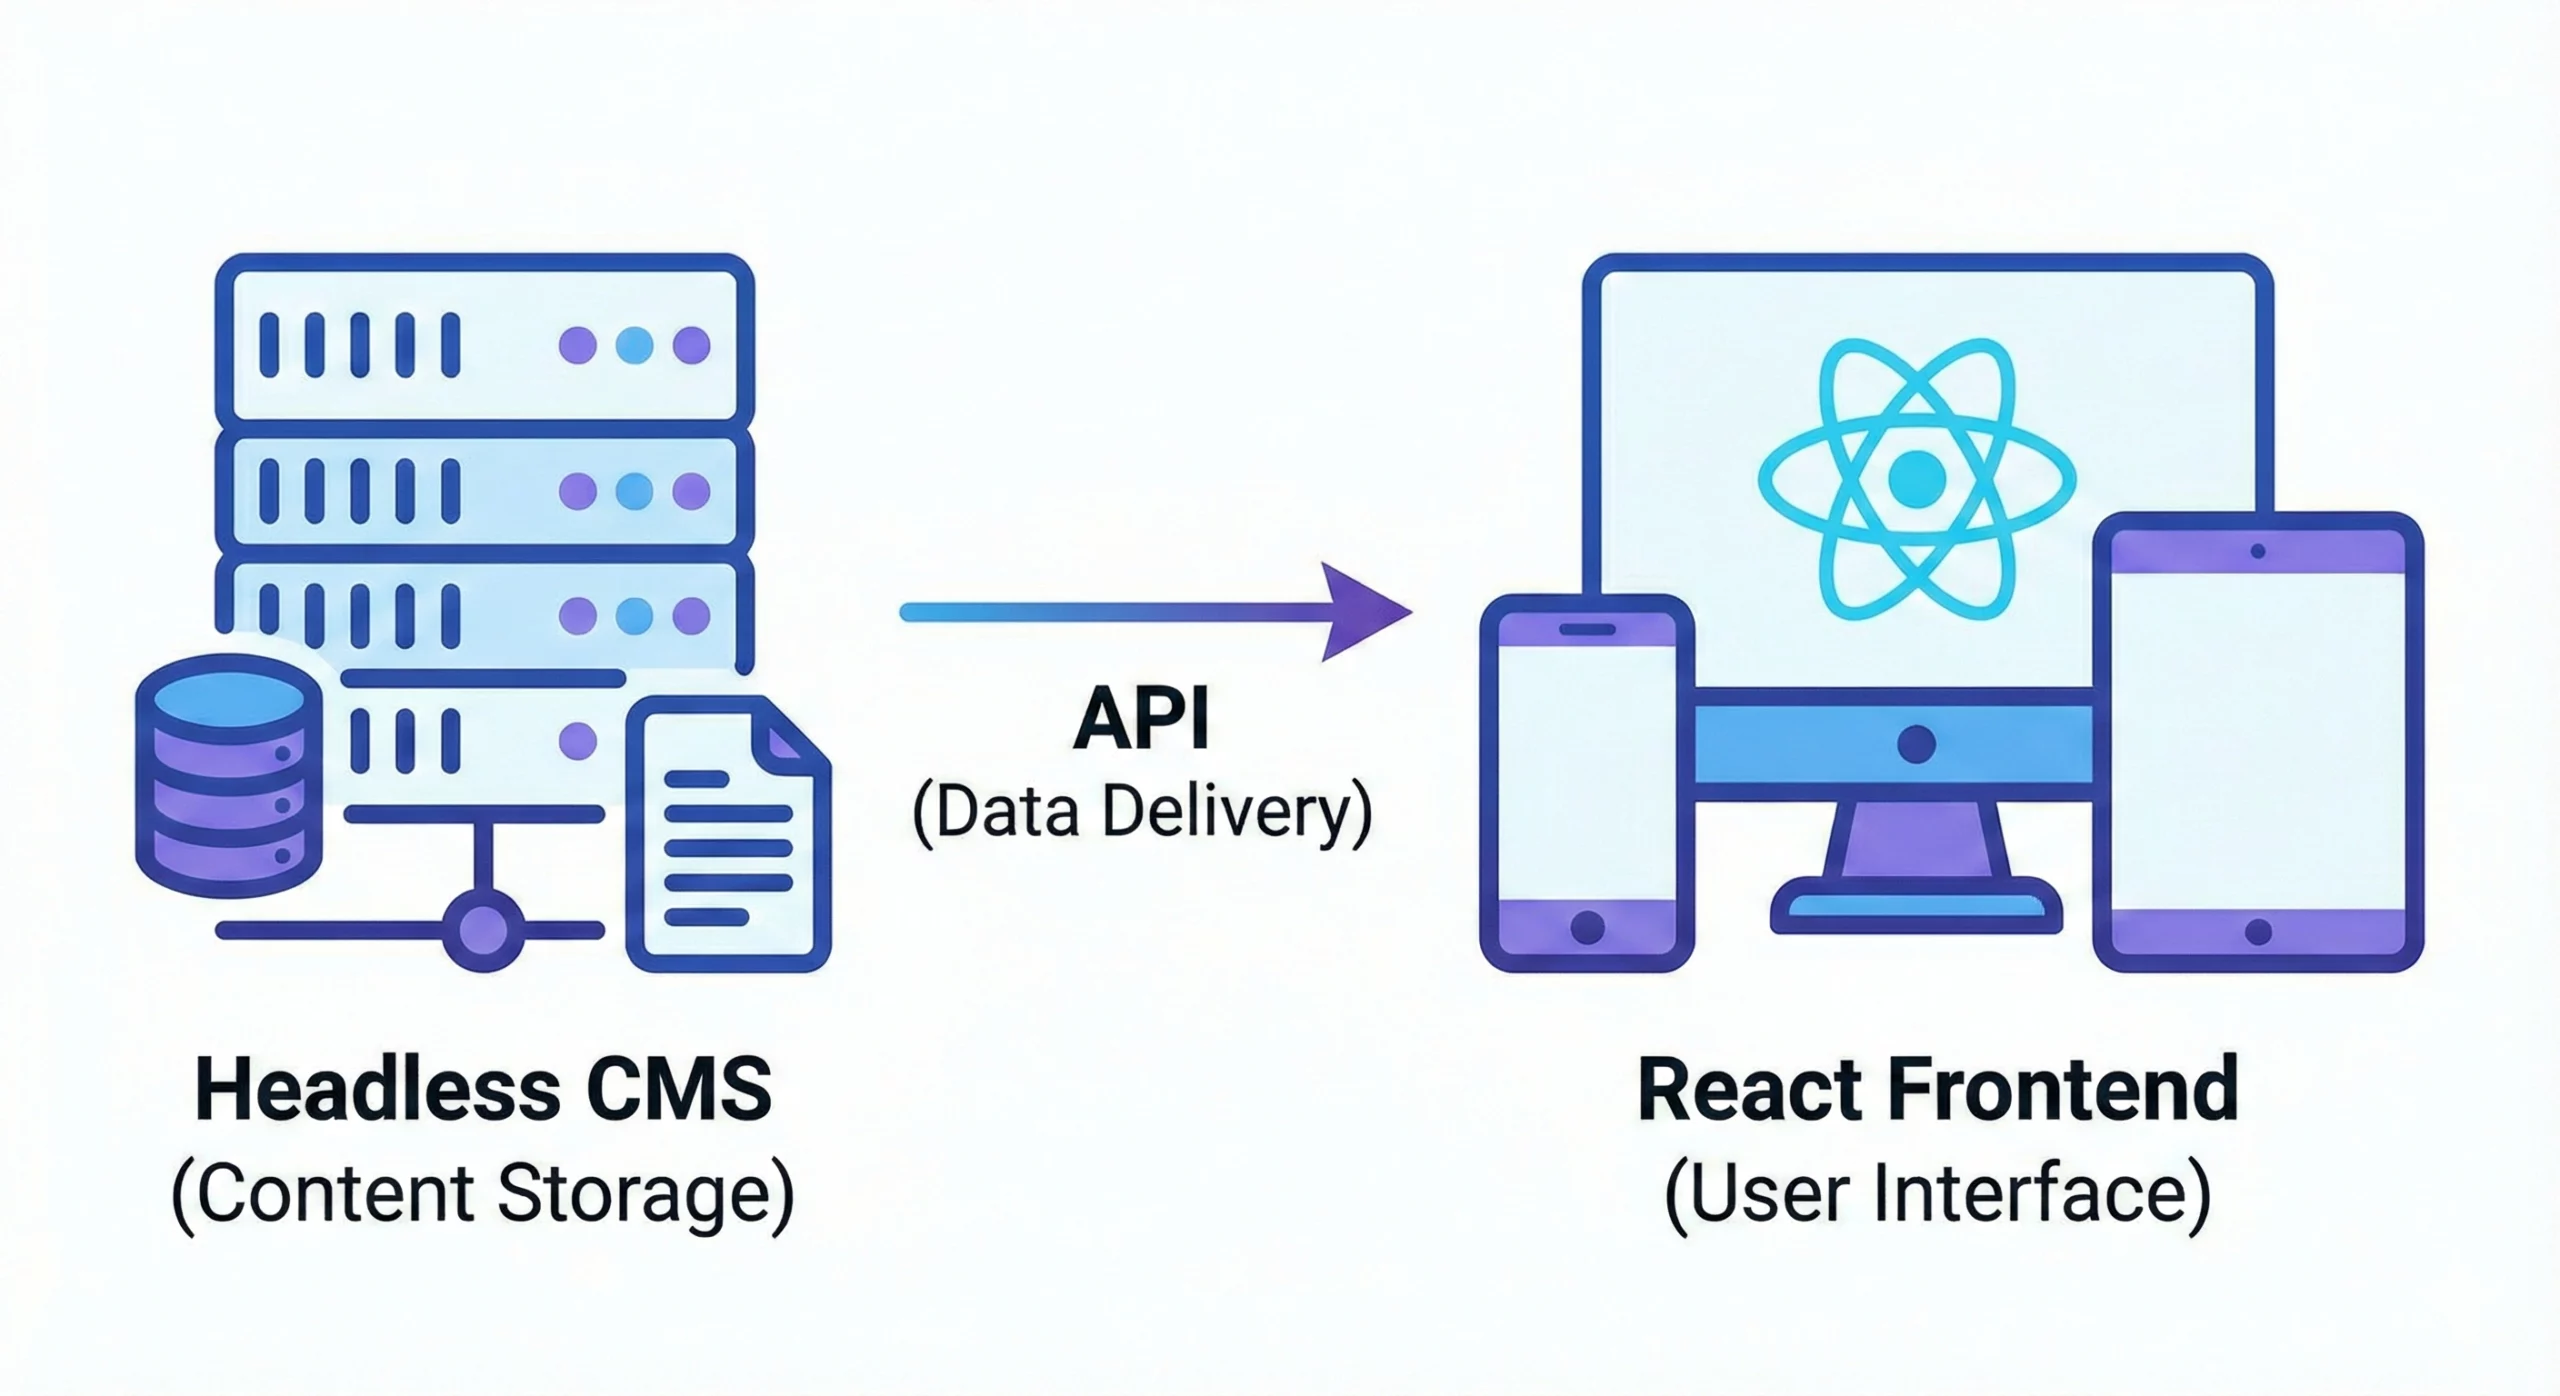
A headless CMS works behind the scenes to store and manage content without deciding how it should look on the screen. It focuses only on the backend, while a separate frontend takes care of design and layout. Content gets shared through APIs, which act like messengers that deliver information to different devices such as websites, mobile apps, smartwatches, and digital displays.
It works similarly to a content library. It keeps everything organized and easy to access, but it does not tell you how to present it. You choose the style, layout, and technology, and the headless CMS supplies the content wherever you need it. This flexibility helps brands stay consistent across many platforms without starting from scratch.
A headless CMS enables teams to create and update content in one centralized location. Developers then use any preferred tool, such as React, Vue, or Next.js, to display that content on various devices. Since the CMS does not handle visual design, it stays light, fast, and flexible.
How a Headless CMS Works
Content creators add text, images, videos, and product details inside the CMS. The system stores this information safely and exposes it through APIs. A separate frontend app collects that content and displays it according to the design chosen for the website or app. This process ensures the content is structured and ready for reuse across multiple channels.
How to Use a Headless CMS with React
A headless CMS and React work together to manage content at the backend and display it at the frontend. The CMS stores text, images, product details, and pages, while React takes this data and shows it to users. Here is a simple step-by-step way to set it up.
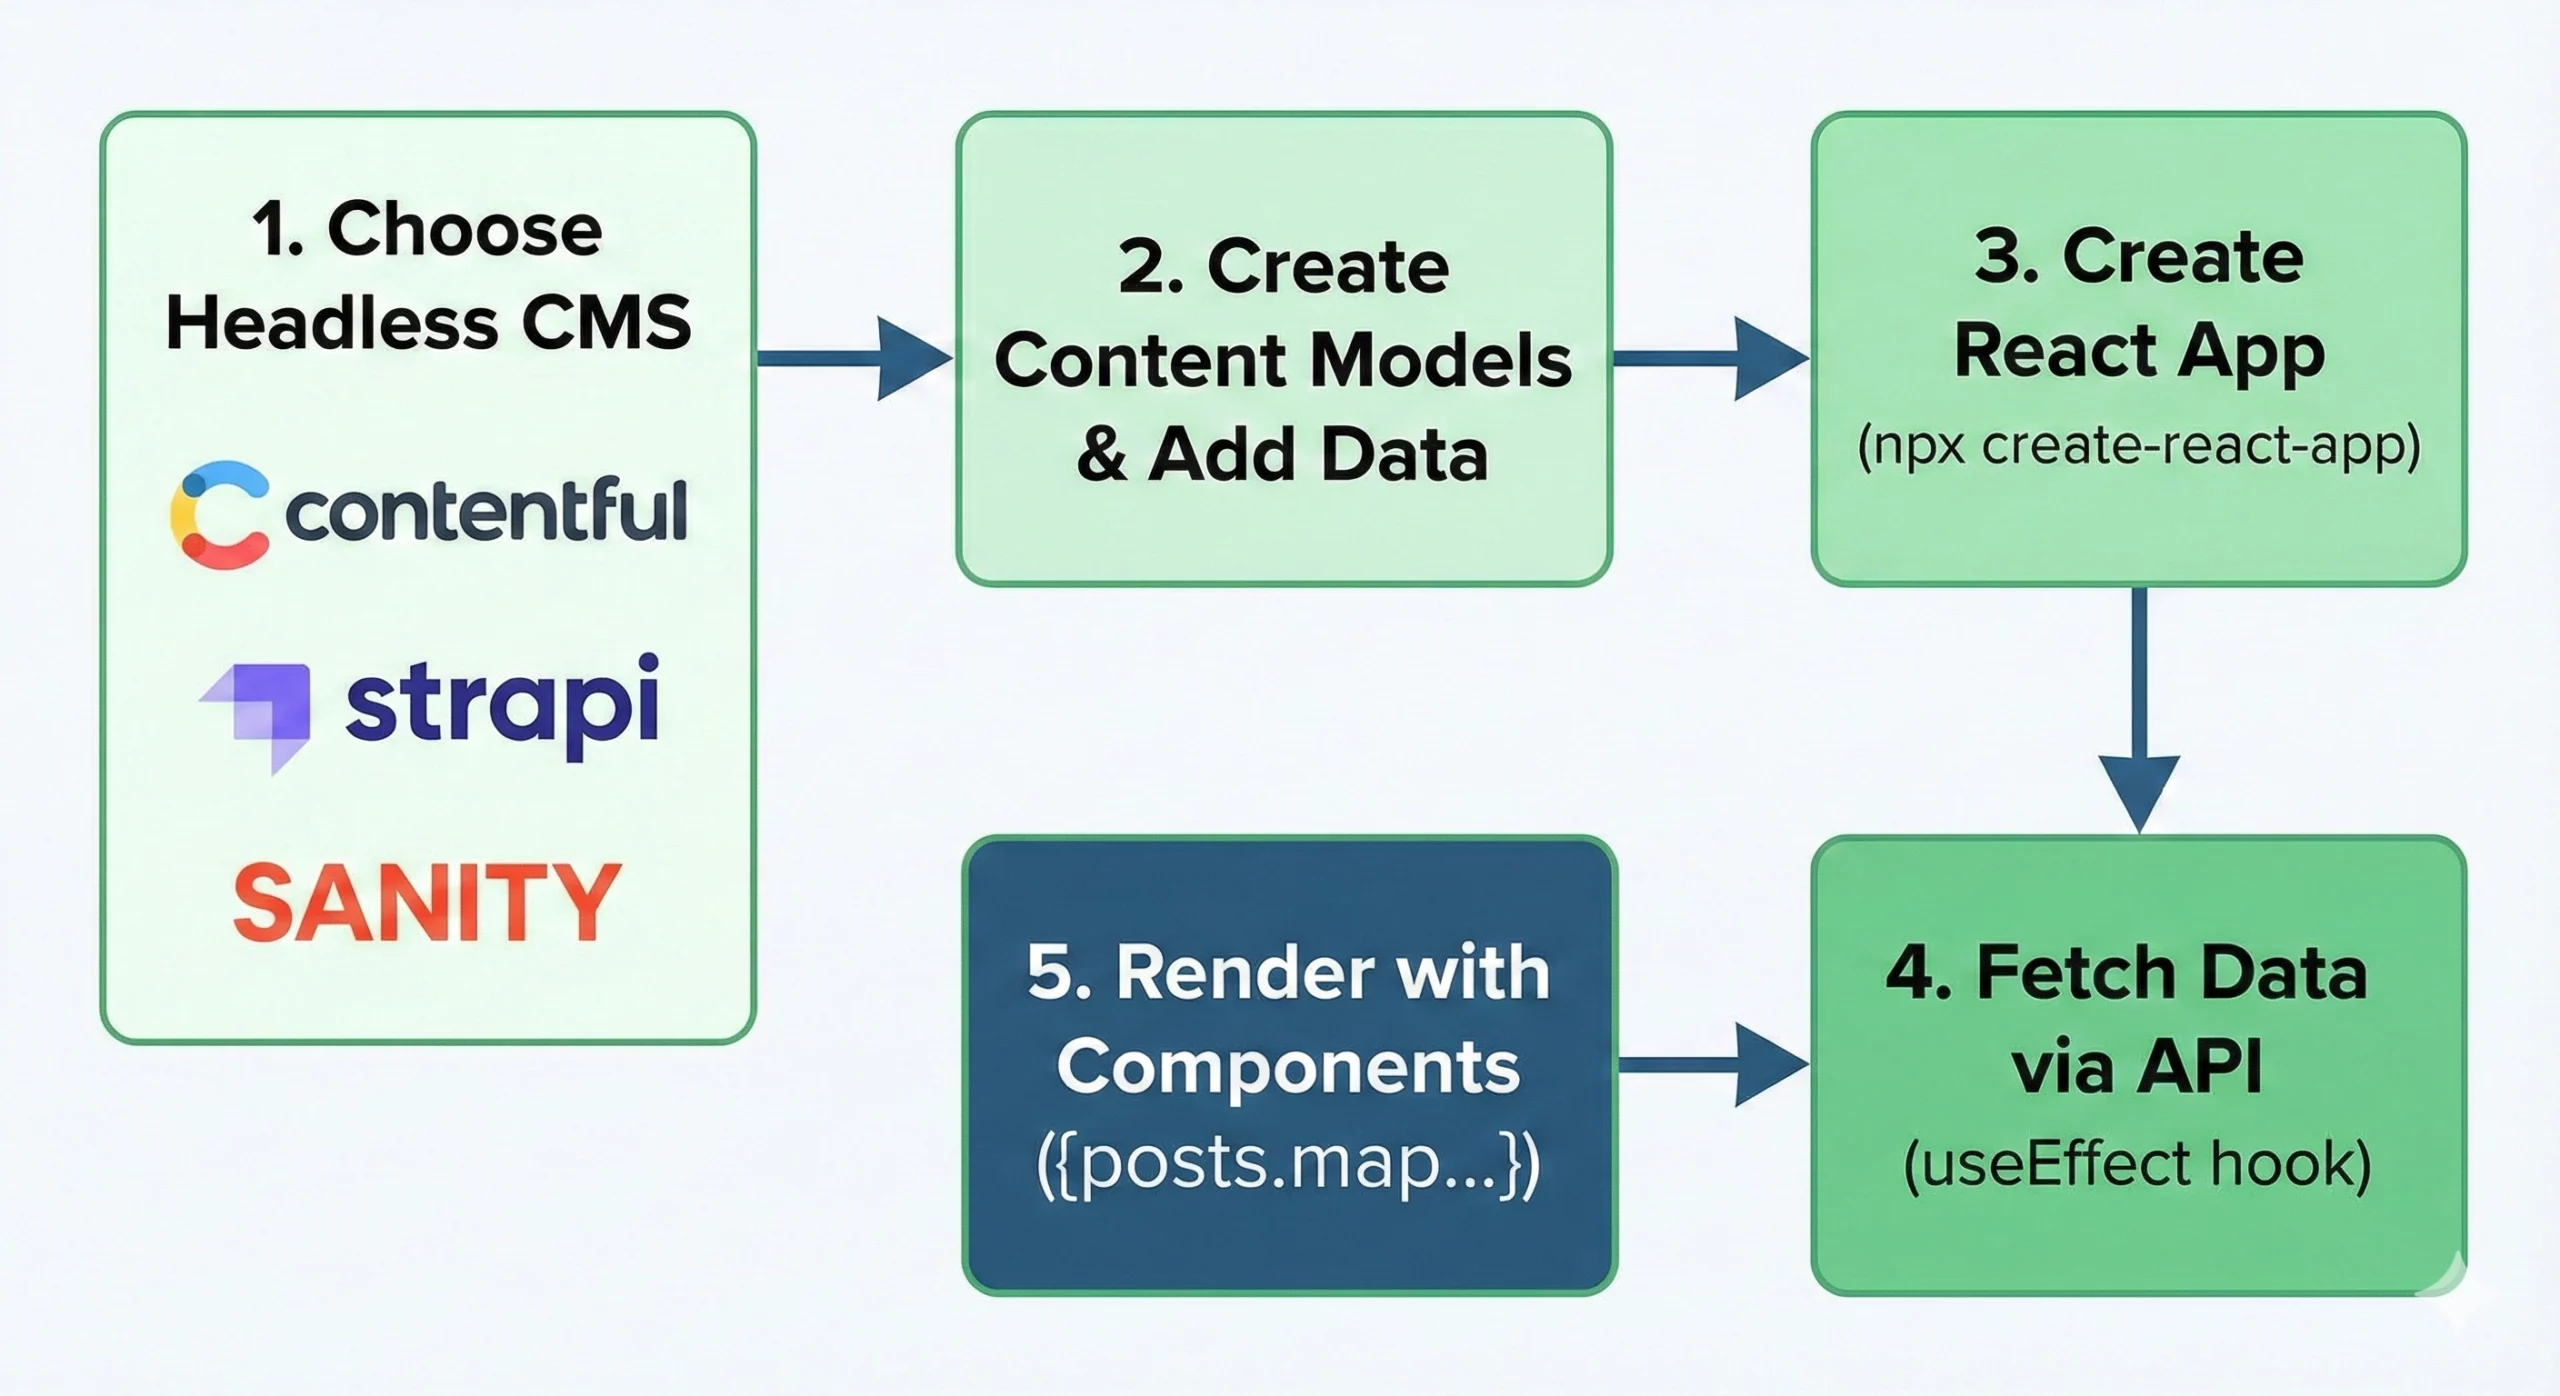
Step 1: Choose a Headless CMS
Start by picking a CMS that matches your project needs. Some popular choices include:
- Contentful for a clean interface and strong APIs
- Strapi for developers who want full control
- Sanity if your team edits content together
- Prismic for quick setup and easy integration with React
Look for ease of use, strong APIs, and smooth integration with your React project.
Step 2: Create Content Models
Once you choose a CMS, set up the structure of your content. For example, a blog site needs a model for blog posts. Inside the CMS, create fields such as:
- Title
- Body text
- Author
- Publish date
- Featured image
After the structure is ready, start adding real content to your CMS.
Step 3: Create Your React Project
Now build the frontend. You can start a new React app in your terminal.
npx create-react-app my-headless-cms-appInstall any package your CMS needs. For example, Contentful requires:
npm install contentfulYour React app is now ready to pull content from the CMS.
Step 4: Fetch Data from the CMS
Use your CMS API inside React components to bring content into your site. This example shows content fetching from Contentful:
import React, { useEffect, useState } from 'react';

import { createClient } from 'contentful';

const client = createClient({

space: 'your_space_id',

accessToken: 'your_access_token'

});

function BlogPosts() {

const [posts, setPosts] = useState([]);

useEffect(() => {

client.getEntries({ content_type: 'blogPost' })

.then((response) => setPosts(response.items))

.catch(console.error);

}, []);

return (

<div>

<h1>Blog Posts</h1>

{posts.map(post => (

<div key={post.sys.id}>

<h2>{post.fields.title}</h2>

<p>{post.fields.body}</p>

<img src={post.fields.featuredImage.fields.file.url} alt={post.fields.title} />

</div>

))}

</div>

);

}

export default BlogPosts;
React now displays content straight from the CMS.
Step 5: Build a Better UI with Reusable Components
Break your page into small components such as a blog card, header, footer, and navigation menu. This keeps your site clean and easier to scale.
function BlogPostPreview({ title, excerpt, imageUrl }) {

return (

<div className="blog-post-preview">

<img src={imageUrl} alt={title} />

<h3>{title}</h3>

<p>{excerpt}</p>

</div>

);

}
Once your UI is ready, add routing if your site has multiple pages using:
npm install react-router-domStep 6: Improve Performance
A fast site keeps users engaged. You can boost performance by:
- Loading large components only when needed
- Compressing images
- Serving static files using a CDN
Lazy loading is one simple example:
import React, { lazy, Suspense } from 'react';

const BlogPostDetail = lazy(() => import('./BlogPostDetail'));

function App() {

return (

<Suspense fallback={<div>Loading...</div>}>

<BlogPostDetail />

</Suspense>

);

}
Step 7: Deploy Your Website
Build your project for production:
npm run buildYou can deploy on platforms such as Vercel, Netlify, or AWS Amplify. Many of these tools connect directly to your Git repository and publish updates automatically.
[Need assistance with a different issue? Our team is available 24/7.]
Conclusion
Using React with a headless CMS gives you a fast, flexible way to manage content and deliver smooth experiences on any device. React focuses on the interface, while the CMS keeps everything organized behind the scenes. If you want more speed, control, and easier updates, it’s the right time to implement a Headless CMS with React and build a website that grows with your business.
