


Learn how to troubleshoot a VMware VM that won’t boot after a snapshot issue, check VMDK chains, fix CID mismatches, and recover the VM safely.
A VMware VM can refuse to power on after a snapshot operation even when the virtual disk itself is still intact. The problem is often the snapshot structure. If a snapshot or consolidation is interrupted, VMware may no longer be able to follow the disk relationship needed to open the VMDK. Our Server Management Services include VMware troubleshooting and infrastructure support for issues such as failed snapshot operations and VM recovery.
This is most likely to surface during a backup or snapshot consolidation when the operation is interrupted, leaving the VM with an incomplete snapshot structure. Storage problems, low datastore space, or an ESXi host failure can also leave the VM with an incomplete snapshot chain.
Before removing a snapshot or editing a VMDK, find out what actually failed. The snapshot files, VMDK descriptors, and vmware.log can usually tell you where to start.
An Overview
- How VMware Snapshots Work
- What Can Break the Snapshot Structure?
- Check for Signs of a Failed Consolidation
- A Typical Failure Scenario
- Inspect the VMDK Before Changing It
- Check for a Disk Lock
- Recover the VM Safely
- Back Up the VM Directory
- Validate the Snapshot Structure
- Correct a Confirmed CID Mismatch
- Clone the Disk if the Structure Cannot Be Repaired
- When to Stop Editing the VMDK
- Prevent Future Snapshot Problems
- Conclusion
How VMware Snapshots Work?
A VMware snapshot does not overwrite the original virtual disk. Instead, VMware creates a delta disk and sends subsequent writes there. The original disk stays unchanged while the delta records changes made after the snapshot.
With more than one snapshot, the disks form a parent-child structure. VMware relies on the information in each VMDK descriptor to follow that structure.
Three fields are particularly useful when investigating the problem:
-
- CID
-
- parentCID
-
- parentFileNameHint
The CID identifies a disk, while parentCID tells VMware which parent that disk is supposed to belong to.
For example:
CID=52ab3412
parentCID=91ff8832
The actual values will be different in your environment. What matters is the relationship between them. The child’s parentCID should correspond to the CID of its parent.
If those values no longer line up, VMware can lose the path through the snapshot structure and fail to open the required disk.
What Can Break the Snapshot Structure?
Backup operations are a common place for this to happen. A backup application may create a snapshot and later ask VMware to remove or consolidate it. If that process stops halfway through, the cleanup may not finish.
Storage conditions can make the situation worse. A datastore with little free space may not have enough room for consolidation, while a sudden increase in storage latency can interrupt an operation already in progress.
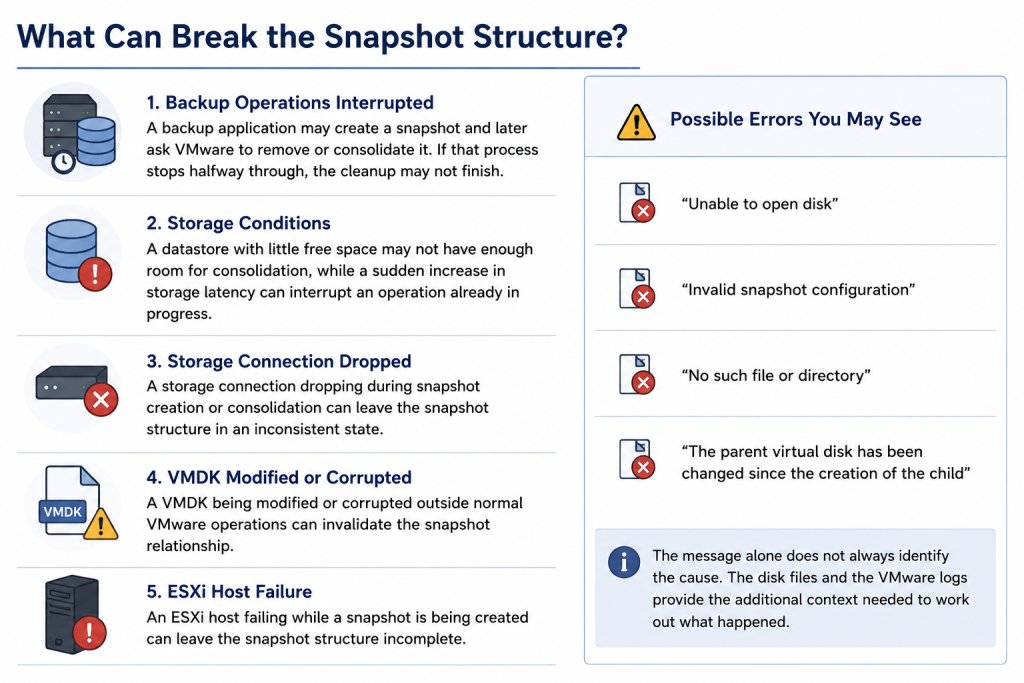
Other possibilities include:
-
- A storage connection dropping during snapshot creation or consolidation
-
- A VMDK being modified or corrupted outside normal VMware operations
-
- An ESXi host failing while a snapshot is being created
The error shown by VMware depends on where it encounters the problem. You may see:
-
- “Unable to open disk”
-
- “Invalid snapshot configuration”
-
- “No such file or directory”
-
- “The parent virtual disk has been changed since the creation of the child”
The message alone does not always identify the cause. The disk files and the VMware logs provide the additional context needed to work out what happened.
Check for Signs of a Failed Consolidation
Start in vSphere.
A persistent “Virtual machine disks consolidation is required” warning is a clear indication that VMware believes snapshot-related disk changes still need to be consolidated. A delete-snapshot operation that remains stuck is another clue.
The VM directory can provide more evidence. If delta files are still present after consolidation was supposed to finish, don’t remove them simply because the operation appears to be complete. They may still be part of the disk structure VMware needs.
Then check vmware.log. CID mismatch messages are particularly useful when you suspect that the parent-child relationship has been damaged.
When these signs appear together, you have a much stronger case for investigating the snapshot structure rather than treating the problem as a generic VM boot failure.
A Typical Failure Scenario
Consider a Windows Server VM during a backup.
The backup creates a snapshot and later starts consolidation. A brief datastore latency spike occurs while the merge is running.
The consolidation stalls.
The backup itself completes, but the snapshot cleanup does not. Delta files remain in the VM directory, the consolidation warning stays in vSphere, and vmware.log contains CID mismatch errors.
The next attempt to power on the VM fails.
At this point, deleting the remaining delta files would be a risky move. First determine which disk is the parent and whether the descriptors still reference it correctly.
Need help recovering a VMware VM after a snapshot issue?

Inspect the VMDK Before Changing It
A VMDK is made up of more than the large file visible in the datastore. There is a small descriptor and the larger -flat.vmdk file that contains the disk data.
The descriptor tells VMware how to interpret the underlying disk. As a result, an intact -flat.vmdk does not necessarily mean VMware can use it if the descriptor is missing or damaged.
Start by looking at the descriptors:
cat vmname.vmdk
cat vmname-000001.vmdk
Check the CID in the parent descriptor against the parentCID in the child.
Don’t stop after checking one snapshot. If there are several delta disks, follow the structure through the relevant files. A mismatch further along can prevent VMware from opening the disk.
Check for a Disk Lock
A disk lock is another possibility, particularly after an interrupted operation.
Run:
vmkfstools -D vmname-flat.vmdk
This can help identify whether the disk is still locked by a host or process.
If the problem is a lock, changing the VMDK descriptor will not address the cause.
Recover the VM Safely
Keep the VM powered off while you investigate. A broken snapshot structure will not repair itself through repeated power-on attempts, and additional lock errors can make the original issue harder to isolate.
1. Back Up the VM Directory
Before editing or replacing any VMDK files, make a copy of the complete VM directory:
cp -r VM_NAME VM_NAME_backup
Leave this copy untouched.
If a descriptor change does not produce the expected result, you still have the original files available.
2. Validate the Snapshot Structure
After inspecting the descriptors, validate the chain with:
vmkfstools -e vmname-000001.vmdk
If the command confirms a CID or parentCID mismatch, identify the correct parent before making any changes.
Do not guess at the value. Check the parent descriptor and confirm its actual CID, then compare it with the child’s parentCID.
3. Correct a Confirmed CID Mismatch
If the parent is known and the mismatch is confirmed, the parentCID in the child descriptor may need to be changed to match the parent’s actual CID.
Make this change only after preserving the original VM files.
The edit should correct a known mismatch. It should not be a trial-and-error exercise. An incorrect value can leave the disk structure in a different state and complicate recovery.
4. Clone the Disk if the Structure Cannot Be Repaired
Some snapshot structures cannot be safely repaired by editing the descriptors.
In that situation, cloning provides another recovery option:
vmkfstools -i broken.vmdk repaired.vmdk
The resulting VMDK is self-contained, but the snapshot history is not retained. Earlier snapshot points will no longer be available for rollback.
That makes cloning a fallback rather than the first option.
Once the replacement VMDK has been created, verify that the VM is attached to the correct disk before removing anything from the original disk set.
Then power on the VM and check that the operating system starts normally and that the expected data is available.
When to Stop Editing the VMDK
Manual repair is not always the safest route.
If the parent disk cannot be identified, several descriptors are inconsistent, or the available files do not provide enough information to establish the correct structure, making additional edits can increase the recovery risk.
This is where a known-good VM backup becomes important.
The objective is not simply to make the VM boot. You also need to preserve a usable recovery path while making changes to the original disk structure.
Prevent Future Snapshot Problems
Snapshot failures are easier to deal with when the environment is prepared for them.
-
- Remove snapshots when they are no longer needed. Long-lived snapshots can grow and make later consolidation more demanding.
-
- Keep 20 to 25 percent free space on the datastore.
-
- Keep snapshot structures short.
-
- Check backup jobs to make sure their snapshots are successfully removed.
-
- Monitor datastore performance during backup and consolidation operations.
-
- Maintain regular VM backups so a failed snapshot is not your only recovery option.
Conclusion
A VMware VM that will not boot after a snapshot failure does not automatically mean the virtual disk data has been lost. The data may still be intact while VMware is unable to follow the disk structure correctly.
Start with the evidence. Check the consolidation status, look at the remaining delta files, inspect the VMDK descriptors, compare CID and parentCID, and rule out disk locks before changing anything.
Most importantly, preserve the original VM directory first. If there is a confirmed mismatch, make a targeted correction. If the disk structure cannot be repaired safely, cloning or restoring from a known-good backup may be the better option.
Keeping snapshot structures short, maintaining adequate datastore capacity, monitoring consolidation, and verifying that backup jobs complete their cleanup can reduce the chance of a routine snapshot operation becoming a VM recovery incident.

