


Wondering how to install pgAdmin with Docker? we can help you.
Docker is an open-source containerization platform to run on Windows, Linux, and macOS.
As part of our Docker Hosting Support, we assist our customers with several Docker queries.
Today, let us see how to install pgAdmin with Docker.
How to install pgAdmin with Docker?
First and foremost, you must have Docker installed on your computer.
Today, let us see the steps followed by our Support Techs in order to install pgAdmin with Docker.
1.Installing Docker Compose:
You can download Docker Compose binary file very easily with the following command:
$ sudo curl -L “https://github.com/docker/compose/releases/download/1.24.1/
docker-compose-$(uname -s)–$(uname -m)“ -o /usr/local/bin/docker-compose
Ubuntu/Debian/Linux Mint:
$ sudo apt install curl -y
CentOS/RHEL/Fedora:
$ sudo dnf install curl -y
Once docker-compose binary file is downloaded, run the following command:
$ sudo chmod +x /usr/local/bin/docker-compose
Now, check whether docker-compose command is working as follows:
$ docker-compose version
It should print the version information as shown in the screenshot below.

2.Setting Up Docker Compose for the Project:
Firstly, our Support Techs create a project directory (let’s say ~/docker/pgdev) as follows:
$ mkdir -p ~/docker/pgdev
Then, navigate to the project directory ~/docker/pgdev as follows:
$ cd ~/docker/pgdev
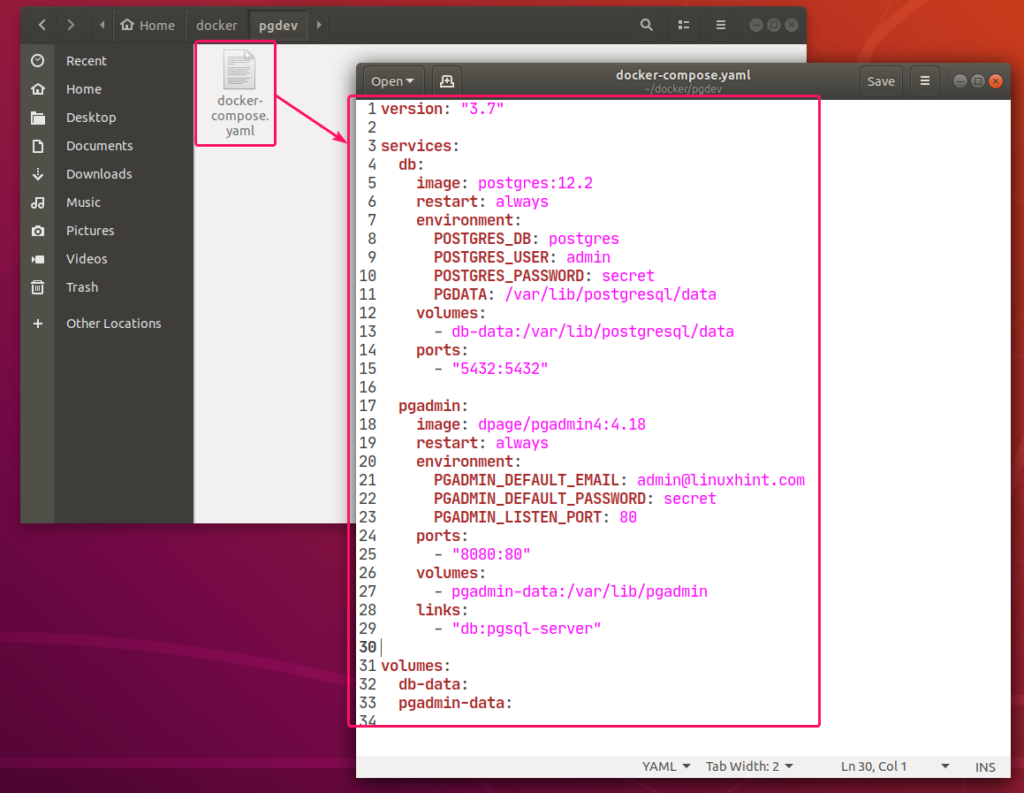
Next, create a docker-compose.yaml file in the project directory ~/docker/pgdev and type in the following lines in the docker-compose.yaml file.
version: “3.7”
services:
db:
image: postgres:12.2
restart: always
environment:
POSTGRES_DB: postgres
POSTGRES_USER: admin
POSTGRES_PASSWORD: secret
PGDATA: /var/lib/postgresql/data
volumes:
– db-data:/var/lib/postgresql/data
ports:
– “5432:5432”pgadmin:
image: dpage/pgadmin4:4.18
restart: always
environment:
PGADMIN_DEFAULT_EMAIL: admin@linuxhint.com
PGADMIN_DEFAULT_PASSWORD: secret
PGADMIN_LISTEN_PORT: 80
ports:
– “8080:80”
volumes:
– pgadmin-data:/var/lib/pgadmin
links:
– “db:pgsql-server”
volumes:
db-data:
pgadmin-data:
The docker-compose.yaml file should look as follows.
In this, 2 services db and pgadmin are created.
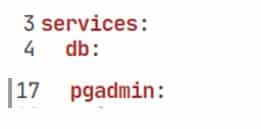
DB service will run the postgres:12.2 image in a Docker container.

Pgadmin service will run the dpage/pgadmin4:4.18 image (from DockerHub) in another Docker container.

In db service,
The POSTGRES_DB, POSTGRES_USER, POSTGRES_PASSWORD environment variables are used to set the default database name, admin username and admin user password for the PostgreSQL server respectively.
The PGDATA environment variable is use to configure the PostgreSQL server to store the data to /var/lib/postgresql/data directory of the container.

In pgadmin service,
The PGADMIN_DEFAULT_EMAIL, PGADMIN_DEFAULT_PASSWORD environment variables are used to set the login email and password of pgAdmin web interface respectively.
The PGADMIN_LISTEN_PORT is used to set the pgAdmin port 80 in the container.

In db service,
All the contents of the /var/lib/postgresql/data directory will svae permanently in the db-data volume.
![]()
In the pgadmin service,
All the contents of the /var/lib/pgadmin directory will save permanently in the pgadmin-data volume.
![]()
In the db service,
The container port 5432 is mapping to the Docker host port 5432.
![]()
In the pgadmin service,
The container port 80 is mapping to the Docker host port 8080.
![]()
In the pgadmin service,
Ahostname alias pgsql-server to the db container is create. So, you can access the PostgreSQL server using pgsql-server as the hostname.
![]()
3.Starting PostgreSQL server and pgAdmin.
Now, to start the db and pgadmin services, run the following command:
$ docker-compose up -d
The services should start in the background.
You can see the port 8080 and 5432 are open by the docker-proxy service by running the below command.
$ sudo netstat -tlpn
To see how the ports are mapped, run the following command:
$ docker-compose ps
For the db service, the Docker host port 5432 is mapping to the container TCP port 5432.
For the pgadmin service, the Docker host port 8080 is mapping to the container TCP port 80.

4.Accessing pgAdmin 4 or PostgreSQL server from Other Computers.
If you want to access pgAdmin 4 or PostgreSQL database server from another computer on your network, then you must know the IP address of your Docker host.
To find the IP address of your Docker host, run the following command:
$ ip
5.Accessing pgAdmin from Web Browser.
Now, you can easily access pgAdmin 4 from your web browser.
Visit http://localhost:8080 from your Docker. You should see the pgAdmin login page.
Next, login with your email and password.
Once you login, you should see the pgAdmin dashboard.
Next, to add the PostgreSQL server running as a Docker container, right click on Servers, and then go to Create > Server…
In the General tab, type in your server Name.
Then, go to the Connection tab and type in pgsql-server as Host name/address, 5432 as Port, postgres as Maintenance database, admin as Username, secret as Password and check Save password? checkbox.
Then, click on Save.
PgAdmin 4 should be connected to your PostgreSQL database. Now, you can work with your PostgreSQL database as much as you want.
6.Accessing PostgreSQL from DataGrip.
You can also access your PostgreSQL database server from DataGrip IDE or any other SQL IDEs.
In case of DataGrip, click on + from the Databases section and go to Data Source > PostgreSQL.
In order to install PostgreSQL driver click on Download.
Then, type in the Docker host IP address as the Host, 5432 as the Port, admin as the User, secret as the Password, postgres as the Database and click on Test Connection.
Now, you can manage your PostgreSQL databases from DataGrip.
7.Stopping PostgreSQL and pgAdmin.
To stop the db and pgadmin services, run the following command:
$ docker-compose down
The db and pgadmin services should be stopped
8.Cleaning Up PostgreSQL and pgAdmin Data.
If you want to remove all the PostgreSQL database data and settings, and all the pgAdmin settings, you must remove the db-data and pgadmin-data volumes.
You can find the actual name of the data volumes with the following command:
$ docker volume ls
There are 2 volumes for the pgdev project, pgdev_db-data and pgdev_pgadmin-data.

Then, you can remove these volumes with the following command:
$ docker volume rm pgdev_db-data pgdev_pgadmin-data
[Need help with the installation? We can help you]
Conclusion
In short, today we saw how our Support Techs go about installing pgAdmin with Docker.


0 Comments