A subdomain in an Ubuntu server is a subdivision of the main domain. Read the article to know more about the steps to create a subdomain in Ubuntu Server. At Bobcares, we assist our customers with several Ubuntu queries on a daily basis as part of our Server Management Services.
Steps to Create a Subdomain in Ubuntu Server
Creating subdomains on the server has several benefits, particularly for handling and setting up the website or app. It can also help us improve site management, increase user experience, as well as simplify the web activities. We must make sure to have the following before going to the setup steps:
1. An Ubuntu server with a domain name setup and pointed to the server’s IP address.
2. SSH access to the server.
3. Apache2 web server setup and running.
Now, we must run the following steps in order to create the subdomain in Ubuntu:
1. Initially, log in to the server via SSH.
2. Then, create a directory for the subdomain’s files using the mkdir code.

3. Now, we must change the ownership of the new directory to the web server user:

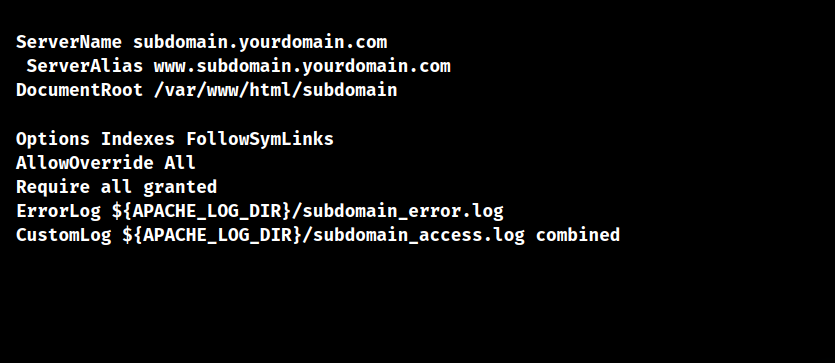
4. Then, create a new virtual host config file for the subdomain:

5. Now, paste the following content into the file, replacing with our details:

6. Now, enable the newly created virtual host config:
![]()
7. Restart the Apache to apply the changes:

8. Lastly, to verify the setup, open a web browser and go to http://subdomain.yourdomain.com. If there are no issues, we must be able to see website files for our subdomain.
[Searching solution for a different question? We’re happy to help.]
Conclusion
Creating subdomains on the server offers several benefits, especially for handling sites and apps. In summary, this article offers simple steps from our Tech team to create subdomains in Ubuntu Server.


0 Comments