Let us go through a detailed note on how to add Firewalld to Debian with the support of our Server Management support Services at Bobcares.
How to Add Firewalld to Debian?

Here, we will look at how to install and set up the Firewalld on Debian 10 or Debian 11. Firewalld is a Linux firewall management utility. It supports IPv4, IPv6, Ethernet bridges, and ipset firewall setups.
Firewalld is a front end to the Netfilter framework in the Linux kernel. It is the default firewall management system for the RHEL 7+ family of Linux. We can use it on Debian-based Linux versions.
The firewalld package is available in the Debian apt store. Just run the following in the terminal as root or a user with Sudo access.
sudo apt update

sudo apt -y install firewalld
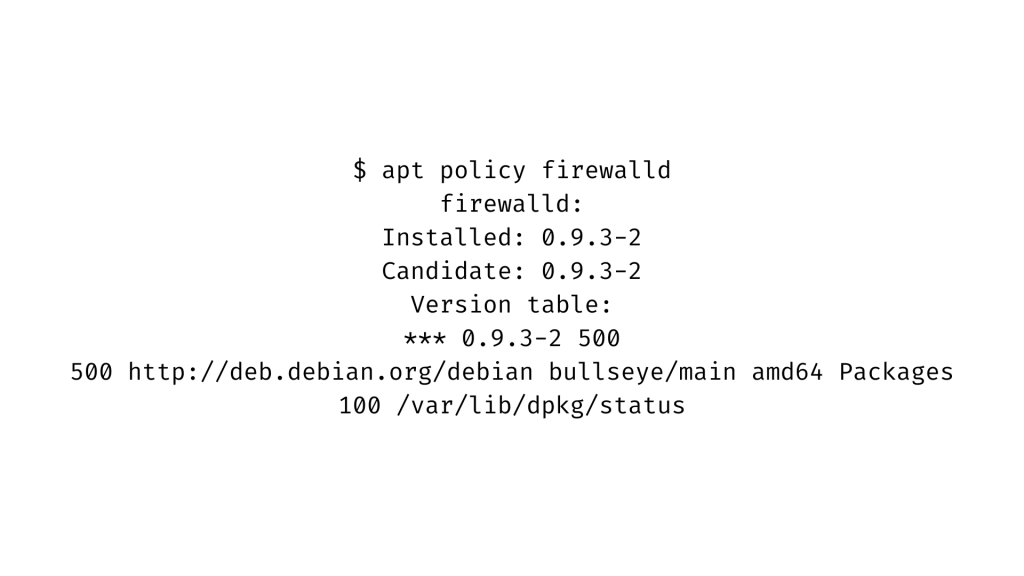
This command line will install firewalld on Debian on 11/10. It will set the service to start at boot. Use the command line given below to Pull package details:
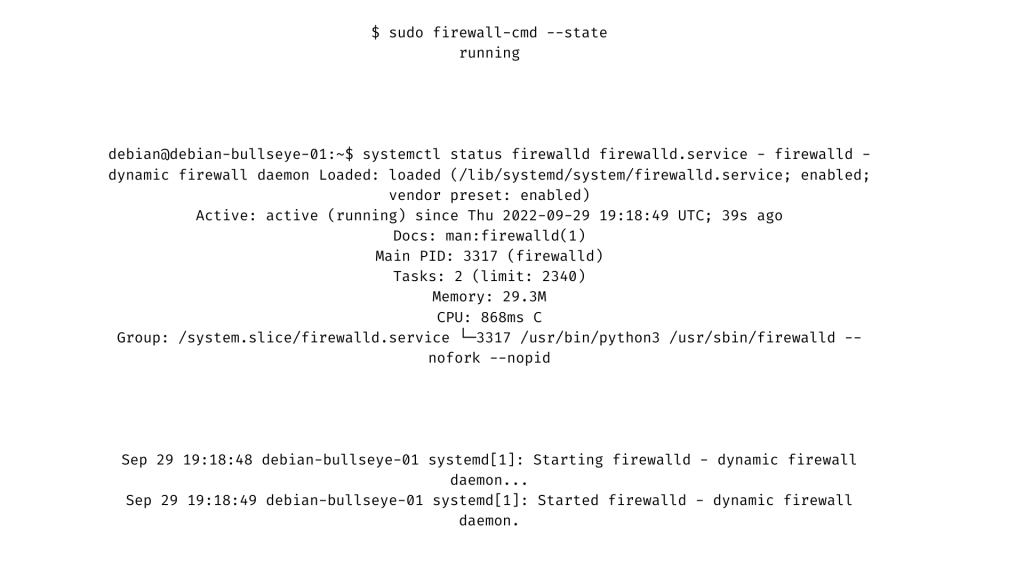
Confirm that the service is in a running state by typing in the following command:
If the UFW is active we have to disable it to make the Firewalld default firewall.
sudo ufw disable,On Debian 10 or Debian 11, Using Firewalld
The starting up of the package and the firewalled service are complete. Now let’s look at how to use it to keep the server or the system safe.
List all firewall rules configured
Use the command given below to list the current rules:
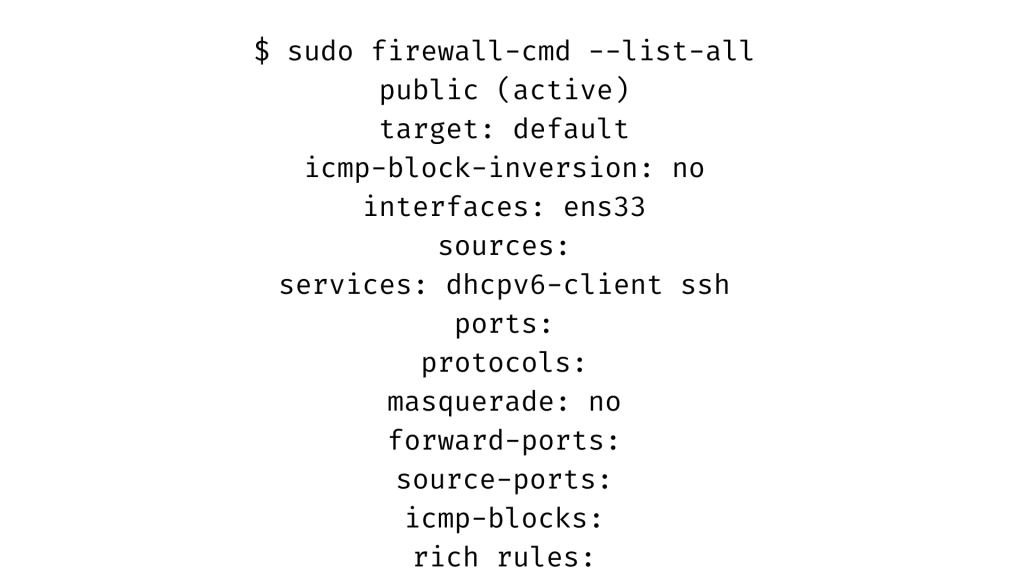
When we start the firewalled service, ssh and dhcpv6 client services will automatically start up.
List services that we can enable or disable
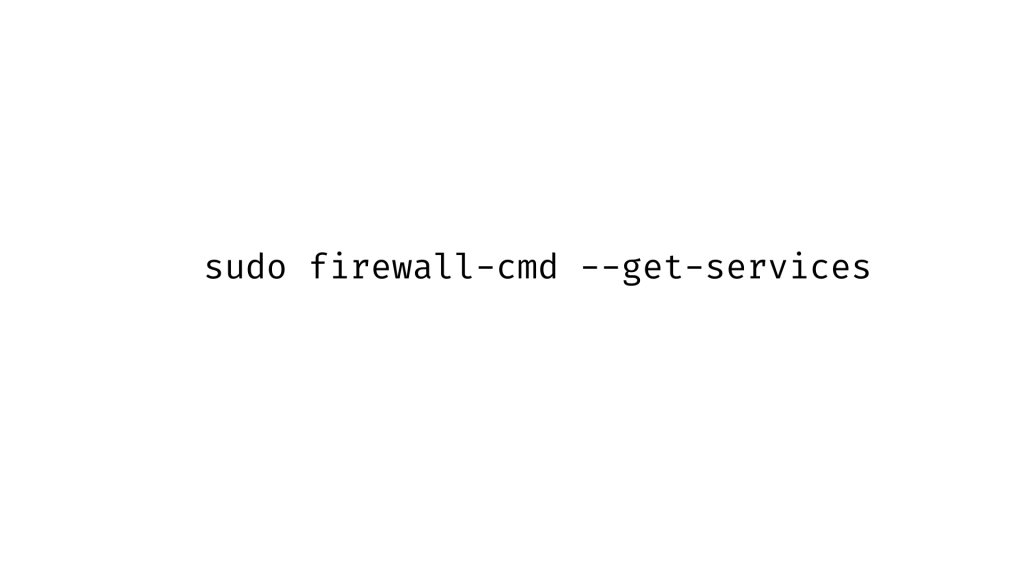
Use the following command to acquire a complete list of services that we can start or stop. Note that the following steps are vital to adding firewalld to Debian.
List of services / Enable service
The command syntax to permit service on the firewall is:
sudo firewall-cmd --add-service="servicename" --permanentThe example code given below will allow turning on an HTTP service:
$ sudo firewall-cmd --add-service="http" --permanent

success
$ sudo firewall-cmd --reloadSeparate services with commas as shown below for a list.
sudo firewall-cmd --add-service={http,https,smtp,imap} --permanent --zone=public
sudo firewall-cmd --reload,Enable TCP port
The next step to add firewalld to Debian is to enable the TCP port. Use the following command to enable it:
sudo firewall-cmd --add-port=port/tcp --permanent

sudo firewall-cmd --reload.
Type in the following syntax to enable ports 8080 and 8443.

Note that for the UDP ports, we have to replace /tcp with /udp.
Create a New Zone
Use the command to make a Firewallzone:
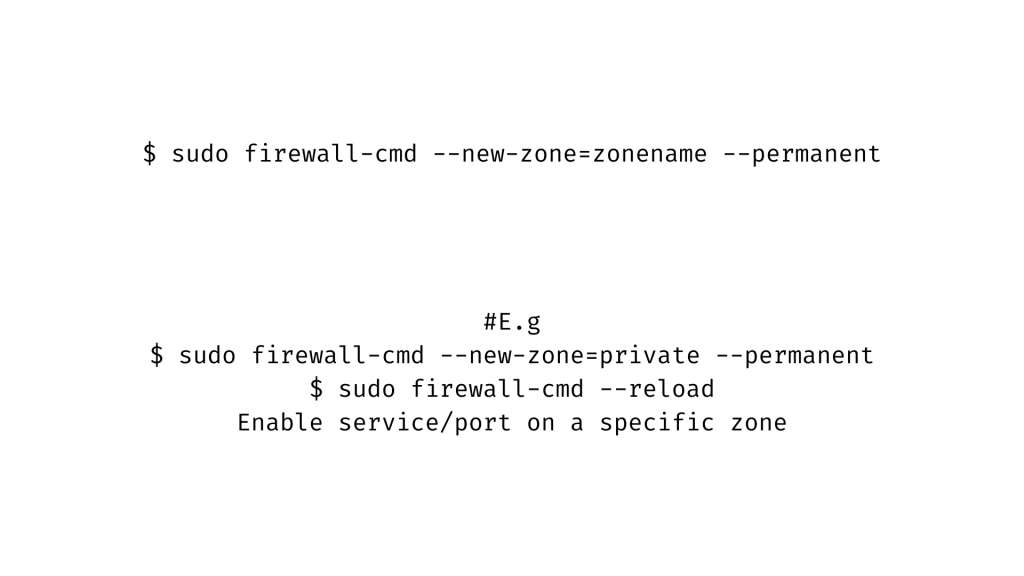
The syntax for turning on a service or port in a zone is as shown below:
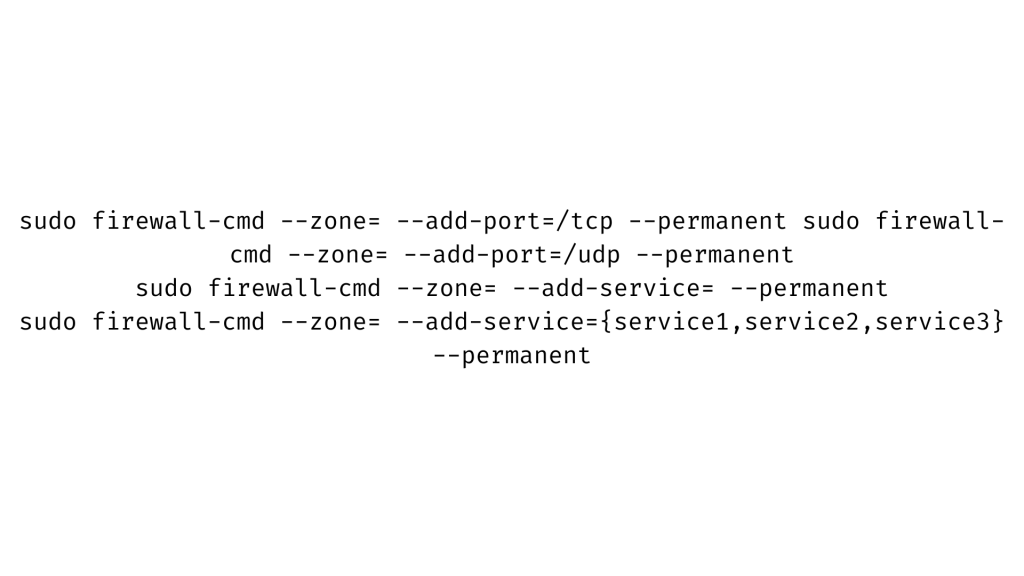
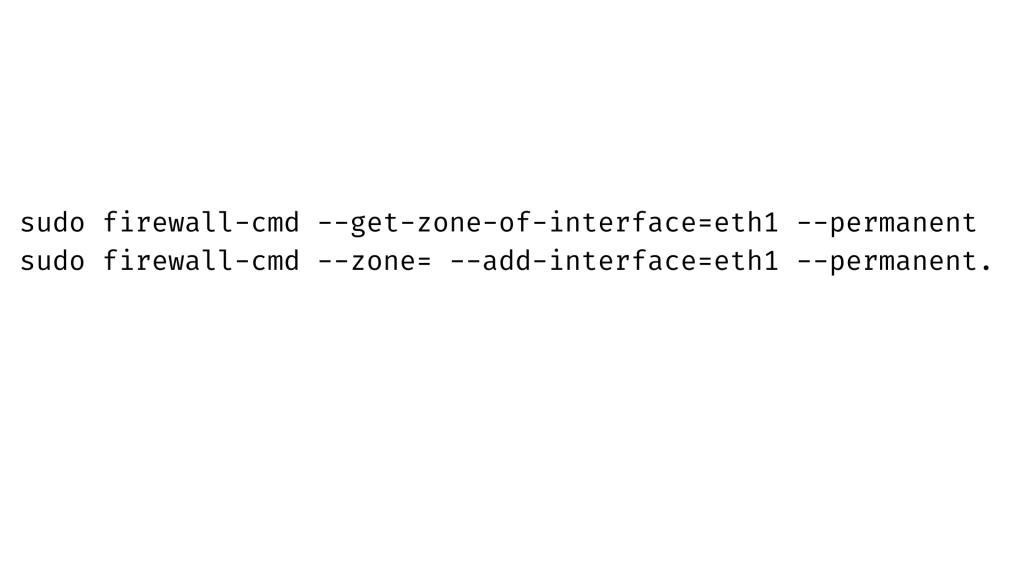
Add an interface to a zone
For systems with more than one interface, we can add it to a zone. This allows easy firewalld to Debian management.
E.g Backend web servers to the private zone, and fronted applications to the public zone. Type in the following command line to set up this option:
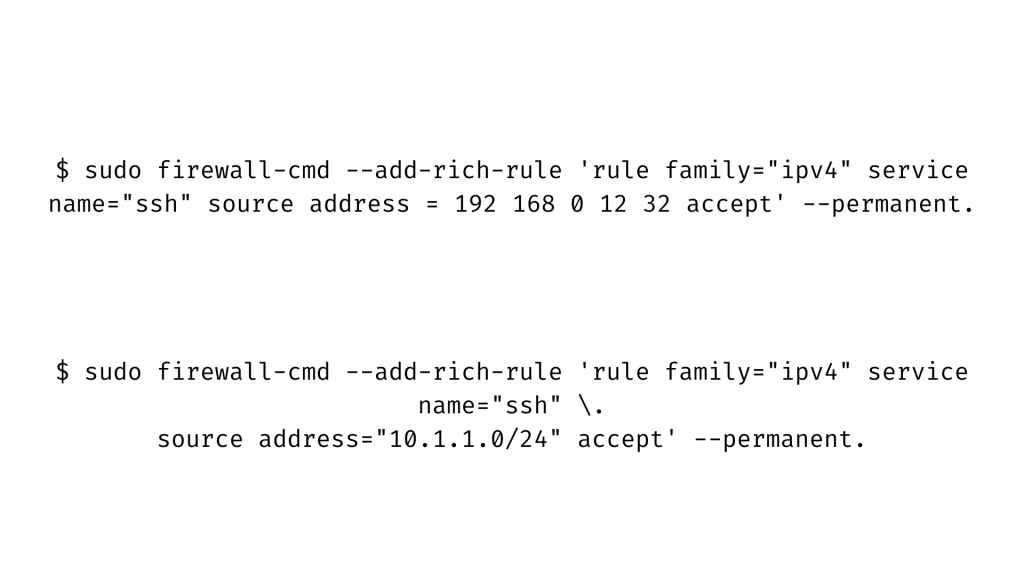
Enabling access from a certain subnet or IP
We can limit access from a specific IP address or subnet. We can do this with the use of rich rules as shown in the command line given below:
List rich rules
We can setup the List rich rules by using the following command:
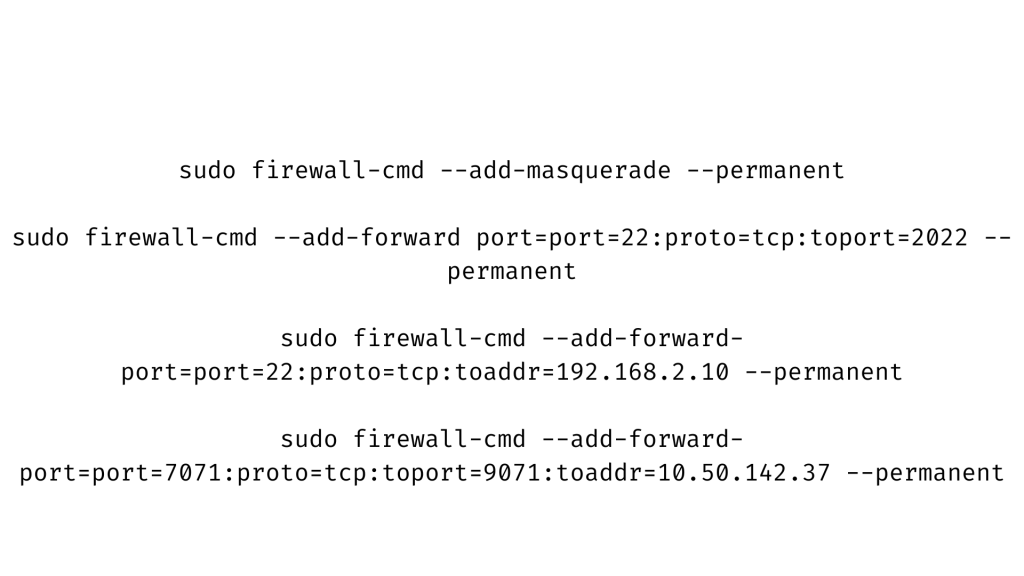
sudo firewall-cmd --list-rich-rulesConfigure Port forwarding
See the examples given below to set the port:
Removing a port or service
Replace –add it with –-remove in each command used in enabling service. This will allow us to remove a port. After this step, we can start using Firewalld on Debian10 or 11 Linux.
[Need assistance with similar queries? We are here to help]
Conclusion
We have now learned how to add firewalld to Debian in a few simple steps by our Server Management Support services.
PREVENT YOUR SERVER FROM CRASHING!
Never again lose customers to poor server speed! Let us help you.
Our server experts will monitor & maintain your server 24/7 so that it remains lightning fast and secure.


0 Comments