Bobcares

Apache ActiveMQ using Docker Compose | Implementation Guide

by | Jan 13, 2023

Let’s look into the implementation of Apache ActiveMQ using Docker Compose. Bobcares, as a part of our Docker Hosting Support Services, offers solutions to every query that comes our way.


We can easily implement the Apache ActiveMQ using Docker Compose with these 8 steps explained in this post. With Compose, we can specify the services in a YAML file and spin everything up or take it down with just one command. And lastly, we can access the ActiveMQ WebConsole by logging in with the username and password as admin. 


Implementation of Apache ActiveMQ using Docker Compose

As there isn’t an official Docker image for Apache ActiveMQ, we can use one on this page. It is updated to the most recent version of Apache ActiveMQ. This is what our docker-compose.yaml file will include when we use Docker Compose to install ActiveMQ.


version: ‘3.9’
services: activemq:
image: symptoma/activemq:latest
container_name: ‘activemq’
ports: – 61616:61616

volumes:
– ~/Documents/data/activemq/data:/data/activemq
– ~/Documents/data/activemq/log:/var/log/activemq


Since ActiveMQ’s WebConsole is not normally accessible from the outside as of version 5.16.0, we’re only using port 61616 here. For our ease of use, the two files inside the ActiveMQ container are likewise mounted to the external folders.


When the command docker compose up is executed in the directory containing the docker-compose.yaml file with the above content, the following outcome is obtained:


Apache ActiveMQ using Docker Compose


Therefore, we have already launched an ActiveMQ server with WebConsole. We can edit the Dockerfile file at https://github.com/symptoma/activemq/blob/master/Dockerfile if we wish to expose WebConsole for external access. This is the Dockerfile that was used to create the Docker Image we mentioned earlier.


Steps

1. To start, go to https://activemq.apache.org/components/classic/download/ and download the most recent version of ActiveMQ. Then extract it.


2. Now locate the below line from /conf/jetty.xml file in the extracted directory.

 
Apache ActiveMQ using Docker Compose
 

And change it as:

 
Apache ActiveMQ using Docker Compose
 

3. Copy this jetty.xml file to the same directory as the above file.


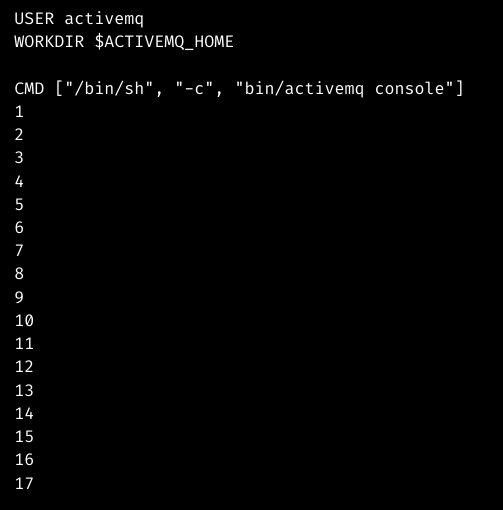
4. When using ActiveMQ, include the following line in the Dockerfile to replace the jetty.xml file.

 
Apache ActiveMQ using Docker Compose

Apache ActiveMQ using Docker Compose
 

5. Run the Docker build command to build the Image from this Dockerfile:docker build -t activemq:0.0.1.


Apache ActiveMQ using Docker Compose


6. After having the Image, we will alter the docker-compose.yaml file as follows to expose the WebConsole port and change the name of the image:


7. Again run the code “docker compose up”:


Apache ActiveMQ using Docker Compose


8. Finally, we can access the ActiveMQ WebConsole using the address http://localhost:8161. Log in with username and password as admin. And we will see this:


Apache ActiveMQ using Docker Compose


[Need help with another issue? We’re here to help.]


Conclusion

The article provides the steps from our Tech team to implement Apache ActiveMQ using Docker Compose.


PREVENT YOUR SERVER FROM CRASHING!

Never again lose customers to poor server speed! Let us help you.

Our server experts will monitor & maintain your server 24/7 so that it remains lightning fast and secure.

GET STARTED

0 Comments

Submit a Comment

Your email address will not be published. Required fields are marked *

Never again lose customers to poor
server speed! Let us help you.

Privacy Preference Center

Necessary

Necessary cookies help make a website usable by enabling basic functions like page navigation and access to secure areas of the website. The website cannot function properly without these cookies.

PHPSESSID - Preserves user session state across page requests.

gdpr[consent_types] - Used to store user consents.

gdpr[allowed_cookies] - Used to store user allowed cookies.

PHPSESSID, gdpr[consent_types], gdpr[allowed_cookies]
PHPSESSID
WHMCSpKDlPzh2chML

Statistics

Statistic cookies help website owners to understand how visitors interact with websites by collecting and reporting information anonymously.

_ga - Preserves user session state across page requests.

_gat - Used by Google Analytics to throttle request rate

_gid - Registers a unique ID that is used to generate statistical data on how you use the website.

smartlookCookie - Used to collect user device and location information of the site visitors to improve the websites User Experience.

_ga, _gat, _gid
_ga, _gat, _gid
smartlookCookie
_clck, _clsk, CLID, ANONCHK, MR, MUID, SM

Marketing

Marketing cookies are used to track visitors across websites. The intention is to display ads that are relevant and engaging for the individual user and thereby more valuable for publishers and third party advertisers.

IDE - Used by Google DoubleClick to register and report the website user's actions after viewing or clicking one of the advertiser's ads with the purpose of measuring the efficacy of an ad and to present targeted ads to the user.

test_cookie - Used to check if the user's browser supports cookies.

1P_JAR - Google cookie. These cookies are used to collect website statistics and track conversion rates.

NID - Registers a unique ID that identifies a returning user's device. The ID is used for serving ads that are most relevant to the user.

DV - Google ad personalisation

_reb2bgeo - The visitor's geographical location

_reb2bloaded - Whether or not the script loaded for the visitor

_reb2bref - The referring URL for the visit

_reb2bsessionID - The visitor's RB2B session ID

_reb2buid - The visitor's RB2B user ID

IDE, test_cookie, 1P_JAR, NID, DV, NID
IDE, test_cookie
1P_JAR, NID, DV
NID
hblid
_reb2bgeo, _reb2bloaded, _reb2bref, _reb2bsessionID, _reb2buid

Security

These are essential site cookies, used by the google reCAPTCHA. These cookies use an unique identifier to verify if a visitor is human or a bot.

SID, APISID, HSID, NID, PREF