


Load Testing with Locust on GCP Kubernetes: A handy guide from our in-house experts.
At Bobcares, we offer solutions for every query, big and small, as a part of our Server Management Service.
Let’s take a look at how our Support Team is ready to help customers attempt Load Testing with Locust on GCP Kubernetes.
All About Load Testing with Locust on GCP Kubernetes
Locust is a popular open-source load testing tool. It is extremely scalable as it completely event-based implementation. Furthermore, this load testing tool is capable of distributing requests across different multiple target paths. For instance, it can distribute requests to the /metrics and /login target paths.
Before we start load testing with Locust, we have to set up GCS and enable the Cloud Shell.
$ gcloud config set compute/zone us-central1-a
Updated property [compute/zone]
Then, access the source code from the repository:
$ git clone https://github.com/GoogleCloudPlatform/distributed-load-testing-using-kubernetes.git

$ cd distributed-load-testing-using-kubernetes/
Next, we deploy the web application with the gcloud app deploy command:
$ gcloud app deploy sample-webapp/app.yaml
After that, we create a Kubernetes Engine cluster as seen below:
$ gcloud container clusters create locust-testing
kubeconfig entry generated for locust-testing.
NAME            LOCATION       MASTER_VERSION  MASTER_IP      MACHINE_TYPE   NODE_VERSION  NUM_NODES  STATUS
locust-testing  us-central1-a  1.11.6-gke.2    35.225.199.73  n1-standard-1  1.11.6-gke.2  3          RUNNING
$ cd kubernetes-config/
$ ls
locust-master-controller.yaml locust-master-service.yaml locust-worker-controller.yaml
How to deploy Locust Master
The Locust master is the first component of the deployment. In other words, it is the entry point for performing the load testing tasks. Interestingly, it is deployed as a replication controller that has a single replica since we require only a single master.
According to our Support Team, the replication controller is handy while deploying a single pod as it offers high availability.
The locust-master-controller.yaml file contains the configuration for the ports:
kind: ReplicationController
apiVersion: v1
metadata:
  name: locust-master
  labels:
    name: locust
    role: master
spec:
  replicas: 1
  selector:
    name: locust
    role: master
  template:
    metadata:
      labels:
        name: locust
        role: master
    spec:
      containers:
        - name: locust
          image: gcr.io/cloud-solutions-images/locust-tasks:latest
          env:
            - name: LOCUST_MODE
              value: master
            - name: TARGET_HOST
              value: http://workload-simulation-webapp.appspot.com
          ports:
            - name: loc-master-web
              containerPort: 8089
              protocol: TCP
            - name: loc-master-p1
              containerPort: 5557
              protocol: TCP
            - name: loc-master-p2
              containerPort: 5558
              protocol: TCP
Then, we deploy the locust-master-controller as seen below:
$ kubectl create -f locust-master-controller.yaml
replicationcontroller "locust-master" created

$ kubectl get rc
NAME            DESIRED   CURRENT   READY     AGE
locust-master   1         1         1         1m

$ kubectl get pods -l name=locust,role=master
NAME                  READY     STATUS    RESTARTS   AGE
locust-master-kg482   1/1       Running   0          1m
Next, we deploy the locust-master-service with the following command:
$ kubectl create -f locust-master-service.yaml
service "locust-master" created
In turn, this exposes the Pod with an internal DNS name as well as ports 5557, 8089, and 5558. Here, the type: LoadBalancer directive in locust-master-service.yaml will inform Google Kubernetes Engine to make a new Google Compute Engine forwarding-rule from an IP address to the locust-master Pod.
We can view the new forwarding-rule with this command:
$ kubectl get svc locust-master
NAME            TYPE           CLUSTER-IP      EXTERNAL-IP     PORT(S)                                        AGE
locust-master   LoadBalancer   10.35.253.55   35.202.16.162   8089:31521/TCP,5557:31809/TCP,5558:30194/TCP   58s
How to deploy Locust Workers
The locust workers are responsible for executing the load testing tasks. Furthermore, the locust workers are deployed by just one replication controller in charge of creating ten pods. Additionally, these pods are spread across the Kubernetes cluster.
According to our Support Techs, each pod utilizes environment variables for controlling configuration information.
Then we deploy the locust-worker-controller with this command:
$ kubectl create -f locust-worker-controller.yaml
replicationcontroller "locust-worker" created
We can verify the 10 locust-worker pods deployment with the command below:
$ kubectl get pods -l name=locust,role=worker
We can scale how many locust-worker pods with this command:
$ kubectl scale --replicas=20 replicationcontrollers locust-worker
replicationcontroller "locust-worker" scaled
Execute the following command to get a list of locust worker-pods:
$ kubectl get pods -l name=locust,role=worker
How to Execute Tests
Our Support Techs use the following command to get external IP addresses in order to execute Locust tests:
$ kubectl get svc locust-master
NAME            TYPE           CLUSTER-IP      EXTERNAL-IP     PORT(S)                                        AGE
locust-master   LoadBalancer   10.35.253.55   35.202.16.162   8089:31521/TCP,5557:31809/TCP,5558:30194/TCP   11m
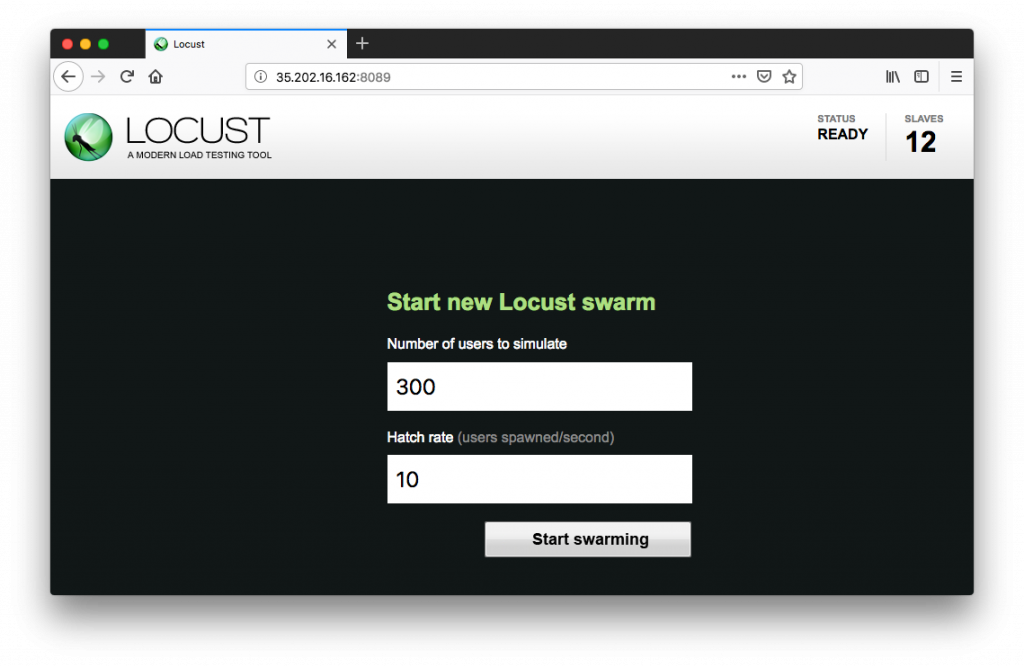
Here, we can enter the total number of users to stimulate as well as spawn rate for each user. Clicking Start swarming will prompt the simulation to begin.
We will soon be able to see statistics aggregate. Then, we can stop the simulation at any time with the Stop button. Finally, we can download the complete results in the form of a spreadsheet for further analysis.
[Looking for a solution to another query? We are just a click away.]
Conclusion
In brief, our skilled Support Engineers at Bobcares demonstrated how to carry out Load Testing with Locust on GCP Kubernetes.
PREVENT YOUR SERVER FROM CRASHING!
Never again lose customers to poor server speed! Let us help you.
Our server experts will monitor & maintain your server 24/7 so that it remains lightning fast and secure.


0 Comments