Let us learn more on how to migrate zabbix to new server. With the support of our Server management support services at Bobcares we can go through the whole backup setup process.
Moving the Zabbix database to a new database server.
- Former server: Debian Linux 9 with MariaDB 10.1.48 installed.
- Debian Linux 11 with MariaDB 10.5.12 is the new server (from Debian packaging)
- The front end of Zabbix (5.0.19 LTS) is running on Apache.
Step 1: Dumping the current database
# mysqldump --single-transaction zabbix | gzip > /mnt/zbx-dump.sql.gzThere is no need to halt Zabbix for this. If the user is not operating as root locally, then the user can add —user, —host, and similar parameters.
Aftert that, transfer the large size file to the new database server. This is the first step to migrate zabbix to a new server.
Step 2: Set up the new database
Firstly, to create the new database and the right user and permissions on the new server, use the standard mysql commands: create database, create user, give all access.
Remote access username syntax (instead of or in addition to ‘zabbix’@’localhost’): ‘zabbix’@’10.10.10.0/255.255.255.0’
Use the same password as in Zabbix server configurations.
Do not import any SQL structure at this time; we want to start with an empty database.
Step 3: Transfer the database to the new server
$ zcat zbx-dump.sql.gz | mysql -u zabbix -p zabbixThis might take a long time. (As an example, a 50 GB database was loaded in around two hours.)
Step 4: Update Zabbix to utilize the new database.
For the fourth step to migrate zabbix to new server edit the command line given below:
/etc/zabbix/zabbix_server.conDBHost should now be set to the new database server IP.
Start the Zabbix server again:
sudo systemctl restart zabbix-serverEdit:
/etc/zabbix/web/zabbix.conf.php: Set $DB['SERVER']Edit the command line given above to the new database server address.
Reboot Apache by typing in the following command line. This completes the fourth step to migrate zabbix to new server:
sudo systemctl restart apache2Step 5: Testing
Examine the Zabbix frontend (GUI) to ensure that everything appears normal and performant. If we notice anything unusual, check the Zabbix server log (/var/log/zabbix/zabbix server.log).
There will be some gaps in the graphs and event lists since there is no data in the new database between steps 1 and 4.
Check the Zabbix server log or the MariaDB log if we encounter unexpected difficulties. If nothing else works, we can undo the adjustments made in the previous stage. The existing data in the previous database has not been lost.
If the troubleshooting takes a long time and we want to reduce the interval for lost data in Zabbix, we need go back to step 1. In that scenario, remember to first install the new zabbix database on the new server (otherwise we will get an error while creating the database in step 4).
This concludes the testing to migrate zabbix to a new server.
Step 6: Configure database partitioning upkeep.
The table partitioning is there if the database was partitioned (for example, read this Zabbix blog article), but the method for generating new partitions is not.
Re-implement the system scripts (cron job or similar) on the new database server, or if stored procedures are used, we may set them up afresh (see the Zabbix blog article), or copy from the previous database:
# mysqldump --single-transaction --routines --no-data --no-create-info zabbix > /mnt/zabbix-partitioning.sqlTransfer the file to the new server. Next, on the new server, import it as follows:
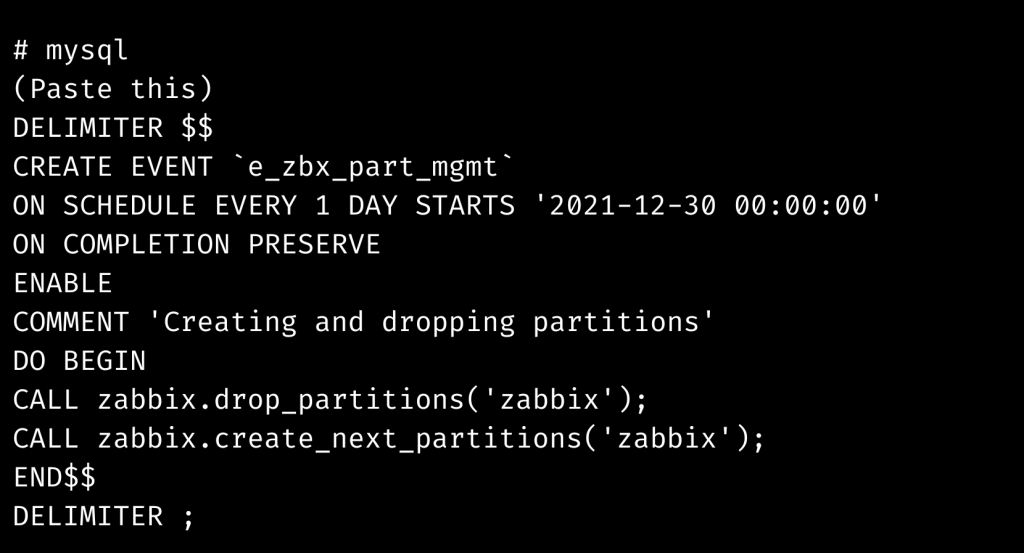
# cat zabbix-partitioning.sql | mysql zabbixRecreate the partitioning event by doing the following:

Step 7: Monitoring
Lastly, ensure that all essential monitoring, such as generic MariaDB monitoring and partition monitoring, is in place.
[Need assistance with similar queries? We are here to help]
Conclusion
To sum up we have now seen how to migrate zabbix to a new server. With the steps put forward by Server management support services at Bobcares, we have now gone through the whole setup process.
PREVENT YOUR SERVER FROM CRASHING!
Never again lose customers to poor server speed! Let us help you.
Our server experts will monitor & maintain your server 24/7 so that it remains lightning fast and secure.


0 Comments