The article explains how to set up an ETag-based cache with NGINX on Ubuntu. As part of our Server Management Service, Bobcares provides answers to all of your NGINX questions.
ETag-based cache with NGINX on Ubuntu
We can enhance the functionality and effectiveness of the web server by utilizing ETags in conjunction with caching systems. Here’s how to configure Ubuntu to use NGINX for ETag-based caching:
1. Use the following command to install NGINX if it isn’t already there:

2. Open the website’s NGINX configuration file. Usually, this file can be found in the /etc/nginx/sites-available/ directory. Use a text editor to modify the configuration file for the website.

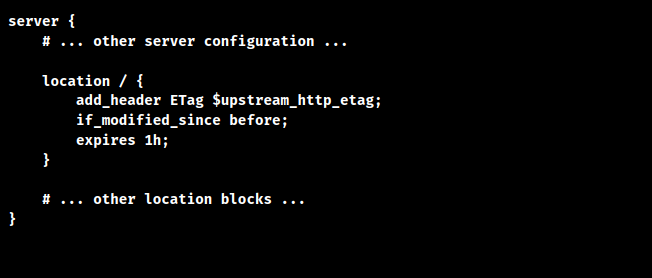
3. Add or change the following lines in the setup file’s server block to enable ETags:

4. Close the text editor after saving the configuration file.
5. It’s a good idea to check the settings for syntax issues before implementing it:

We can proceed to reload NGINX to apply the modifications if the test is successful.
6. To implement the modified configuration, reload NGINX:

The ETag header will be used by NGINX with these options in place to identify whether a resource has changed since it was last cached. If the resource has changed, NGINX will update the cache and request the updated resource from the upstream server.
[Need to know more? We’re available 24/7.]
Conclusion
ETags can stop transferring pointless data between the server and clients, enhancing performance and using less bandwidth.
PREVENT YOUR SERVER FROM CRASHING!
Never again lose customers to poor server speed! Let us help you.
Our server experts will monitor & maintain your server 24/7 so that it remains lightning fast and secure.


0 Comments