


PowerDNS Admin can be easily installed and configured with this guide by our experts.
At Bobcares, we offer solutions for every query, big and small, as a part of our Server Management Services.
Let’s take a look at how our Server Management Support Team is ready to help customers understand more about PowerDNS-Admin.
All About PowerDNS Admin
PowerDNS Admin is a powerful web administrative tool for PowerDNS. It allows us to create as well as manage DNS zones easily from a web browser. Furthermore, it offers several features to make our jobs easier:
- Domain template
- Multiple domain management
- User management
- User activity logging
- Support Local DB / LDAP / SAML / Active Directory user authentication
- User access management according to domain
- Support Google / Azure / Github / OpenID OAuth
- Dashboard and pdns service statistics
- Support Two-factor authentication
- Limited API for manipulating zones & records
- Edit IPv6 PTRs using IPv6 addresses directly
- DynDNS 2 protocol support
Here are the prerequisites for setting up PowerDNS-Admin:
- PowerDNS
- A database server for storage
- Python language development environment
- uWSGI Python application web-server
- Nginx web-server as a reverse proxy to the web application
- Development libraries for MariaDB, LDAP, SASL, and SSL
- Source code from Git
How to install PowerDNS Admin
- First, copy the PowerDNS-Admin source code from git to the Nginx web root directory.
git clone https://github.com/ngoduykhanh/PowerDNS-Admin.git /var/www/html/pdns
- Next, head to the PowerDNS-Admin web root directory and create a virtual environment as seen below:
cd /var/www/html/pdns/
virtualenv -p python3 flask
- Then, activate the environment and install the required libraries:
source ./flask/bin/activate
pip install -r requirements.txt
After that, exit the virtual environment.
- Now, open the default PowerDNS admin configuration file and define the database connection details.
vim /var/www/html/pdns/powerdnsadmin/default_config.py
Under #Basic App Config, we have to replace the SALT and SECRET_KEY keys, Furthermore, we also have to set the bind address and port.
Under #Database Config, we have to add information about our PowerDNS database connection details.
Then, save and exit the configuration file.
- After that, we have to reactivate the virtual environment and run the DB migration:
cd /var/www/html/pdns/
source ./flask/bin/activate
export FLASK_APP=powerdnsadmin/__init__.py
flask db upgrade
- Next, generate asset files as seen here:
yarn install --pure-lockfile
flask assets build
By this point, our PowerDNS Admin is up and ready. By executing the run.py file in the webroot directory, we can run it in standalone mode.
How to enable PowerDNS API access
The next part of the process is to open the PowerDNS configuration file and enable the API. Additionally, we also have to set the API key.
vim /etc/powerdns/pdns.conf
api=yes
api-key=afqu3eiv2vxytepe8AQu7nav2Aing1
After that, we have to save the file and restart PowerDNS for the changes to take effect.
How to add Nginx Configuration
To begin with, create a PowerDNS-Admin Nginx. In this scenario, we create a file as seen here:
vim /etc/nginx/conf.d/pdns-admin.conf
Then we add the following content to the file:
server {
  listen	*:80;
  server_name               pdnsadmin.bobcares-demo.com;

  index                     index.html index.htm index.php;
  root                      /var/www/html/pdns;
  access_log                /var/log/nginx/pdnsadmin_access.log combined;
  error_log                 /var/log/nginx/pdnsadmin_error.log;

  client_max_body_size              10m;
  client_body_buffer_size           128k;
  proxy_redirect                    off;
  proxy_connect_timeout             90;
  proxy_send_timeout                90;
  proxy_read_timeout                90;
  proxy_buffers                     32 4k;
  proxy_buffer_size                 8k;
  proxy_set_header                  Host $host;
  proxy_set_header                  X-Real-IP $remote_addr;
  proxy_set_header                  X-Forwarded-For $proxy_add_x_forwarded_for;
  proxy_headers_hash_bucket_size    64;

  location ~ ^/static/  {
    include  /etc/nginx/mime.types;
    root /var/www/html/pdns/powerdnsadmin;

    location ~*  \.(jpg|jpeg|png|gif)$ {
      expires 365d;
    }

    location ~* ^.+.(css|js)$ {
      expires 7d;
    }
  }


  location / {
    proxy_pass            http://unix:/run/pdnsadmin/socket;
    proxy_read_timeout    120;
    proxy_connect_timeout 120;
    proxy_redirect        off;
  }

}
Then, save and close the file. Now, it is time to remove the Nginx default site and then run config syntax check.
mv /etc/nginx/sites-enabled/default{,.old}
nginx -t
After the output shows the process is successful, restart Nginx.
According to our Support Techs, we have to open Nginx on the firewall to offer external access. After that, we will be able to access the PowerDNS-Admin web interface by entering http://server-hostname in the browser. This will take us to the login screen.
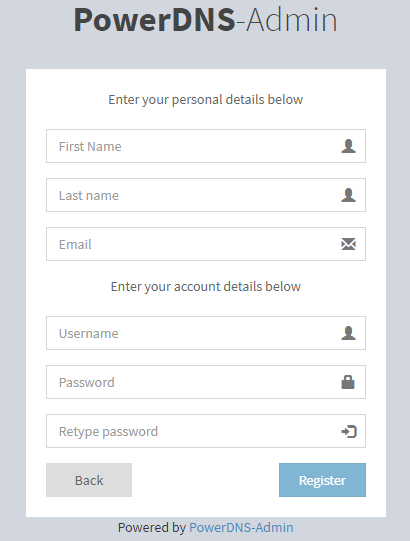
Here we can create a PowerDNS Admin administrative user account and we are all set.
[Need assistance with another query? We are available 24/7.]
Conclusion
In a nutshell, our skilled Support Engineers at Bobcares introduced PowerDNS-Admin to us.
PREVENT YOUR SERVER FROM CRASHING!
Never again lose customers to poor server speed! Let us help you.
Our server experts will monitor & maintain your server 24/7 so that it remains lightning fast and secure.


0 Comments