


Let us study how to set up the proxmox docker portainer. With the support of our Server management support services, we can give a complete note of the process.
Installing Proxmox: Docker Portainer

Let’s use an LXC container to install Docker. Return to the shell window and enter the following:
pveam update- This operation effectively changes the list of templates from which we may create a container. We’ll need a template to build our container around. On the left, choose local storage, followed by CT Templates on the right.
- Navigate to the template area and click on the Tmeplates button.
For the Template, we’ll use turnkey-core, which is essentially a very lightweight version of Linux that should help make the container fast and light. Look for and download the core. It will download and will be available in the template database on the server. Remember, if there are only a few templates to pick from, make sure we ran the pveam update command before in the shell.
Creating a Container for proxmox docker portainer
- Click on Create CT (container) on the top right.
- We must assign an ID to the container. The node (server) should already be populated. Add credentials as needed.
- Select the template that we’d previously downloaded.
- For the next tabs, we must pick 100gb, 1 CPU, and 2048gb RAM.
- For the network, we must configure it to DHCP, and for DNS, we have left it as is. Following the process, a confirmation page will appear. From here, press the finish button.
- Then, go to the container settings tab and double-click on features. We must ensure that “Nesting” and “keyctl” are both active.
After that, launch the container (right click shortcut) and we should be up and running in a few seconds. Log in with root and the password you chose on the General page above, and you should now be at a linux prompt, ready for the next step.
We must install a Turnkey. When the installation screens occur, we may skip the first two but install the third. When the procedure is complete and Turnkey will install, press Ctrl+C to leave and then perform the following instructions as usual:
apt-get updateapt-get upgradeInstalling Docker
The next step in proxmox docker portainer setup is to Install the Docker. Copy and paste the following commands into the shell of the container we just created:
apt-get updateapt-get install \
apt-transport-https \
ca-certificates \
curl \
gnupg \
lsb-releasecurl -fsSL https://download.docker.com/linux/debian/gpg | gpg –dearmor -o /usr/share/keyrings/docker-archive-keyring.gpg ** for some reason wordpress isn’t showing that dearmor needs a double dash not a single**echo \
“deb [arch=amd64 signed-by=/usr/share/keyrings/docker-archive-keyring.gpg] https://download.docker.com/linux/debian \

$(lsb_release -cs) stable” | tee /etc/apt/sources.list.d/docker.list > /dev/null
apt-get updateapt-get install docker-ce docker-ce-cli containerd.ioDocker should have been added and installed to the container as a result of this. To verify that it is operational, use the following command:
systemctl status dockerIf everything goes smoothly, we should get a command line that says Docker succeeded. This completes the DOkcer installation process in the proxmox docker portainer.
So Docker is now operating in a very lightweight container. Install Portainer to make it easy to manage our Docker containers.
Installing Portainer
This is extremely simple. Type the following command at the same shell terminal as before.
docker volume create portainer_dataThis establishes a location for us to store our data. The next step is to download and install the Portainer image from the cloud.
docker run -d -p 8000:8000 -p 9000:9000 --name=portainer --restart=always -v /var/run/docker.sock:/var/run/docker.sock -v portainer_data:/data portainer/portainer-ceAnd now we’re done. The preceding command will download Portainer, expose it on the container’s IP address:9000, and tell it to always restart.
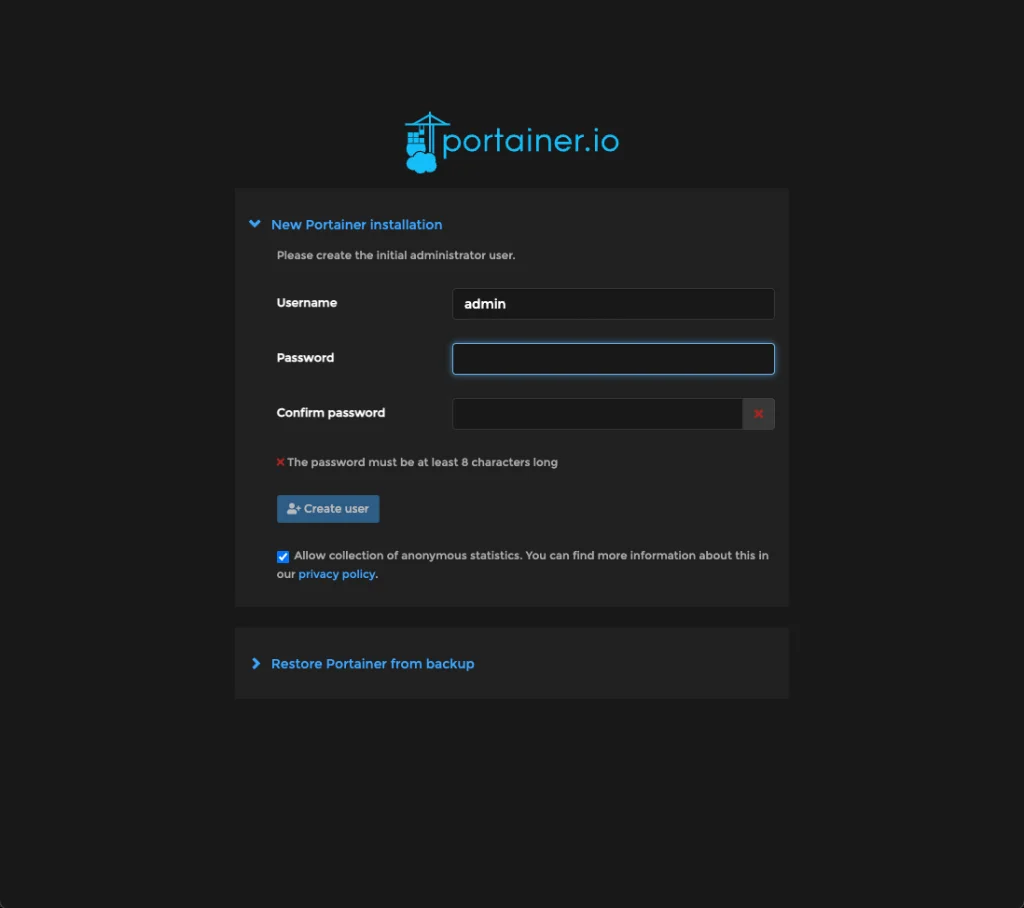
Allow a few seconds for it to properly download and install, and if everything went as planned, we should be greeted with the following page:
It is important to note that we must verify the container’s IP address. We may type the following in the container’s command prompt:
ifconfigThen, under the router’s settings, we may reserve that container’s IP address. We implemented things in this manner so that the router has complete control over which IP addresses are assigned to which machines, containers, virtual machines, and so on. If we wish to manually provide the IP address in the container, we can simply click on the network tab, double-click the DHCP option we established previously, and make any necessary changes.
Here, we can take a snapshot of the container with only Portainer and Docker installed to utilize as a foundation in the event that something goes wrong with the installation in the future.
[Need assistance with similar queries? We are here to help]
Conclusion
To summarize, we have now seen how to set up the proxmox docker portainer. With the support of our Server management support services, we have learned how to set this up in a few simple steps.
PREVENT YOUR SERVER FROM CRASHING!
Never again lose customers to poor server speed! Let us help you.
Our server experts will monitor & maintain your server 24/7 so that it remains lightning fast and secure.


couple of things that hung me up were as follows
1. make sure to uncheck unprivilaged container
2. in the container options enable the nesting feature
3. apt-get install -y docker.io instead of containerd.io
Thank you for this post but Im getting the below error messages when running apt-get update
E: Type ‘“deb’ is not known on line 1 in source list /etc/apt/sources.list.d/docker.list
E: The list of sources could not be read.
Hi Michael,
Our experts can help you with the issue.we will be happy to talk to you through our live chat(click on the icon at right-bottom).