


Setup OpenVPN on pfSense with the steps described in this article. Bobcares offers solutions for your queries as a part of our Server Management Services.
How to set up OpenVPN on pfSense?
It is easy to set up an OpenVPN (OVPN) server on pfSense. Having our VPN server on the router has multiple benefits. We can connect to our home network and even access the local machine using a remote device from anywhere around the world. The main steps in the setup process are as follows:
- Sign up for a No-IP account
- Add a dynamic DNS in pfSense
- Downloading and setting up Client Export Package
- Setup OpenVPN on pfSense
- Configure a new VPN user
Let’s look into the details of each step one by one.
Sign up for a No-IP account
1. Go to the noip.com site, and create a hostname.
2. Click on Sign-up. Provide the necessary details. Then create the account.
3. Now enable the account through email confirmation. After that, log in to the No IP account using the account details. Then, create a Username as asked.
4. From the dashboard, go to the Dynamic DNS >> No-IP Hostnames. Now we can see the IP Address and the DynDNS Name.
Add a dynamic DNS in pfSense
1. Go to Services >> Dynamic DNS on pfSense. Click on the +Add option.
2. On the new screen, provide the required details. Select No-IP (free) from the list of services. Type “WAN” in the textbox for “Interface to Monitor.” The hostname will be that of the No-IP account. The username and password are the same ones used for the No-IP account.
3. Provide a description and click on the Save button. After doing this, the Cached IP should appear in green, showing that the IP is updated.
Downloading and setting up Client Export Package
1. Firstly, install the Client Export Package.
2. Go to System >> Package Manager >> Available Packages.
3. Search and find OpenVPN. Select on +Install option near the
openvpn-client-exportSetup OpenVPN on pfSense
The pfSense OpenVPN Wizard helps us to easily set up OVPN on pfSense.
1. Go to VPN >> OpenVPN. Hit on Wizards to start the process. The Type of Server should be Local User Access. Give a new Certificate Authority a name and create it. To go on, select Add new CA. Then create a server certificate, give it a name, and fill out the details asked.
2. Now set up the Server for OpenVPN on pfSense. Provide the details as follows:


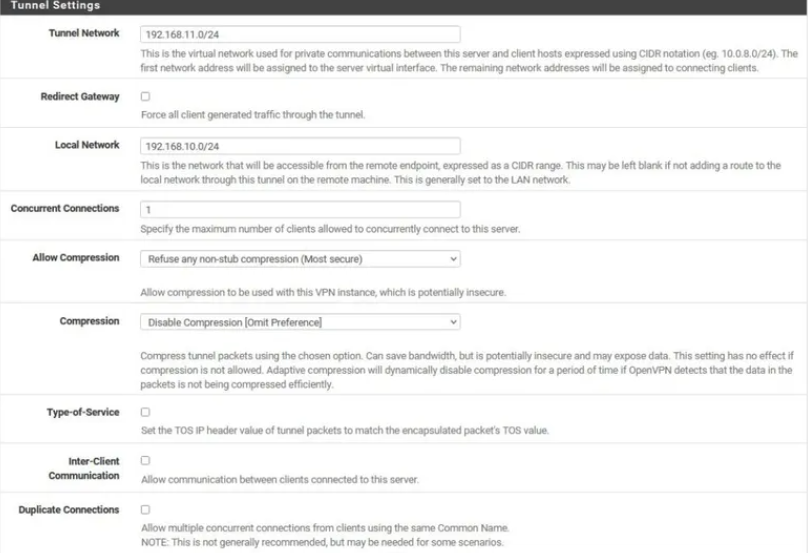
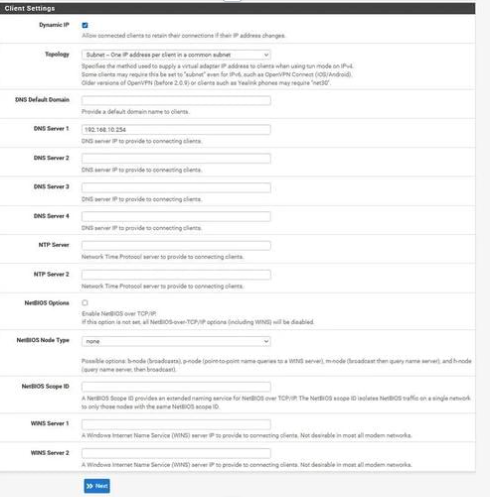

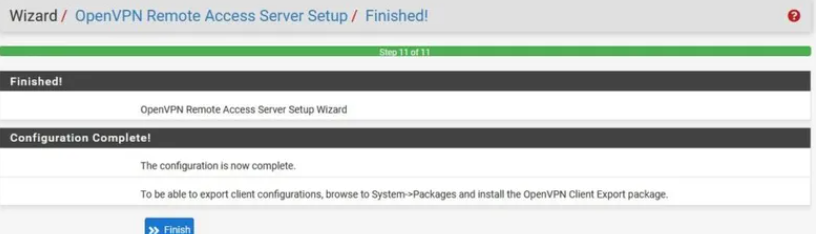
3. To complete the setup of the pfSense OpenVPN Server, click Finish.
Configure a new VPN user
1. Go to System >> User Manager. Click on +Add to add a new user.
2. We must tick the box next to “Click to create a user certificate” after giving the user a username and password. As shown in the image below, complete every field. Ensure that the Certificate Authority we choose is the one we created before. Click Create User whenever we are ready.

[Looking for a solution to another query? We are just a click away.]
Conclusion
Based on FreeBSD, pfSense is an effective free firewall and router. There are many advantages to using pfSense rather than a regular router. It is easy to set up openvpn on pfSense with the steps provided in this article.
PREVENT YOUR SERVER FROM CRASHING!
Never again lose customers to poor server speed! Let us help you.
Our server experts will monitor & maintain your server 24/7 so that it remains lightning fast and secure.


Bob, you rock. Quickest and simplest instructions for this I’ve seen. Nice work.
Hi,
Thanks for the feedback. We are glad to know that our article was helpful for you 🙂