Web developers love Laravel framework.
This is because, it eases the common tasks in web projects like authentication, routing, sessions, etc.
At Bobcares, we often receive requests from website owners to install Laravel in their cPanel accounts as part of our Outsourced Technical Support services.
Today, let’s discuss the 2 methods to install Laravel in a cPanel server.
How to install Laravel on cPanel server?
You can install Laravel in a cPanel account using the below methods.
- Automatic installation via Softaculous
- Manual installation using Composer
But, before we start with the installation steps, let’s take a look at the pre-requisites.
- PHP version 5.6 or higher
- OpenSSL PHP extension
- Mbstring PHP extension
- PDO PHP extension
- Tokenizer PHP extension
- XML PHP extension
- Ctype PHP extension
- JSON PHP extension
- Phar PHP extension
- Mcrypt PHP extension
Most web hosts allow you to enable these extensions through the “Select PHP Version” option in cPanel(see below).

PHP Selector
Let’s now move on to the installation steps in detail.
1) Automatic installation via Softaculous
You can use the Softaculous option to automatically install Laravel on a cPanel server.
Our Hosting Engineers follow the below steps to install Laravel from Softaculous.
- Go to cPanel > Softaculous Apps Installer.
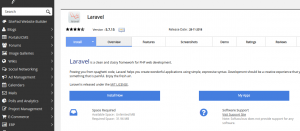
- After that, search for Laravel and click on it.
- Click on Install Now.
- Then, enter the folder name where Laravel will be installed.
- If it needs to be installed in public_html folder, leave the folder name blank.
- Click on Install

Install Laravel via Softaculous
You can see that this is so easy because the entire installation is done with a single click.
However, sometimes, we have to opt for a manual installation.
2) Manual installation using Composer
Now, let’s see the steps to manually install Laravel on a cPanel server.
a) SSH access
To manually install Laravel in cPanel account, you must have SSH(Shell access) enabled for your account.
If not, you must contact the web host and enable shell access.
b) Install Composer
Likewise, the next important step is to install the Composer module.
Composer is a tool for dependency management in PHP.
You can declare the libraries on which your project depends, and it will manage them for you.
To install this module, we first download the composer installer file.
cd /bin
wget https://getcomposer.org/installerCopy Code
Before installation, our Hosting Engineers check the compatibility of the installer using the below command.
php installer --checkCopy Code
And, if everything is good, following message will be displayed.
php installer --check
All settings correct for using ComposerCopy Code
Then, we install Composer module with the below command and after successful installation, we remove the installer file.
php installerCopy Code
b) Install Laravel
First, navigate to the folder where Laravel needs to be installed.
After that, our Support Engineers install Laravel with the composer create-project command.
php /bin/composer.phar create-project laravel/laravel {directory_name} --prefer-distCopy Code
For instance, if you need to install Laravel in a sub-directory “test“, you can replace “directory_name” as “test”.
Laravel project files are located in /public folder.
That is, if you install it in a test folder, the files will be in “/test/public/“.
Additionally, the index.php is the front controller of Laravel for all HTTP requests and it is located in /public folder.
So, to make Laravel project files publicly available, you must create a symbolic link in the public_html folder that points to public folder.
ln -s /home/username/laravel/public /home/username/public_htmlCopy Code
It’s done!! Open the browser and navigate to your domain. You can see the Laravel welcome screen.
Common issues in Laravel install
Sometimes, Laravel install runs smoothly and sometimes errors can occur.
Based on our experience in managing cPanel servers, let’s see some of the common problems that may arise when you install Laravel.
a) File permission issues
Sometimes, cPanel users complain that their Laravel installation isn’t working properly.
In most of the cases, we find that installation was successful, but proper permissions for files and directories were not assigned.
The Laravel app/storage directory and the bootstrap and cache directories should be writable by the web server. Otherwise, Laravel will not run.
Our Hosting Engineers review the application and web server logs to identify the error and then assign proper permissions to the required files.
b) Incorrect binaries in composer.json file
Similarly, another common error that we noticed during the Laravel installation process is given below:
Parse error: syntax error, unexpected '['Copy Code
This is due to the wrong PHP binaries specified in the composer.json file.
Here, we review and correct the binary entries under the section scripts in he composer.json file.
This error list is not complete. You can come up with n number of errors during manual installation.
Need assistance to install Laravel in your cPanel account? click here to talk to our experts. We’re online 24/7.
Conclusion
Laravel is one of the best PHP frameworks for web development. Today, we’ve discussed how our Dedicated Support Engineers install Laravel on a cPanel server.


Your article Awesome Thanks for this information, very informative as well as Modern.
Nice post! Thanks for sharing amazing content.
Nice post! Thanks for sharing amazing content.
Thanks for this great post!