Install Concrete5 – we can help you in installing Concrete5?
Concrete5 is an open-source CMS written in PHP. This allows individuals to easily manage their site structure and content.
Here at Bobcares, we often receive requests to install Concrete5 as a part of our Server Management Services.
Today, let’s see how our Support Engineers install Concrete5.
What is concrete5
Concrete5 is a free, open-source, content management system. It helps in both the building and running of great websites.
With Concrete5 we can build online magazines, newspapers, small websites, etc.
It makes easier to build our own website in seconds, and the editing is really smooth, just a click is needed to build what we want.
Let us discuss how our Support Engineers install concrete 5 for our customers.
How to Install concrete5
Recently, one of our customers approached us with the request to install Concrete5 for him. Our Support Engineers followed the steps below for installing it.
1. We downloaded concrete5 from https://www.concrete5.org and clicked the download button.
2. From there we downloaded the latest installation .zip file to our computer and extracted .zip file.
3. After that, we uploaded the contents of the extracted Concrete5 directory to the document root directory of the customer’s account using FTP.
Database Creation
Next, we need to create a database. The steps we did while creating are given below:
4. Then, we created MySQL database and database user for Concrete5 from the command line as our customer’s account doesn’t include cPanel. For that we followed the steps as shown:
mysql -u root -pAnd entered the MySQL root password
5. Then we created the database user ‘newuser’ using the command below:

6. In order to log in to MySQL as ‘newuser’, we did the steps:
mysql -u newuser -pAnd entered the newuser password. Finally, the database ‘newdata’ is created using:
CREATE DATABASE newdata;7. Next, we went to the Concrete5 installation URL i.e. https://www.ourdomainname. Then Installed concrete5 page appeared.
Filling out the Installation Details
Finally, we fill out the following details
1. There we selected a language from the language box and clicked ‘Continue to Installation’.
2. Then under Site Information, in the Site Name text box, we gave a name for the site.
3. Next, Under Administrator Information, we filled the following fields and in the Email Address text box, given the administrator’s e-mail address.
Also, enter a password for the administrator in the Password and Confirmed Password fields.
4. In category Database Information, under that, we completed the following fields:
Gave localhost In the Server text box and in MySQL Username field entered ‘newuser’. Then we entered ‘newdata’ and password in MySQL Password text box and Database Name Text box respectively.
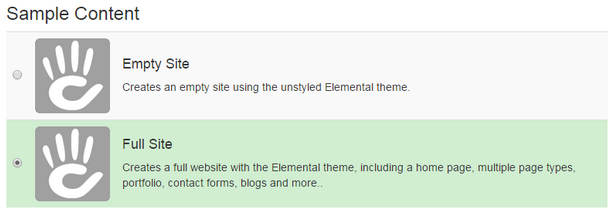
5. Then in the Sample Content category. From there we selected the Full Site option.

6. Then, click the Install Concrete5 option. Then the installation process started.
7. When the installation completed, we clicked on Continue to your site and visited our site.
Finally, Our Support Engineers successfully completed the Concrete5 installation.
[Having trouble in installing concrete5? – Our Experts are available 24/7.]
Conclusion
in short, we have discussed about Concrete5. Also, we have discussed how our Support Engineers install this for our customers.


0 Comments