Learn how to deny IP address access in Nginx. Our Nginx Support team is here to help you with your questions and concerns.
How to Deny IP Address Access in Nginx
Nginx servers let us control access to our website by configuring custom settings to block specific IP addresses.
Our experts have put together this step-by-step guide on managing IP access using Nginx.
To begin the process of blocking an IP address, we need to access the NGINX configuration files. We can edit the main configuration file or virtual host files depending on our setup.
We can access the main NGINX configuration file as seen below:
sudo vi /etc/nginx/nginx.confFor virtual hosts, such as `/etc/nginx/sites-enabled/website.conf`, use:
sudo vi /etc/nginx/sites-enabled/website.confHow to Block a Specific IP Address
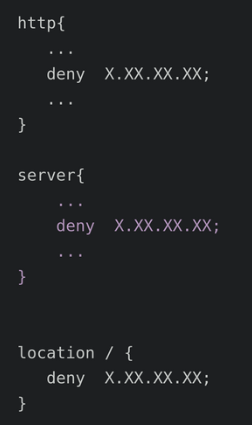
We can block an IP address globally by adding the `deny` directive within the `http`, `server`, or `location` context:
How to Block an IP Address for a Specific Subdomain
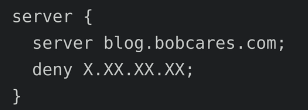
To block an IP address for a specific subdomain, such as `blog.bobcares.com`, edit the corresponding configuration file:
vim /etc/nginx/sites-enabled/blog.confAdd the `deny` directive within the `server` block:
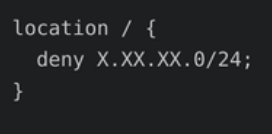
Similarly to block an entire IP range, use the CIDR notation:
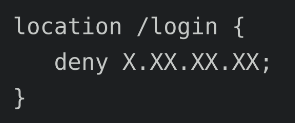
To block an IP address from accessing a specific URL, such as the login page:
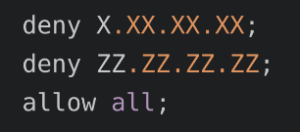
To block multiple IP addresses, use multiple `deny` directives:
After making changes to the NGINX configuration, we have to restart the NGINX service to apply the new settings.
Following these steps, we can effectively manage and restrict IP access to our website using NGINX.
[Need assistance with a different issue? Our team is available 24/7.]
Conclusion
In brief, our Support Experts demonstrated how to use pfSense Limiter for better bandwidth management.


0 Comments