Would you like to add an ISO to SolusVM? Here is an easy fix by our Support Engineers.
Adding an image file to SolusVM is no longer a difficult task with Bobcares by your side. Dive in to find out how to get it done in a jiffy.
How to add an ISO to SolusVM
Adding an ISO to SolusVM is an easy job that does not take too much time. Let’s see how our Support Engineers recommend going about it:
- First, connect via SSH to the Master server.
- Next, upload the ISO image to /home/solusvm/kvm/iso/. For instance:
# wget https://mirror.nsc.liu.se/centos-store/6.4/isos/x86_64/CentOS-6.4-x86_64-minimal.iso -O /home/solusvm/kvm/iso/CentOS-6.4-x86_64-minimal.iso
- After that login to the SolusVM web interface.
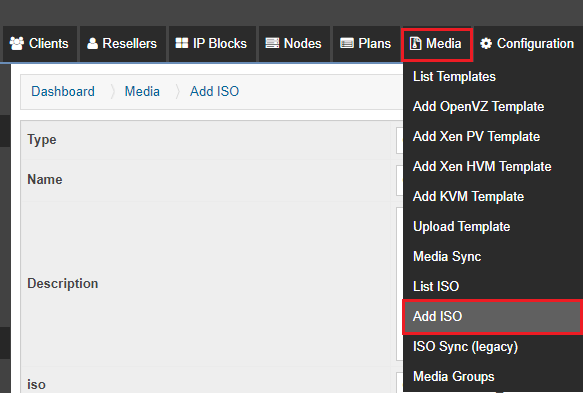
- Then navigate to Media and select Add ISO and click to expand.

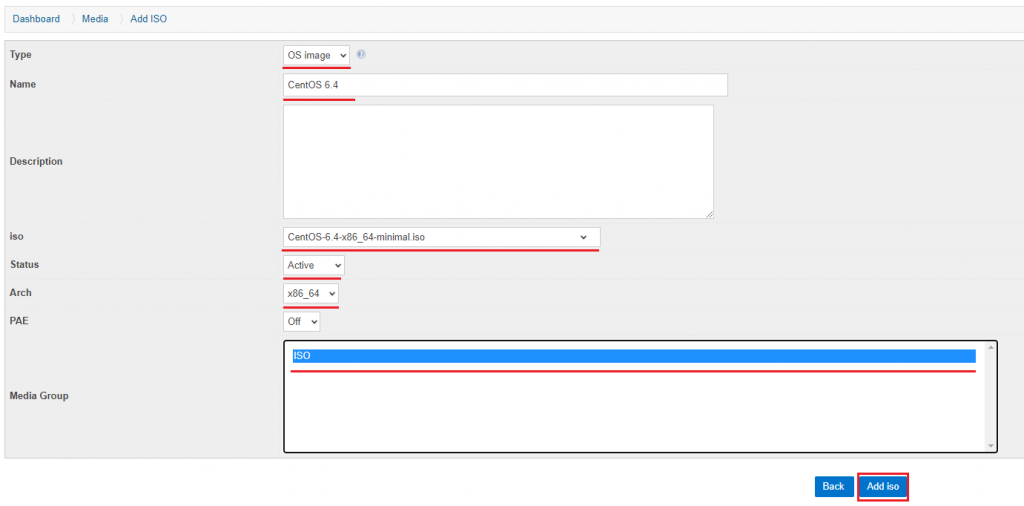
- Then enter the following details and click Add ISO:

- Type: OS image
- Name & Description of the ISO.
- Choose the ISO from the list.
- Set Status to Active.
- Choose architecture from the Arch list. For instance, it will be x86_64 for modern OS.
- Next, navigate to Media, Media Sync, and select Create.
- Choose the ISO image as well as the node where the virtual private server from the ISO will be created.
- Finally click Create Sync Job.
[Need an extra hand? Give us a call.]
Conclusion
In brief, we saw how to add an ISO to the SolusVM without too much trouble. With Bobcares by your side, Server Management becomes a breeze.
PREVENT YOUR SERVER FROM CRASHING!
Never again lose customers to poor server speed! Let us help you.
Our server experts will monitor & maintain your server 24/7 so that it remains lightning fast and secure.


0 Comments