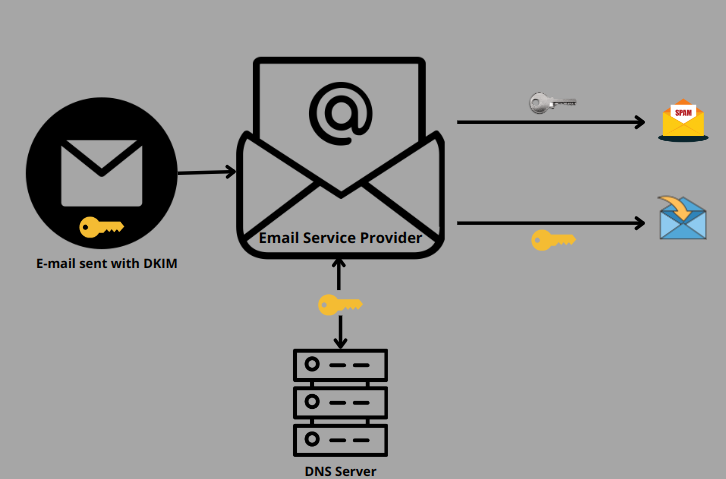
The Virtualmin DKIM offers security by enabling recipient mail servers to recognize forged sender addresses. We offer solutions to inquiries about Virtualmin as part of our Server Management Services.
What Is Virtualmin DKIM?
Virtualmin DomainKeys Identified Mail (DKIM) is an email signature standard that allows the recipient to validate the sender’s email address. This allows us to easily detect spamming. From version 3.81 onward, Virtualmin supports DKIM.
Virtualmin uses a functionality called milter to implement DKIM signing and verification. Any email relayed through the Virtualmin system, whether via web or client, will have a signature added by the milter, as long as the domain is DKIM enabled.

Signing takes place with a private key on the sender’s server that corresponds to a public key added to the sender’s DNS domain. The recipient can use this key to verify that the corresponding private key creates the email signature, thus proving that the message was truly sent from that domain.
Now let’s explore the method to install it.
Installing Virtualmin DKIM
Installation is now easy with the following steps:
- Firstly, log into Virtualmin as root.
- Now go to go to ‘DomainKeys Identified Mail’ in the Email Messages. Virtualmin will produce an error message indicating that the configuration DKIM file is missing.
- Finally, click the Install Now button to finish the download and installation.
Virtualmin supports the configuration of DKIM on Debian, Ubuntu, Fedora, CentOS, and Redhat Enterprise systems. We can also install it from the command line with these commands:
For CentOS, Fedora, or Redhat, we can use
yum install dkim-milterCopy CodeFor Debian or Ubuntu, we can use
apt-get install dkim-filterCopy CodeActivating DKIM In Virtualmin
Our Support team helps users with these steps to configure DKIM signing of outgoing email messages. Now let’s see them closely.
- First of all, log into Virtualmin as root.
- Then go to Email Messages -> DomainKeys Identified Mail.
- Change ‘Signing of outgoing mail enabled?’ Yes.
- Now provide a short name that we like to use to identify the signing key in the Selector for DKIM record name field.
- Lastly, click the Save button.
To activate DKIM, we must make sure to enable the DNS and email features on the virtual servers. The mail server also needs to be set up to use a private signing key whose corresponding public key is in the DNS. Virtualmin will additionally configure the DKIM milter by default to check to receive an email with the necessary signatures.
When DNS searches find a DKIM signed message as invalid or non-verifiable, then it results in the prevention of the delivery of DKIM signed messages. So set the option “Verify DKIM signatures on incoming email” to No to deactivate verification.
Deactivating DKIM In Virtualmin
When we need to disable the DKIM feature, we can follow these steps:
- Firstly, login to Virutalmin as root.
- Now go to Email Messages -> DomainKeys Identified Mail.
- Then change ‘Signing of outgoing mail enabled?’ No.
- Lastly, click the Save button, thus removing the public key from all domains, and stop the mail server from signing messages with the DKIM milter.
[Seeking solution to another query? We are just a click away.]
Conclusion
Virtualmin DKIM is standard for signing email messages which provide added security for the emails. So by using this feature, we can protect our systems from spammers to a great extent. In this article, we have shown you the installation steps of Virtualmin DKIM from our Support team.
PREVENT YOUR SERVER FROM CRASHING!
Never again lose customers to poor server speed! Let us help you.
Our server experts will monitor & maintain your server 24/7 so that it remains lightning fast and secure.


0 Comments