Are you frustrated about why you are not receiving emails from an authorized sender? We can use SpamExperts Whitelist to solve this problem.
The SpamExperts whitelist option can easily avoid wrongly blocked emails from a certain sender or recipient.
At Bobcares, we often get requests related to the SpamExperts, as a part of our Server Management Services.
Today, let’s see how our Support Engineers quickly add an email in SpamExperts Whitelist.
What is SpamExperts?
SpamExperts is an email filter that filters incoming and outgoing spam. It scans and filters whether the incoming or outgoing email contains spam, viruses or any other email-related attacks.
Moreover, the main features of the SpamExperts are Spam Quarantine and Email archiving.
The Spam Quarantine temporarily stores suspicious emails. As a result, this allows users to easily manage emails and classify them as suspicious or authorized ones.
Also, the SpamExperts can archive the emails. The archived emails are in an encrypted and compressed state. Here, the emails are stored safely in an easily retrievable fashion.
How we whitelist an email in SpamExperts?
At Bobcares, we often get requests from the customers about missing emails from some specific domains or email addresses. Now, let’s see how our Support Engineers allow emails for our customers.
Login to SpamExperts
Initially, we log in to the SpamExperts. In cPanel, we follow the below steps.
1. Firstly, log in to the cPanel account.
2. After that, under the Email section, click on Professional Spam Filter.
3. In this section, we see a list of domains or subdomains.
4. Then we click on the Login link to log into the Spam Experts Dashboard.
In Plesk, We open Professional Spam Filter under Extensions.
Whitelisting Senders in SpamExperts
By whitelisting the senders, the SpamExperts don’t check the emails from the whitelisted senders for spam. Instead, they are automatically sent to any recipient on the account. To whitelist the senders, we follow the below steps.
1. Initially, we log into the SpamExperts dashboard.
2. Then we click on the Sender whitelist icon.
3. After that, we navigate to Whitelist a recipient option.
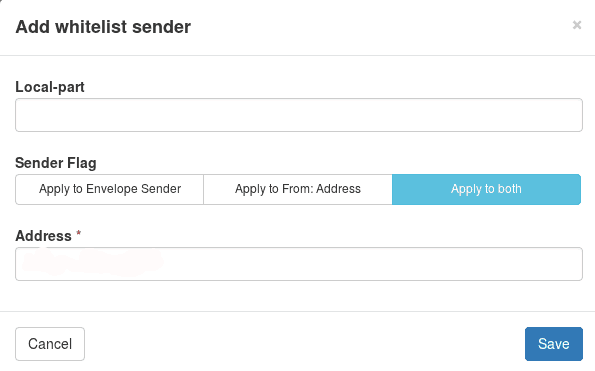
4. Then we enter the email address to whitelist in the Address field. After that, in the Local-part, we add the name of the email to be added and in Address the name of the domain.

If we want to whitelist a full domain, we add the domain name in the Address bar and leave the Local-part empty. Also, we can whitelist the entire TLD by using *.com in the Address bar.
Also, we make sure that the Apply to both options is selected.
5. Finally, we click the Save Button.
Whitelisting Recipients in SpamExperts
The recipient in the whitelist will receive email without it being checked for spam. To whitelist the recipients we follow the below steps.
1. Initially, we log into the SpamExperts dashboard.
2. Then click on the Recipient whitelist icon.
3. After that, we locate the Whitelist a recipient area and enter the email address in the Address field to whitelist the recipient.
4. Finally, we click the Save Button.
[Need any further assistance in adding SpamExperts Whitelist? – We can help you]
Conclusion
In short, SpamExperts helps us to protect the email account from the incoming and outgoing spam. Today, we saw how our Support Engineers help our customers to whitelist sender and recipients in SpamExperts.


0 Comments