Clusters with Prisma Cloud and AWS RDS made easy with Bobcares by your side.
At Bobcares, we offer solutions to queries, big and small as a part of our Server Management Service.
Let’s take a look at how our Support Techs helped a customer deploy Prisma service to their own Prisma Cloud cluster.
Clusters with Prisma Cloud and AWS RDS
Our Support Team is here with an in-depth tutorial to help get Prisma Cloud and AWS RDS up and running. We will learn how to :
- Keep aside a MySQL database instance via AWS RDS.
- Set up a new Prisma cluster via the Prisma Cloud Console.
- Use MySQL database as a backing data store for the Prima cluster.
Clusters with Prisma Cloud & AWS RDS: Signing up for AWS
In case, we do not have an AWS account, we have to sign up here.
The process will take a while. It is a good idea to have your credit card information and phone number in hand while signing up.
Clusters with Prisma Cloud & AWS RDS: Creating a new AWS RDS instance
Here, we will create a new AWS RDS instance in the us-east-1 AWS region. You can also choose any one of the following supported regions:
- eu-west-1 / EU West (Ireland)
- us-west-2 / US West (Oregon)
- us-east-1 / US East (N. Virgina)
- ap-northeast-1 / Asia Pacific (Tokyo)
Getting started
First, we will set up a new RDS instance in the region we prefer.
Selecting DB engine
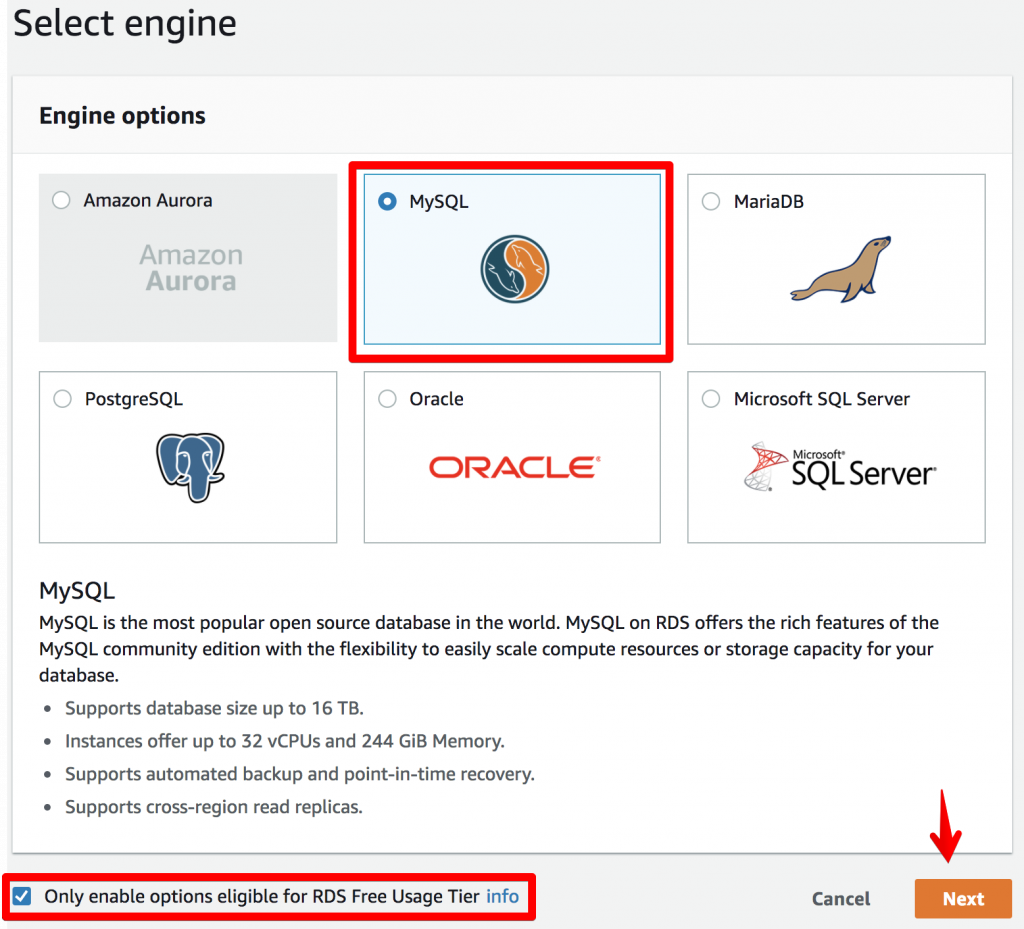
Next, we will navigate to the Select engine dialog box and choose MySQL as seen below:

Our Support Engineers would like to point out that some of the engine options seen above are not eligible for the RDS Free Usage Tier. In case, we want to choose a different DB and ensure it is free, we have to check the Only enable options eligible for RDS Free Usage Tier checkbox.
Choosing use case
Here, we will select Dev/Test-MySQL option as a use case in this scenario.
Specifying DB details
Here, as seen in the image below we will select the most recent version of MySQL from the dropdown list under DB engine version.
Then we can choose anything we prefer for the DB instance class. In this scenario, we will go with db.t2.micro – 1 vCPU, 1GiB RAM.
Next, we will enter the DB instance identifier, the Master username as well as Master password and click Next.
Configuring advanced settings
Now we will proceed to the Configure advanced settings dialog box and select Yes checkbox to activate public accessibility.
We will leave the remaining settings and scroll to the Backup section. Here, we will set the value of the Backup retention period to 0 days. In other words, there will be no automatic backups for the database instance.
Although we don’t need to make any changes to the remaining sections, we can do so if we prefer. Next, we will launch the DB instance with the Launch DB instance button.
Configuring instance settings
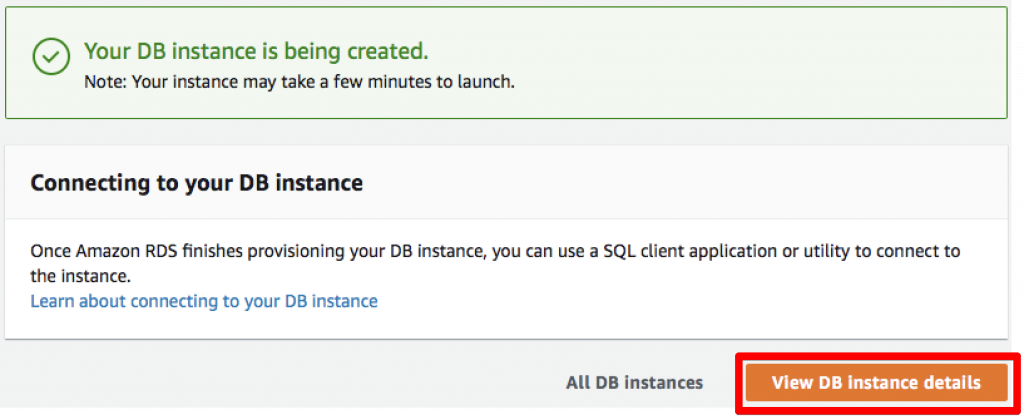
After the instance is available, we will click View DB instance details.

Here, we will locate the Endpoint and note it down for later. We will require it while setting up the cluster.
Then, navigate to the Details section and click the link below the Security groups label and go to the security groups.
After that, we will select the Inbound tab to verify the “a Custom TCP Rule” inbound rule is listed. We have to set it to source 0.0.0.0/0.
However, if the inbound rule does not exist, we will click the Edit button to set up a new inbound rule with “Anywhere” as the source and then save it.
Clusters with Prisma Cloud & AWS RDS: Creating a Prisma cluster
- First, we will go to Prisma Cloud Consoles and sign up or log in.
- Then, we will connect the new MySQL database by navigating to the Clustersview by choosing the tab in the top menu.
- After that, we will insert the following information:
- Host: This is the endpoint we noted down earlier.
- Port: The default port value is 3306.
- User: The username we chose earlier.
- Password: The password we chose earlier.
Then, we will click the Test connection button.
After testing the connection, we will offer a Cluster Name and a Description.
Finally, we will select a Cluster region. Our Support Techs recommend choosing a region that is closest to where most of our users are located.
We will also need to provide our credit card information at this point. Then, we will click Create Cluster.
- Next, the provisioning status of the cluster will be printed continuously. We can go back to the cluster overview and follow the provisioning status. After the cluster is up and running, the status will say Healthy.
Clusters with Prisma Cloud & AWS RDS: Deploying a Prisma service to the cluster
After we provision the cluster, we can use it as the runtime environment for the Prisma service by utilizing it as a deployment target.
We will install the latest CLI version with this command:
npm install -g prisma
Next, we will log in to the Prisma Cloud account as seen below:
prisma login
In other words, this stores the cloud session key in ~/.prisma/config.yml. Moreover, this key is used by CLI to authenticate us against Prisma Cloud.
After that, we will create a new service with this command:
prisma init hello-world
Now, we will choose the “Minimal setup: database-only “ option when prompted by CLI. Then, we will go to the newly created directory and deploy the service as seen below:
cd hello-world
prisma deploy
After running Prisma deploy, we will be prompted by Prisma CLI to select a cluster we prefer as a deployment target,
After selecting the cluster we created earlier, the Prisma service is deployed to our own Prisma Cloud cluster.
[Looking for further assistance? We are here to lend a hand.]
Conclusion
At the end of the day, we learned how to install Premium SSL in SolusVM under the guidance of the skilled Support Engineers at Bobcares.
PREVENT YOUR SERVER FROM CRASHING!
Never again lose customers to poor server speed! Let us help you.
Our server experts will monitor & maintain your server 24/7 so that it remains lightning fast and secure.


0 Comments