Let us learn how to set up the envoy load balancer Kubernetes with the support of our Server management support services at Bobcares.
Envoy load balancer in Kubernetes
Envoy is a high-performance, open-source proxy, and load balancer. It is widely used in Kubernetes settings for network traffic routing, load balancing.
It is used for sophisticated traffic management functions. Envoy offers a dependable and adaptable solution for load balancing within Kubernetes clusters.
The following are the procedures for deploying Envoy as a load balancer in front of a Kubernetes service.
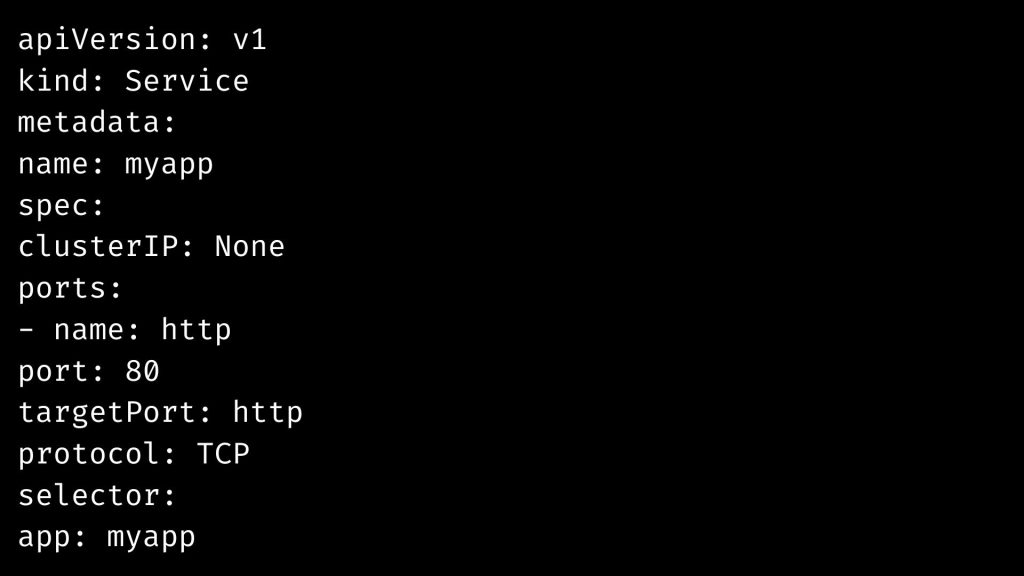
Create the headless service for our application
A headless service is a type of service in Kubernetes. It is especially useful when used in conjunction with Envoy’s STRICT_DNS service discovery mode.
A headless service does not offer a single IP address or load balancing to the underlying pods. It includes DNS setup that returns an A record with the pod’s IP address for all pods that meet the label selector.
We can use this service in instances when we wish to do load balancing while still maintaining connections to upstream pods ourselves. This is what the Envoy allows us to achieve.
Set the.spec.clusterIP value to “None” to establish a headless service. Assuming our application pods have the label app with the value myapp, we can construct the headless service with the yaml below.

(The name of the Service does not have to be the same as the name of our application or the app label, but it is a good practice.)
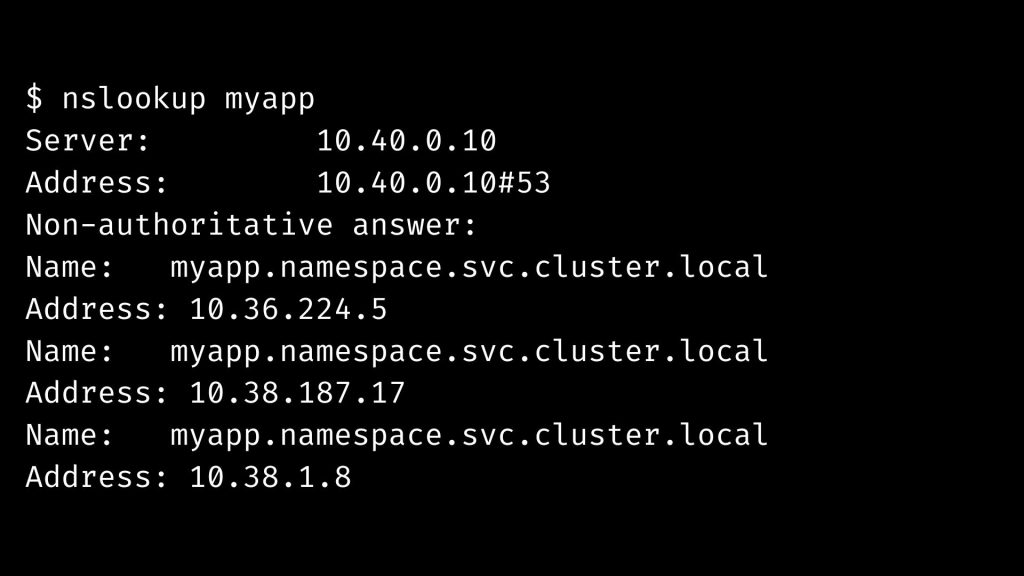
When we look at the DNS entries for our service within the Kubernetes cluster, we can see the individual A records with the IP addresses. If we have three pods, we’ll see something like this in the DNS summary.

Envoy’s STRICT_DNS service discovery keeps the IP address of all A records returned by the DNS, and it updates the collection of IPs every couple of seconds.
Create the Envoy image
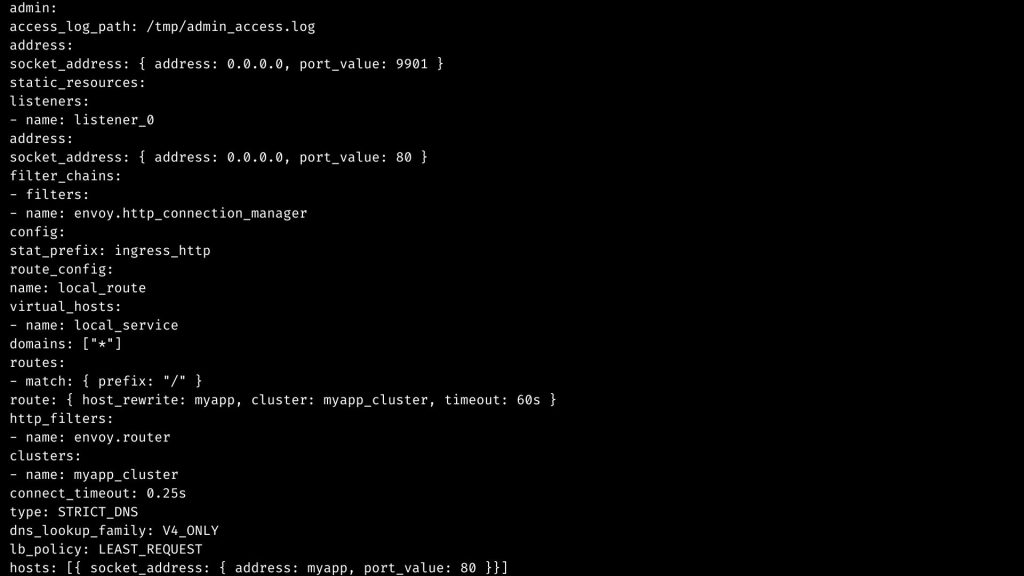
The easiest method to utilize Envoy without providing a dynamic API for the control plane is to put the hardcoded settings to a static yaml file.
The setup below loads balances to the IP addresses specified by the domain name myapp.

Create the Envoy image: Comman line epxlained
Note the following parts in the command line and its fucntions:
- type: STRICT_DNS:
The type of service discovery is specified here. It’s critical to set it to STRICT_DNS since it works well with the headless service we’ve created.
- lb_policy: LEAST_REQUEST:
We may select from a number of load balancing methods, the most prevalent of which are probably ROUND_ROBIN and LEAST_REQUEST.
- hosts: [{ socket_address:
: address: myapp, port_value: 80 ]: This is the section where we give the domain name from which Envoy will obtain the A records to route to.
Now for the nest steps uin the poorcess we have to put ht eDockewr file given below to the envoy.yaml config file.
FROM envoyproxy/envoy:latest

COPY envoy.yaml /etc/envoy.yaml

CMD /usr/local/bin/envoy -c /etc/envoy.yaml
The final step is to generate the image and push it somewhere so that it can be used by Kubernetes. No we ahve to use the command line given below to close up the process:
$ docker build -t markvincze/myapp-envoy:1 .

$ docker push markvincze/myapp-envoy:1
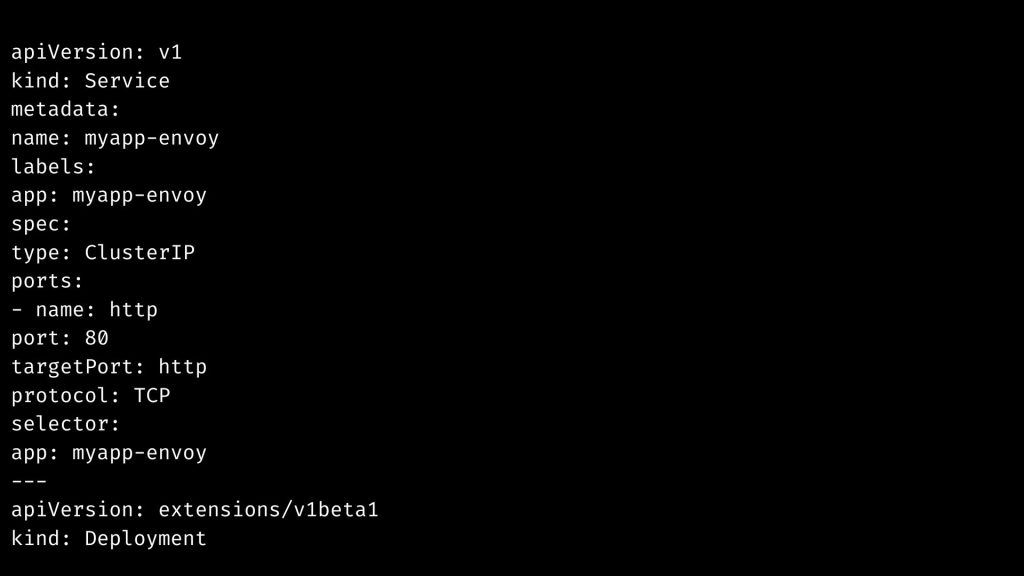
Set up the Envoy deployment
This isthe final step to use the envoy as a load balancer in front of a Kubernetes service.
Follow the command line given below:


After running this yaml, the Envoy proxy should be active. We can contact the underlying service by sending requests to the Envoy service’s primary port.
In this example, we merely installed a ClusterIP service, but we could also use a LoadBalancer service or an Ingress object to access the proxy from outside the cluster.
[Need assistance with similar queries? We are here to help]
Conclusion
To sum up we ahve now seen how to setup the envoy load balancer kubernetes with the support of our tech support team.
PREVENT YOUR SERVER FROM CRASHING!
Never again lose customers to poor server speed! Let us help you.
Our server experts will monitor & maintain your server 24/7 so that it remains lightning fast and secure.


0 Comments