Securing Websites has become really easy with free SSL certificate providers like Let’s Encrypt.
This certificate not only adds trust for your website but also makes data transfer secure.
Although, there are many benefits, maintaining Let’s Encrypt certificates requires some additional work initially.
At Bobcares, we help server owners in the installation and setup of Let’s Encrypt service as part of our Support Services for Web Hosts.
Today, we will see how we can set up Plesk server with Let’s Encrypt service.
How to enable Let’s Encrypt service in Plesk?
Plesk supports “Extensions“, which are user-friendly tools developed by Plesk or third parties.
Fortunately, Let’s Encrypt can be easily set up in Plesk version 12.5 or higher easily via these “Extensions“.
There are 3 steps to install SSL certificate on the website.
1. Enable Let’s Encrypt extension
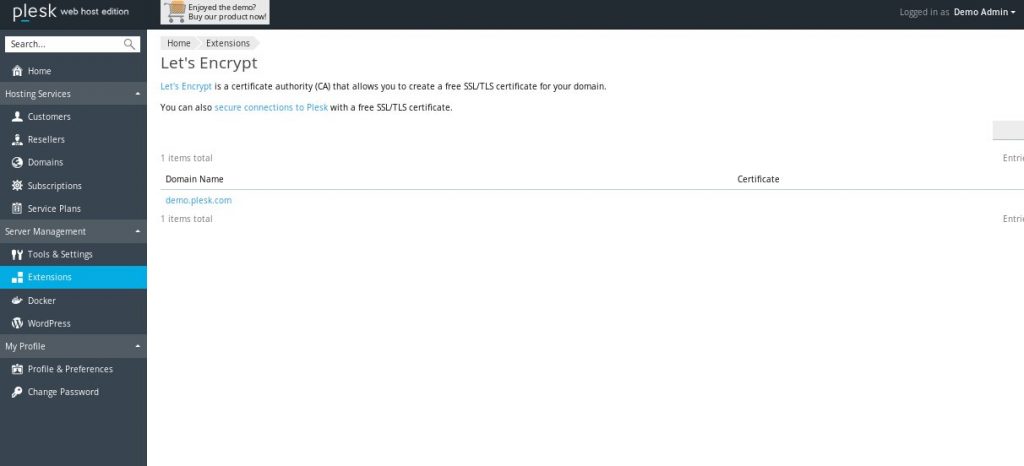
To enable the Let’s Encrypt extension, login to the Plesk panel. Then click on “Extensions” option under “Server Management.” Search for the extension “Let’s Encrypt” and enable it.
After enabling the extension, the page will look like :

2. Install Certificate
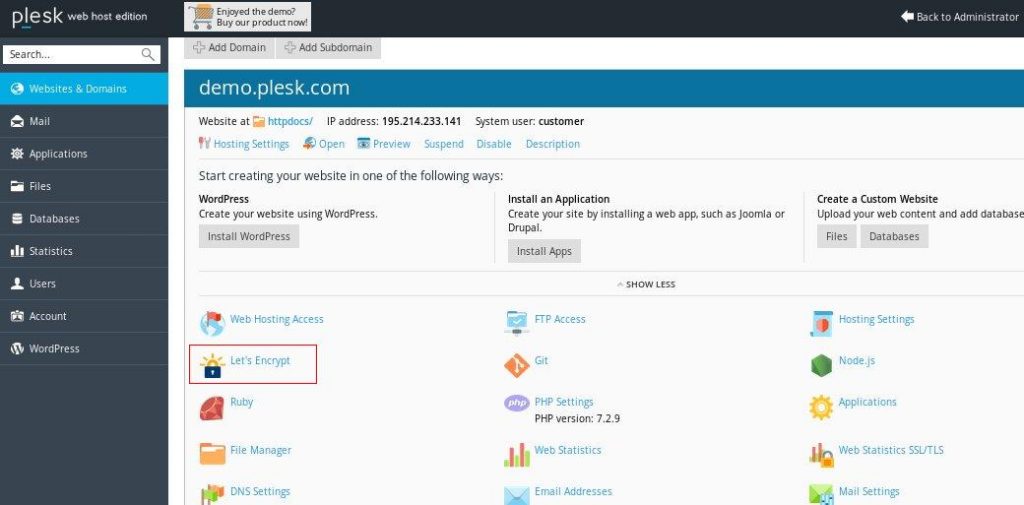
The second step is to install certificate for a domain. To do this, we need to click on the option “Let’s Encrypt” under the Websites and Domains section.

Clicking on the install button will readily install the certificate.
3. Renew Certificate
Unfortunately, Let’s Encrypt certificate needs renewal every 90 days. Because of this, manually tracking and renewing at expiry is rather impossible. But, Plesk’s Let’s Encrypt extension makes renewals easy.
And, Plesk will automatically renew them once a month. This ensures that SSL certificate on the website is active all the time.
Issues with Let’s Encrypt in Plesk
Although, the process of installing SSL certificates is quite easy with Plesk, our Support Engineers often find certain errors too.
Now, let’s have a look at these errors.
1. Internal Error
Here, the exact error will be :
Internal error.
ERROR: Call to undefined method pm_Domain::getIpAddresses() (Domain.php:213)
Let’s Encrypt uses IPv6 for validation. The problem here is that domain did not have IPv6 support. Hence, to fix the error, we enabled the IPv6 support for the domain and the certificate installation was successful.
2. Install failure
Secondly, certificate installation on website can fail with the following error too.
Error: Could not issue a Let's Encrypt SSL/TLS certificate for example.com.
Install certificate failure: Unable to set certificate name
In this case, when our Support Engineers checked, we could see that the old certificate entries were present in Plesk configurations and database. So, we had to manually remove the certificate for the domain from the command line. Then, we reissued the certificate and everything started working again.
3. Limit exceeded
Error: For my.example.com could not be issued SSL / TLS certificate from let's encrypt. The limit "Certificates per Registered Domain" has been exceeded for my.example.com. In Let's Encrypt, a maximum of 20 certificates can be issued per registered domain per week.
Similarly, often we see Let’s Encrypt Limit exceeded error as well.
Here, the domain had Let’s encrypt certificates for the www extension and webmail extension. But unfortunately, the dns records for www and webmail was changed recently to a different server. But, Plesk did not know this change. And, Plesk reached rate limit trying to renew the certificate and failing in the process.
We corrected the dns records and SSL certificate installation was successful.
Conclusion
Installing Let’s Encrypt certificate on Plesk is rather simple when using the Extensions. However, it often shows certain errors as well. Today, we’ve seen the causes for these errors and how our Support Engineers solve them.


0 Comments