Install cPanel on Linode with this handy guide by the experts at Bobcares. Read to find out more.
At Bobcares, we offer solutions for every query, big and small, as a part of our cPanel WHM Support.
Let’s take a look at how our Support Team is ready to help customers install cPanel on Linode.
About installing cPanel on Linode
cPanel is a reliable site management platform. It simplifies website as well as server management. On the other hand, Linode Block Storage allows us to extend our server storage capacity according to the requirement. This guide by our experts will help us install cPanel on our CentOS Linode without too much trouble.
Our Support Techs would like to point out that we also have to obtain a VPS license from cPanel or an authorized distributor.
How to install cPanel on Linode
The following steps require root privileges. In other words, we have to run the steps with sudo prefix or as root.
Additionally, we have to purchase a cPanel license before proceeding. We can get one from the cPanel Store and then follow these steps:
- First, log in to Linode as the root user through SSH to the IP address. We can find the IP address in the Networking tab in the Linode Cloud Manager.
- Next, disable NetworkManager before we run the install script as seen below:
 systemctl stop NetworkManager.service
 systemctl disable NetworkManager.service
 systemctl enable network.service
 systemctl start network.service
- Then, download and install cPanel by executing this command:
cd /home && curl -o latest -L https://securedownloads.cpanel.net/latest && sh latest
- Finally, we have to verify the cPanel license.
/usr/local/cpanel/cpkeyclt
How to configure cPanel
- First, open cPanel at https://198.51.110.0:2087. We have to replace 198.51.110.0 with our Linode’s IP address or domain name. If we come across a warning message, ignore the message and continue.
- Then, log in with root credentials.
- After that, read and accept the license agreement.
- Next, we have to provide a working email address. Additionally, we may also offer an AIM name, SMS address, or ICQ number as well.
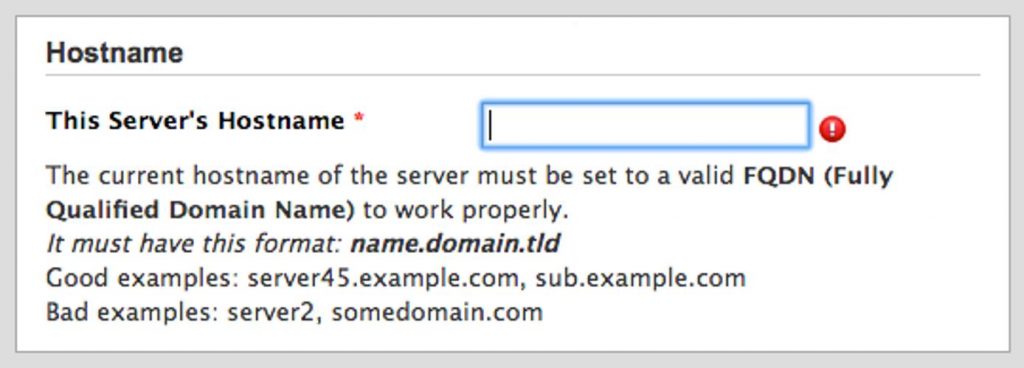
- Then, enter the FQDN of the server.

- Although DNS resolvers are automatically filled in, we can verify the values against the Networking tab in the Linode Cloud Manager.
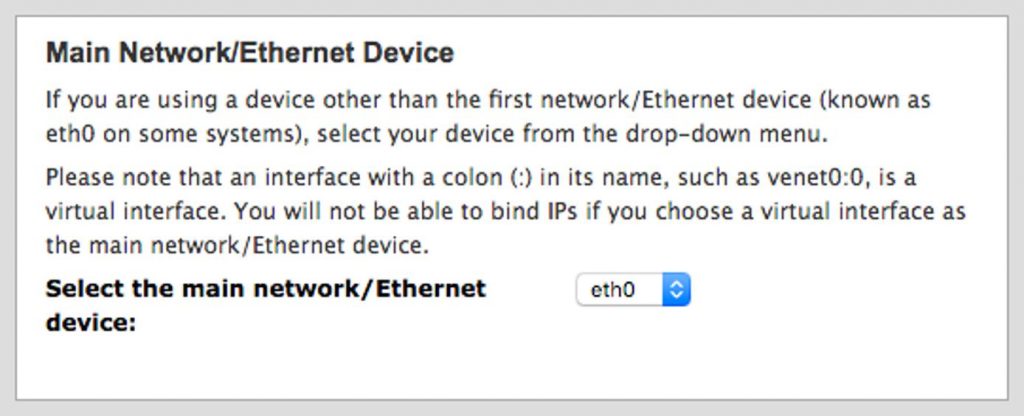
- After that, ensure the main network device is set to eth0 as seen below:

- Next, verify the information is correct and then click Save & Go to Step 3.
- At this point, we will come across the Setup IP Addresses section, where we will click Skip This Step and Use Default Settings.
- Now we have to configure DNS. We can do this via Linode Nameservers or self-managed DNS. Once we are done with listing the preferred nameserver, click Save & Go to Step 5.
- The final section of the cPanel installation process involves additional configuration options like:
- Installing and configuring SFTP.
- Deciding whether or not we want to enable cHulk.
After reviewing the options and entering our preferences, click Save & Go to Step 6.
- Now it is time to enable or disable support for filesystem quotas. Our Support Techs recommend disabling this option unless we have to track disk usage per user.
- Finally, click Finish Setup Wizard to arrive at the Feature Showcase page. We can enable additional features by cPanel on this page and click Exit to WHM after saving the settings.
With this handy guide, installing cPanel is an easy task. However, if you get stuck at any of the above steps, feel free to drop us a line and our Tech Support will help you out in a jiffy.
[Looking for a solution to another query? We are just a click away.]
Conclusion
To sum up, our skilled Support Engineers at Bobcares demonstrated how to install cPanel on Linode.
PREVENT YOUR SERVER FROM CRASHING!
Never again lose customers to poor server speed! Let us help you.
Our server experts will monitor & maintain your server 24/7 so that it remains lightning fast and secure.


0 Comments