Learn how to Restore a Backup from Cloudflare R2 using Backup4all for secure, reliable recovery. Our cloudflare Support team is ready to assist you.
Restore a Backup from Cloudflare R2
This article is for you if you are searching for a smarter, more affordable way to back up your data. Integrating Cloudflare R2 with Backup4all gives you a simple yet powerful setup for protecting files. Take a couple of minutes to read this article, especially if you want something reliable, easy to manage, and ready when you need it most.
Cloudflare R2 offers affordable, S3-compatible cloud storage with no egress fees. When paired with Backup4all, it offers a safe and adaptable method for managing, backing up, and restoring data in both local and cloud contexts. This combination offers fast recovery options, automation, and simple setup for dependable data security.
What is Cloudflare R2 and Backup4all?
Cloudflare R2 is a cost-effective, S3-compatible object storage service that eliminates egress fees. It offers high availability and worldwide performance, making it perfect for storing unstructured data such as movies, backups, and big datasets. Important characteristics include:
- No egress charges
- Compatibility with the S3 API
- Excellent accessibility and prompt delivery
- Safe object-based storage
Backup4all is a Windows backup program that supports Cloudflare R2 in addition to local and cloud destinations. It provides compression, encryption, and automated backups. Important characteristics include:
- Multiple backup types
- Encrypted and scheduled backups
- Easy Cloudflare R2 integration
- Support for multiple storage locations
Backup Types in Backup4all
Backup4all includes intelligent features and a variety of backup options to help you effectively manage and protect your data.
Types of Backups in Backup4all:
Full Backup: Makes a copy of everything; takes the longest to execute but restores the fastest.
Incremental Backup: Only modifications made since the last backup are saved.
Differential Backup: Keep changes made since the last full backup.
Mirror Backup: Creates an exact copy of your files and folders.
Smart Backup: Determines the optimum backup type automatically based on requirements.
Additional Features:
- To conserve space, use zip compression.
- Limits on storage and version management through merging AES encryption to safeguard data.
- Personalized file names for improved structure.
- Restoring a Backup from Cloudflare R2 Using Backup4all.
- Preparing Cloudflare R2 as a Storage Destination.
Read our expert guide on How to Resolve Cloudflare API Error 7003 and fix the issue quickly and effectively.
Scanning and Loading Backup Catalogs
Restoring a backup catalog means obtaining your project or file history back from a backup. When switching to a new system or in the event of data loss, this can assist in data recovery.
1. Locate the backup
- Verify whether the backup is stored on network storage, an external hard drive, or a USB drive.
- Find the backup file and plug it in or access the storage.
2. Decide Where to Restore
- Same Location: Returns the catalog to its original location.
- Change Location: Allows you to select a different drive or folder.
3. Launch the Restore
- Choose restore options according to your configuration.
- Click to begin the process; the time required will depend on the size of the file.
4. Following the Restoration
- Open the recovered catalog to make sure everything is there.
- If your program (like Lightroom) allows it, maximize performance.
- Resolve any problems or missing files with support or help manuals.
Things to Remember:
- Make regular backups to prevent data loss.
- Maintain extra copies and store them in a secure location.
Discover how to boost your security with our expert guide: Cloudflare Access IDP | Enhanced Security.
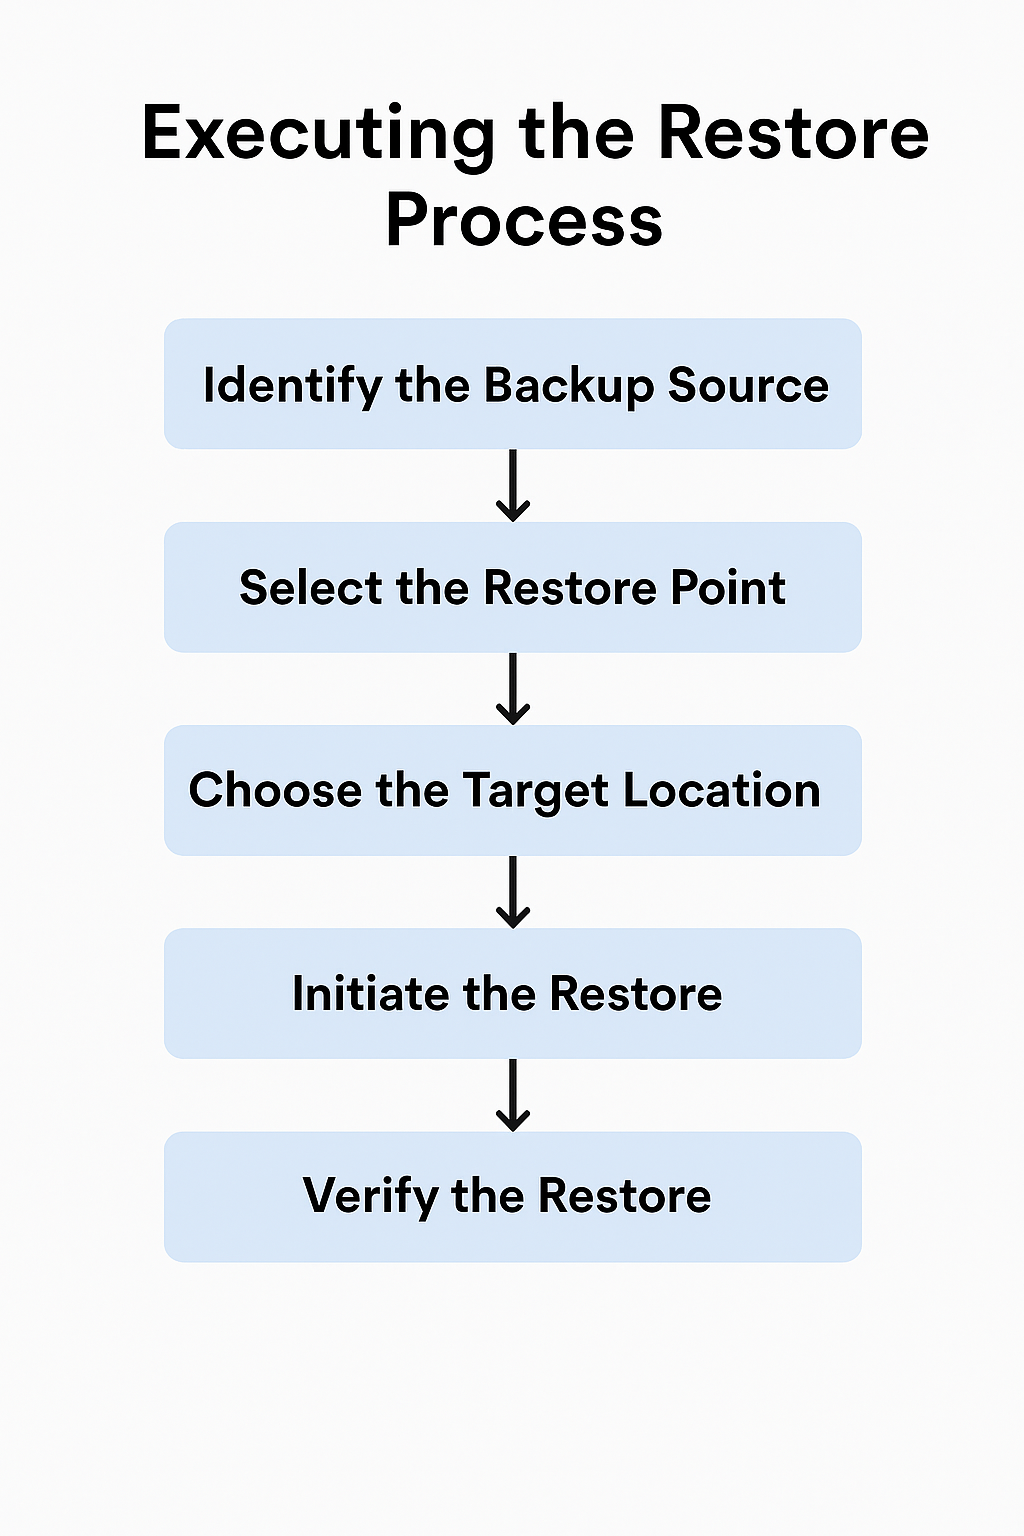
Executing the Restore Process
Restoring data from a backup helps in recovering lost or corrupted information. It is applicable to servers, databases, files, and entire systems. The basic steps are as follows:
- Locate the backup’s location, such as the cloud, network, or external disk.
- Select the backup version or date that you want to restore.
- Choose between restoring to the original location and a new one.
- Start by using the right tool or software.
- Confirm that all data has been properly restored.

Check out our expert guide on Mastering Cloudflare Kubernetes Load Balancer to optimize your deployment and performance.
Creating a Backup to Cloudflare R2
To create and execute backups from Backup4all to Cloudflare R2 with a straightforward and safe cloud setup, follow these instructions.
1: Log in to your Cloudflare account, go to the R2 section, create a new bucket, obtain a read-write API token, and note the Endpoint URL, Access Key ID, and Secret Access Key
2: Open Backup4all, create a new backup job, choose “Online” as the destination, select “S3 Compliant,” select the Cloudflare server, and enter the endpoint, access key, secret key, and bucket name.
3: Select the files or folders to back up, choose the backup type, set a schedule if needed, and name the backup.
4: Initiate the backup
Save → Save and run.
Cloudflare R2 will now be used to backup your files. Use the same procedures and select Restore to restore.
Learn how to fix common issues in our step-by-step guide: How to Resolve Cloudflare API Error 7003.
[Need assistance with a different issue? Our team is available 24/7.]
Conclusion
Cloudflare R2 with Backup4all provides easy backup and restore options together with safe, affordable storage. While maintaining the security and accessibility of your data, you can promptly restore a backup from Cloudflare R2.
In brief, our Support Experts demonstrated how to fix the “554 5.7.1 : Relay access denied” error.


0 Comments