Learn how to efficiently restore VM backup from VMware Consolidated Backup. Our VMware Support team is ready to assist you.
Restore VM Backup from VMware Consolidated Backup
Restoring a VMware virtual machine backup is essential for quickly recovering data and maintaining uptime. This guide shows how to prepare for a restore, check available backups with IBM Spectrum Protect, perform the restore, convert the VM using VMware Converter, and safely power it on. Following these steps ensures your virtual machines are reliable, bootable, and ready for use.
Preparing for the Restore
When planning to restore a VMware virtual machine backup, the first step is to decide whether you want to replace the existing virtual machine or create a new one. This choice affects how smooth your recovery process will be.
If you plan to overwrite the existing virtual machine, you should remove it before starting the restore. Deleting the old instance prevents errors and ensures the backup data is applied cleanly.
If you decide to restore the backup as a new virtual machine, you can leave the original untouched. This method is useful when you want to test the backup, compare performance, or avoid downtime in a production environment. It also provides flexibility because you can keep both versions until you confirm the restored VM is stable.
Taking the time to decide between these two options will help you avoid restore failures and ensure your system comes back online as expected.
Querying Available Backups
To restore a VMware virtual machine with IBM Spectrum Protect, you first need to check which backups are available.
- Log in to the off-host backup server where Spectrum Protect is installed.
- Open a command-line session.
- Windows: cd “C:\Program Files\IBM\SpectrumProtect\baclient”
- Linux/Unix: cd /opt/tivoli/tsm/client/ba/bin
- Run the command:
dsmc q vm * - Review the list of virtual machines, backup dates, and types.
- Note the exact VM name you want to restore
This step ensures you select the correct virtual machine for restoration.
Restoring the Virtual Machine
To restore a VMware virtual machine, run the following command:
dsmc restore vm <vm_name> <destination>If you need to restore from a specific point in time, add the -pitdate and -pittime options:
dsmc restore vm my_vm_name destination -pitdate=YYYY-MM-DD -pittime=HH:MM:SSThis restores the selected virtual machine to the chosen location using the backup you specified.
Post-Restore Confirmation
After the restore, you will see a prompt asking whether to launch VMware Converter. This step is important because the restored image is not immediately ready for use until it is converted into a proper VMware format.
If You Select Yes
- The system automatically runs VMware Converter.
- The restored image is converted into a bootable VM.
- VMware Tools may be installed for better performance.
- Network and guest settings can be customized.
If You Select No
- You must run VMware Converter manually.
- The restored images need to be moved and converted by you.
- Additional reconfiguration may be required to make the VM bootable.
Using VMware Converter saves time and ensures the restored VM is ready to run with fewer manual steps.
Converting the Restored Image with VMware Converter
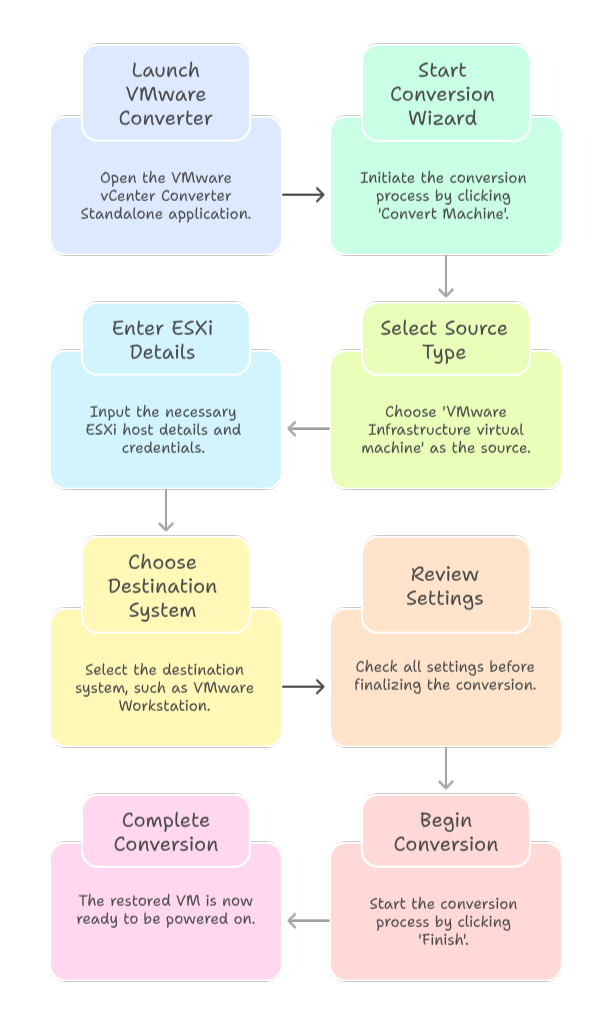
If you restore a VMware virtual machine, you must convert the .vmx image into a usable format. VMware vCenter Converter Standalone makes this process simple.
Steps to Convert the Image
- Launch VMware vCenter Converter Standalone on your Windows machine.
- Click Convert Machine to start the wizard.
- Select VMware Infrastructure virtual machine as the source type.
- Enter your ESXi host details, credentials, and choose the restored .vmx file.
- Set the destination system, either VMware Workstation or another VMware environment.
- Review the settings and click Finish to begin the conversion.
Once complete, the restored VM will be ready to power on in your VMware environment.

Starting the Restored Virtual Machine
After converting a restored VM, you can power it on in VMware vCenter to begin using it.
Steps to Power On Manually
- Log in to VMware vCenter.
- Navigate to the restored virtual machine.
- Right-click the VM and select VM Power, then Power On.
Key Considerations
- Prevent Network Conflicts: Disconnect the VM from the production network before powering it on if the original VM is still running.
- Automatic Power-On: Some backup tools allow you to enable automatic power-on during the restore process.
- Install VMware Tools: After the VM starts, install VMware Tools to improve performance and manageability.
- Guest System Configuration: Configure Windows settings, enter license information, set the time zone, and adjust network adapters to ensure the VM operates correctly.
Following these steps ensures your restored VM starts safely and is ready for use in your environment.
[Need assistance with a different issue? Our team is available 24/7.]
Conclusion
Following the proper steps ensures your virtual machines stay reliable and ready. You can confidently restore VM backup from VMware Consolidated Backup while minimizing downtime and avoiding errors.
In brief, our Support Experts demonstrated how to fix the “554 5.7.1 : Relay access denied” error.


0 Comments