


Learn how to Install NFS Server and Client on RHEL-based Distributions easily. Our NFS Support team is ready to assist you.
Install NFS Server and Client on RHEL-based Distributions
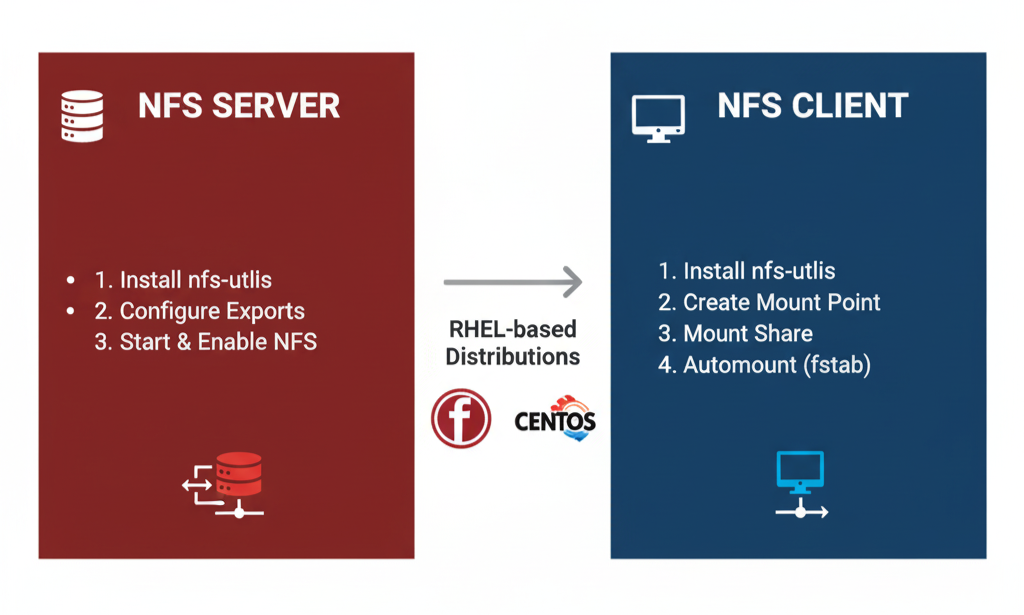
This guide explains how to install and configure NFS services, create and share directories, set up an NFS client, and verify access, enabling seamless file sharing across Linux/Unix systems.
Install and Configure NFS Services
Network File System (NFS) allows Linux servers to share directories and files with other systems over a network. By following this guide, you can easily install and configure NFS Server on RHEL to enable seamless file sharing. The process covers updating system packages, installing NFS utilities, starting and enabling NFS services, verifying their status, configuring firewall access if needed, and exporting shared directories for client access.
- Update System Packages and Install NFS Utilities
sudo yum update -y

sudo yum install -y nfs-utils rpcbind- Enable and Start NFS Services
sudo systemctl enable rpcbind

sudo systemctl start rpcbind

sudo systemctl enable nfs-server

sudo systemctl start nfs-server- Verify NFS Service Status
sudo systemctl status rpcbind

sudo systemctl status nfs-server- Configure Firewall (Optional)
sudo firewall-cmd --permanent --zone=public --add-service=nfs

sudo firewall-cmd --reload- Export Shared Directories
Add the shared directory to /etc/exports and export it:
echo "/shared_data 192.168.1.100(rw,sync,no_root_squash)" | sudo tee -a /etc/exports

sudo exportfs -arv
Configure Firewall for NFS
- Allow NFS Service
sudo firewall-cmd --zone=public --add-service=nfs --permanentReplace public with your active zone if different (firewall-cmd –get-active-zones).
- Allow mountd and rpc-bind Services
sudo firewall-cmd --zone=public --add-service=mountd --permanent

sudo firewall-cmd --zone=public --add-service=rpc-bind --permanent- Reload Firewall to Apply Changes
sudo firewall-cmd --reloadCreate and Export NFS Share
To share directories over the network using NFS, you first need to create the shared folder, set proper permissions, and configure the NFS exports. After setting up, you can export the share and restart the NFS service to apply changes.
- Create the Shared Directory
sudo mkdir -p /srv/nfs/share- Set Permissions
- Full access for all users (use cautiously in production):
sudo chmod 777 /srv/nfs/share- Alternatively, set ownership for specific users/groups as needed.
- Edit /etc/exports
sudo nano /etc/exportsAdd a line for your client(s):
/srv/nfs/share client_ip_or_hostname(rw,sync,no_subtree_check)- rw: read/write access
- sync: writes changes to disk before confirming
- no_subtree_check: improves performance, disables subtree checks
- Export the Share
sudo exportfs -a- Restart NFS Service
sudo systemctl restart nfs-kernel-server- Verify Exported Shares
showmount -eConfigure NFS Client
- Verify Server Exports
showmount -e nfs_server_ipLists directories exported by the NFS server.
- Create Mount Directory
sudo mkdir -p /mnt/nfs_share- Mount the NFS Share
sudo mount nfs_server_ip:/path/to/exported_directory /mnt/nfs_share- Persist Mount in /etc/fstab
Edit /etc/fstab and add:
nfs_server_ip:/path/to/exported_directory /mnt/nfs_share nfs defaults 0 0Example:
sudo nano /etc/fstab

# Add:

192.168.1.100:/data/nfs_share /mnt/nfs_share nfs defaults 0 0- Test Persistent Mount
sudo umount /mnt/nfs_share

sudo mount -a

df -h
Confirms the NFS share mounts automatically at boot.
Verify and Manage NFS Shares
- Verify Shared Files on the NFS Server
- Check Exported Shares:
showmount -e- Verify File Presence:
ls -l /path/to/exported/directory- Verify Shared Files on the NFS Client
- Check Mount:
df -h- Access Shared Files:
ls -l /path/to/client/mountpointTest creating, modifying, or deleting files to confirm read/write access.
- Unmount NFS Shares on the Client
- Unmount the Share:
sudo umount /path/to/client/mountpoint- Remove Persistent Mount (Optional):
sudo nano /etc/fstabComment out or remove the NFS entry to prevent automatic mounting at boot.
[Need assistance with a different issue? Our team is available 24/7.]
Conclusion
By following these steps, you can efficiently install NFS Server and Client on RHEL-based Distributions, enabling secure file sharing, persistent mounts, and easy management of shared directories across your network.
In brief, our Support Experts demonstrated how to fix the “554 5.7.1 : Relay access denied” error.


0 Comments