Server attacks become complex day by day.
That’s why, Droplet owners use stringent security measures.
But, there are scenarios where they need to whitelist trusted IP addresses to bypass these security restrictions.
That’s why, we often receive requests from DigitalOcean Droplet owners to whitelist IP as part of our DigitalOcean Managed Services.
Whitelisting IP address from the DigitalOcean control panel is an easy process, but things can go wrong if not done properly.
Today, let’s discuss the steps to whitelist an IP and the 5 common issues to avoid while whitelisting an IP in DigitalOcean.
Cloud firewall – DigitalOcean firewall service
Before we move on to the steps, let’s first get a brief idea of Cloud firewall.
DigitalOcean uses built in firewall service “Cloud firewall” to secure the Droplets.
Here, all rules are organized in a centralized location and applies to all Droplets.
And, they block all traffic except the ones that are explicitly opened in Cloud firewall.
In other words, it blocks all connections to the ports that aren’t on a whitelist, or is from a source that doesn’t fit the rules in firewall.
So, if you need an IP to access your Droplet or to allow connections to an IP , you’ve to explicitly add it in firewall.
DigitalOcean : whitelist IP – 5 common issues to avoid
Droplet owners usually whitelist an IP from the DigitalOcean control panel using the following steps.
- Go to Networking > Firewalls > Create Firewall.
- Add Inbound rules to allow incoming connections.
- Add Outbound rules to allow outgoing connections.
- Assign Droplet to these firewall rules.
Looks easy right. But, this can go wrong if it’s not done properly.
1) Messed up firewall rules
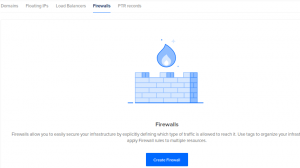
Usually, we create a firewall from Networking > Firewalls > Create Firewall in DigitalOcean control panel.

How to create firewall in DigitalOcean Droplet?
But, we’ve seen cases where Droplet owners approach us and say that they have messed up the firewall rules and are not sure where to add the new rule.
In these cases, our Support Engineers first analyze the firewalls created in the Droplet.
And, we organize them based on the roles done by each rule, so that customers can categorize each rule based on their roles in the Droplet.
For example, consider a Droplet running WordPress websites.
In this case, our Security experts create 2 firewalls, one for whitelisting HTTP/HTTPS ports and one for whitelisting SSH port.
[Want to fix the messed up firewall rules in your server? Our Support Experts are always here for your help.]
2) Wrong Inbound/Outbound rules
Inbound rules define the type of traffic that is allowed to which port and from which source.
While, the outbound rules define the type of traffic that leaves the Droplet from each port to selected destinations.
If no rules are specified, all incoming and outgoing connections are dropped.
And, these rules can be managed from Inbound/Outbound rules section of DigitalOcean control panel.

How to whitelist incoming connection from an IP?
However, we’ve seen cases where Droplet owners use incorrect protocol details while whitelisting IP address.
For example, many fundamental services such as ping, DNS lookups, web requests require outbound UDP.
If protocol is not properly selected during whitelisting an IP address, the entire task becomes unsuccessful and the whitelist rule doesn’t perform the intended task.
In such cases, our Support Engineers, analyze the Inbound/Outbound rules configured in the Droplet and ensure that correct protocol, ports, etc. are given in each firewall rules.
3) Forgot to Assign droplet
If the created firewall rules has to be applied to a Droplet, Droplet owners must explicitly add the Droplets using the Apply to Droplet feature.
But, Droplet owners often miss this step and contact us saying that their firewall rules are not active in their Droplets.
Therefore, our Support Engineers make it a point to map the Droplet to the corresponding firewall rules.
Similarly, DigitalOcean allows up to 10 Droplets per firewall.
In such cases, we use Tags, which are text labels to group Droplets to easily identify it.
Once we’ve tagged the Droplets, we use these tags to map them with firewall rules. In this way, we overcome the individual Droplet limit for firewalls.
4) Difficult to manage multiple Droplets
Eventhough whitelisting IP address from the DigitalOcean control panel is quite easy, it becomes a tedious task when you have many Droplets to manage.
In such cases, our Hosting Engineers use the DigitaOcean doctl command line utility to manage the firewall.
For example, to create a firewall named testing and allow incoming connections from IP 102.xx.10x.156 to port 22, we use the below command.
doctl compute firewall create --name testing
--inbound-rules "protocol: tcp, ports:22 address:102.xx.10x.156"
Similarly, if we need to whitelist multiples IP addresses in the firewall, our Cloud Experts create custom scripts to make it a pain-free task.
5) Whitelist IP on a network interface
Sometimes, Droplet owners need to whitelist connections to one network interface.
Since DigitalOcean doesn’t support this feature, our Hosting Engineers use host-based firewall services.
For example, CentOS server uses iptables as its firewall service while Ubuntu uses UFW.
So, to whitelist all connections on interface eth0, we use the below rule in iptables.
iptables -A INPUT -i eth0 -j ACCEPT
[Need a firewall expert to manage the firewall rules in your server? Our Server Experts can do it for you. We are online 24/7.]
Conclusion
In short, Droplet owners often need to whitelist trusted IP addresses to bypass the security restrictions in the server. Today, we’ve discussed the steps to whitelist an IP in DigitalOcean, the 5 common issues to avoid, and the solution to these common problems from our Cloud Experts.


Access to image at ‘https://www.mydomain.com/uploads/cardimages/172985225e89b0594973689948a8be52.png’ from origin ‘http://xx.xx.216.167’ has been blocked by CORS policy: No ‘Access-Control-Allow-Origin’ header is present on the requested resource.