If you are wondering how to manually migrate WordPress from Godaddy, you are in the right place. All queries, big or small, are answered by Bobcares as part of our WordPress Support Service.
GoDaddy manual WordPress migration
An FTP client like FileZilla and the database management program phpMyAdmin are two pieces of software that are typically used by IT professionals in the manual transfer of a WordPress site into the Managed WordPress account.
The five steps involved in manually transferring a WordPress website into the Managed WordPress account are as follows:
Download the site files
Download the wp-content folder, which contains all of the site’s images and other media, to manually migrate the WordPress site to a Managed WordPress or Pro Managed WordPress account.
- Firstly login to the cPanel.
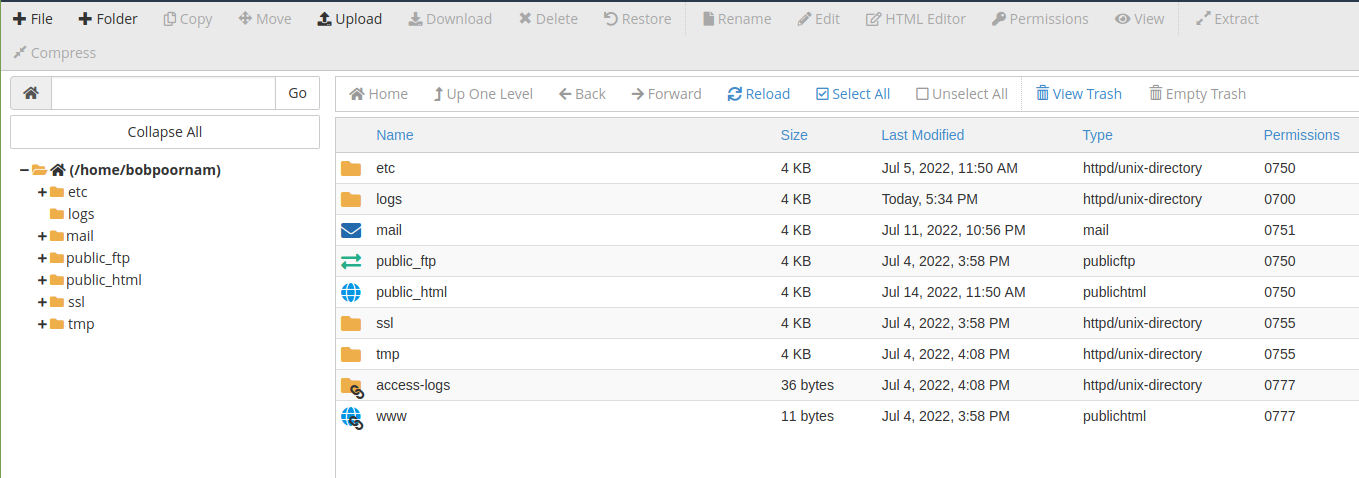
- Then open the File Manager.
- Select public_html from the directory tree on the left.

- Then choose wp-content from the file list on the right.
- Select Compress from the toolbar located above the directory tree and file list.
- Then, Choose Zip Archive under Compression Type, and then choose Compress Files.
- Close the results box for compression once the file manager has generated wp-content.zip. The new zip file ought to appear in the list. If not, choose Reload to reload the page.
- Then click Download after selecting wp-content.zip. The computer copies the zip file to the default download directory.
- Finally, find that file on the computer and unzip it.
Export the Database
- Firstly, Launch phpMyAdmin once we log into the cPanel hosting account for the WordPress website we are moving.
- Then, choose the database for the WordPress website from the left menu.
- Then select Export from the top menu.
- Finally, select Quick, then choose Go, from the Export Method list.
The computer’s default download location is where a file with the .sql extension is exported.
Upload the site files
- Firstly, Use an FTP client to connect to the Managed WordPress account.
- Then find the wp-content folder we downloaded in FileZilla on the Local site side of the interface. Right-click on the folder after selecting it, then choose Upload.
- An alert stating that the Target file already exists will be displayed. Choose Always use this action, Apply to current queue only, and Overwrite.
- Finally, click Ok
Wait until the FTP client has finished uploading the files before moving on to the next step.
Import the Database
- Firstly, launch phpMyAdmin.
- Then select the database name in the left menu.
- Then choose Check All under the Structure tab.
- Select Drop next to Check All under With selected.
- Select “Yes” next to Do you really want to?
- Check to see if the tables were dropped in the left menu. It ought to display 0 tables.
- Then select Choose File under File to import on the Import tab. Find the SQL file we previously exported, select it, then click Open. Make sure that SQL is chosen as the import file format and that partial import is selected.
- Then choose Go.
- After importing the database, make a note of the table prefix. When we make the last edits, we’ll require this.
Import the Database
Make the final edits to the site’s configuration file by connecting with an FTP client and editing the wp-config.php file. We must assign the new Siteurl and Home, as well as update the table prefix. The website can connect to the new database as a result of these changes.
[Looking for a solution to another query? We are just a click away.]
Conclusion
To sum up, using the instructions we have provided, manual WordPress migration from GoDaddy is simple. The procedures to download the site, export the database, upload the site, import the database, and make final edits were described by our Support team.
PREVENT YOUR SERVER FROM CRASHING!
Never again lose customers to poor server speed! Let us help you.
Our server experts will monitor & maintain your server 24/7 so that it remains lightning fast and secure.


0 Comments