Securely backup and recover data with Cloudflare R2 restore with Backup4all. Our Cloudflare Support team is ready to assist you.
Cloudflare R2 restore with Backup4all
Data security and cost-effective storage are more important than ever. Cloudflare R2, paired with Backup4all, gives you a reliable way to back up and restore files without unnecessary expenses. Cloudflare R2 delivers zero egress fees and global availability, while Backup4all ensures simple, automated, and encrypted backups. Together, they create a powerful solution for businesses and individuals who need affordable, flexible, and secure data protection.
Introduction to Cloudflare R2 and Backup4all
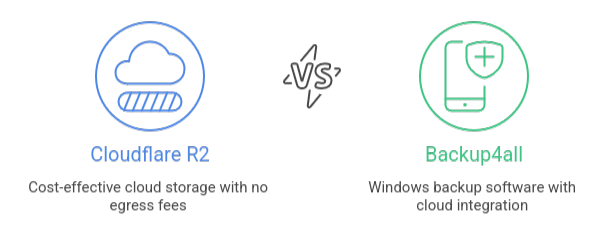
Cloudflare R2 is a cost effective and globally distributed cloud storage service that works with any S3 compatible tool. Its most important feature is the removal of egress fees, which allows businesses and developers to move data freely without paying extra charges. Built on Cloudflare’s global network, R2 delivers fast access and high availability, making it ideal for storing backups, media files, data lakes, and other unstructured datasets. With affordable pricing and reliable performance, it offers a practical alternative to traditional cloud storage providers.

Backup4all is an easy to use Windows backup software that helps users secure and manage their data across multiple destinations. It supports different backup types such as full, incremental, differential, and mirror, while also providing advanced features like scheduling, file encryption, and compression. In addition to local and network drives, Backup4all works smoothly with cloud platforms including Cloudflare R2, giving users flexible options for protecting files. Its simple design and powerful automation tools make it a dependable solution for both personal and business data protection.
How to Restore a Backup from Cloudflare R2
Restoring a Cloudflare R2 backup is easy with any tool that supports S3 compatible storage. You only need your endpoint URL, access key ID, and secret access key to connect. After connecting, you can select your R2 bucket, locate the backup files, and restore them to your chosen location.
Steps to Restore
- Launch the tool you use for backups on your computer or server.
- Go to the option that connects to S3 storage and enter your Cloudflare R2 details, including endpoint URL, access key ID, and secret access key.
- Choose the specific R2 bucket where your backups are stored. This bucket acts as your cloud container for data.
- Browse the bucket and find the catalog file or backup data you want to recover. Some tools have a scan feature to make this step easier.
- Select the backup job or files, pick a destination on your computer or server, and begin the restore. The tool will handle the recovery automatically.
For more insights on troubleshooting, check out our expert guide on How to Fix the Cloudflare Error Code 502.
How to Back Up Files from Cloudflare R2
Cloudflare R2 makes storing and protecting data simple, especially when paired with a backup tool like Backup4all or Duplicator Pro. Since R2 works as an S3 compatible storage service, you can easily connect, schedule, and automate backups to keep your files secure in the cloud.
Step by Step Backup Process
- Login to Cloudflare, create an R2 bucket, and generate an API token. Copy your endpoint URL, access key ID, and secret access key.
- Launch software such as Backup4all or Duplicator Pro.
- Choose an online destination and set Cloudflare R2 as S3 compatible storage.
- Add your endpoint, keys, and bucket name, then save the connection.
- Pick the files to back up, choose the backup type, and schedule automatic runs.
To learn how to resolve connection issues, read our expert guide on How to Fix the “Please Enable WARP” Error in Cloudflare.
How to Create a Backup to Cloudflare R2
Cloudflare R2 offers secure and cost effective storage, and setting up backups is quick when you use an S3 compatible tool such as Backup4all or Duplicator Pro. With the right credentials, you can automate backups and keep your data safe in the cloud.
Steps to Back Up Data
- Create a Cloudflare account, open the R2 section, and make a bucket. Generate an API token with read and write access, then copy your access key ID, secret access key, and endpoint URL.
- Open your backup software, choose S3 compatible storage, and enter the bucket name along with your R2 credentials. Save the settings to connect.
- Start a manual backup or schedule automatic tasks. Once complete, check your R2 bucket in the dashboard to confirm the files uploaded successfully.
Tips for managing backup and restore jobs efficiently
- Start by defining your recovery goals and identifying critical data. Focus on what is essential and set clear recovery points and time objectives.
- Follow a reliable strategy by keeping multiple copies in different locations using the 3-2-1 rule. Combine full, incremental, or continuous backups and store them locally and in the cloud for extra security.
- Automate backups and schedule them during off-peak hours to reduce system impact. Monitor jobs regularly to ensure they complete successfully and storage is sufficient.
- Protect your data by encrypting backups, using immutable storage to prevent tampering, and limiting access to authorized users. Finally, test restores frequently to make sure your data is recoverable and your business stays safe.
Discover the simple steps to set up Cloudflare Permanent Redirect by reading this guide.
[Need assistance with a different issue? Our team is available 24/7.]
Conclusion
Cloudflare R2 restore with Backup4all offers a secure and cost-effective way to protect and recover your data. Cloudflare R2 provides fast, global access without extra fees, while Backup4all automates and encrypts backups. By following a clear backup strategy and testing restores regularly, you can ensure your files remain safe and easily recoverable, making this combination ideal for both personal and business use.
In brief, our Support Experts demonstrated how to fix the “554 5.7.1 : Relay access denied” error.


0 Comments