


Start hosting websites today by installing the Apache Web Server on Debian 12.11. Our Apache Support team is ready to assist you.
Install the Apache Web Server on Debian 12.11
Apache HTTP Server is one of the most trusted tools for hosting websites and applications. Apache can be easily installed and set up in a reliable and secure environment with Debian 12.11. Learn how to get started with this guide.
-
- Apache Web Server
- Prerequisites
- How to Install the Apache Web Server on Debian 12.11
- Step 1: Update the System
- Step 2: Install Apache on Debian 12
- Step 3: Configure the Firewall
- Step 4: Verify Apache Installation
- Step 5: Manage Apache Service
- Step 6: Create an Apache Virtual Host
- Step 7: Secure Apache with SSL Certificates
Apache Web Server
Apache HTTP Server, often called Apache, is one of the most trusted web servers worldwide. You may host websites and applications in a stable and secure environment when you install the Apache Web Server on Debian 12.11 Bookworm.
Apache is a well-liked option for developers and companies because it is open source and totally free. With its APT package manager, Debian streamlines the procedure, enabling dependable and speedy installation, updates, and maintenance.
Apache can be used to deliver both dynamic applications and static content, like pages, photos, and videos. Features like SSL encryption, URL rewriting, user authentication, and load balancing are added via its numerous modules.
Prerequisites
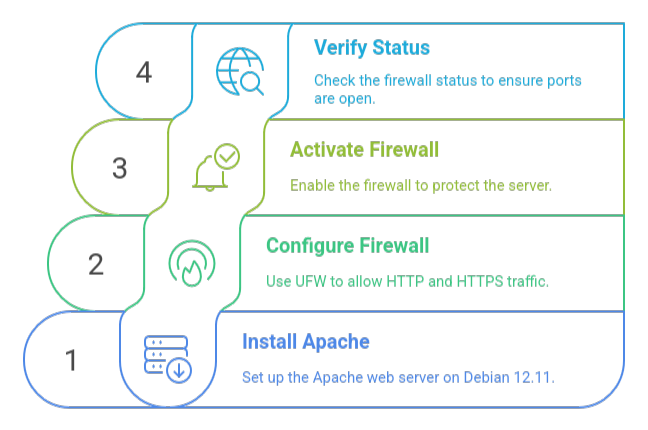
It’s a good idea to use a firewall to protect your server after installing Apache Web Server on Debian 12.11. Although optional, this step helps keep your system safe while still permitting online traffic. You can use the following instructions if you’re running UFW (Uncomplicated Firewall):
sudo ufw allow 80/tcp

sudo ufw allow 443/tcp

sudo ufw enable
Apache can handle regular web traffic (HTTP on port 80 and HTTPS on port 443) thanks to the first two commands. The firewall is activated by the final instruction. After that, verify the firewall’s status using:
sudo ufw statusYour Apache server is ready to safely serve websites if you see that ports 80 and 443 are open.
How to Install the Apache Web Server on Debian 12.11
Apache is one of the most popular and reliable web servers for hosting websites and applications. The following steps will teach you how to safely install and configure the Apache Web Server on Debian 12.11.
Step 1: Update the System
Before installing any new software, update your package list and upgrade existing packages. Run:
sudo apt update

sudo apt upgrade -y
This ensures that your system is running the most recent versions.
Step 2: Install Apache on Debian 12
Apache is included in the default Debian repositories. Install it with:
sudo apt install apache2 -yTo verify the installation and view the installed version, use:
apachectl -v

sudo ufw allow 80

sudo ufw reload
Now allow web traffic on port 80 through the firewall:
sudo ufw allow 80

sudo ufw reload
Start the Apache service:
sudo systemctl start apache2Open your browser and visit your server IP:
http://SERVER-IPYou should see Apache’s default welcome page.
Check the service status with:
sudo systemctl status apache2See our expert article for tips on restarting Apache2 on Debian while keeping your server secure.
Step 3: Configure the Firewall
To allow both HTTP and HTTPS traffic, update the firewall:
sudo ufw allow 'Apache'

sudo ufw reload
Step 4: Verify Apache Installation
To make sure Apache is operating, there are two easy methods:
Method 1: Browser Test: If you go to the IP address or domain of your server, the Apache default page ought to be displayed.
Method 2: Status and Version:
apache2 --version

systemctl status apache2
If Apache is inactive, enable and start it with:
sudo systemctl enable apache2 --nowThis ensures that Apache boots up automatically.
Step 5: Manage Apache Service
You can control the service anytime using:
sudo systemctl stop apache2

sudo systemctl start apache2

sudo systemctl enable apache2
Activate SSL on Apache2 confidently with insights from our expert article.
Step 6: Create an Apache Virtual Host
Several websites can be operated on the same server via virtual hosting. Disabling the default settings is the first step:
sudo a2dissite 000-default.confCreate a new config file:
sudo nano /etc/apache2/sites-available/app.example.com.confAdd:
<VirtualHost *:80>

ServerAdmin email@app.example.com

ServerName app.example.com

ServerAlias app.example.com

DocumentRoot /var/www/app.example.com

DirectoryIndex index.php index.html

ErrorLog ${APACHE_LOG_DIR}/app.example.com-error.log

CustomLog ${APACHE_LOG_DIR}/app.example.com-access.log combined

</VirtualHost>
Save and exit. Then test the configuration:
sudo apache2ctl configtestCreate the web root and enable the website:
sudo a2ensite app.example.com

sudo mkdir /var/www/app.example.com

sudo chown -R www-data:www-data /var/www/app.example.com

sudo chmod -R 755 /var/www/app.example.com
Create a sample page:
sudo nano /var/www/app.example.com/index.htmlPaste:
<!DOCTYPE html>

<html lang="en">

<head>

<title>Greetings from Debian</title>

</head>

<body>

<h1>Apache is working on Debian 12.11</h1>

</body>

</html>
Restart Apache:
sudo systemctl restart apache2To make sure it works, open your domain in a browser.
Correct Apache2ctl command issues safely through our expert article.
Step 7: Secure Apache with SSL Certificates
Apache uses HTTP by default, which is unsafe. You should use Let’s Encrypt to enable HTTPS.
First, set up Certbot and Snap:
sudo apt install snapd -y

sudo snap install certbot --classic
Verify Certbot:
sudo certbot --versionGenerate an SSL certificate:
sudo certbot --apache -d app.example.com -m email@example.com --agree-tosTest auto-renewal:
sudo certbot renew --dry-runAllow HTTPS through the firewall:
sudo ufw allow 443

sudo ufw reload
Finally, visit your domain with HTTPS:
https://app.example.com
Strengthen your Apache server with guidance from our expert article.
[Need assistance with a different issue? Our team is available 24/7.]
Conclusion
Installing the Apache Web Server on Debian 12.11 sets up a reliable and secure hosting environment. Your server can effectively provide webpages and apps after it is set up. By following the instructions, you can be sure that your web server is operational and ready for use.
In brief, our Support Experts demonstrated how to fix the “554 5.7.1 : Relay access denied” error.


0 Comments