


Learn how to Migrate Redis Data to a DigitalOcean Managed Database for improved security, scalability, and performance. Our Redis Support team is ready to assist you.
Migrate Redis Data to a DigitalOcean Managed Database
Redis is a highly effective in-memory data store that is frequently used for session management, caching, and real-time analytics. Redis data migration to a DigitalOcean managed database offers you easy scalability, improved security, and automated backups. Learn how to do this migration quickly and easily with this article.
-
- What is Redis?
- Benefits of DigitalOcean Managed Databases
- Prerequisites for Redis Data Migration to DigitalOcean
- How to Migrate Redis Data to a DigitalOcean Managed Database
- Understanding the Redis Migration Command
- Executing the Migration Command
- Examining the Migration
- Verifying Volatile Keys and TTL
What is Redis?
Redis (REmote DIctionary Server) is an open-source in-memory data store that functions as a message broker, cache, and high-performance database. With sub-millisecond latency, it enables extremely fast read and write operations by storing data in random-access memory (RAM). In addition to supporting rich data structures including strings, lists, hashes, sets, sorted sets, bitmaps, HyperLogLogs, and geospatial indexes, Redis arranges data as key-value pairs.
In order to guarantee durability, it also provides persistence options via snapshots or append-only files. Additionally, you can carry out atomic operations, which preserve data consistency even when updates are happening simultaneously. Developers frequently use Redis for message queuing, leaderboards, caching, session management, and real-time analytics.
Be sure to check out our expert article that explains how to fix the common Redis error about resource pool issues.
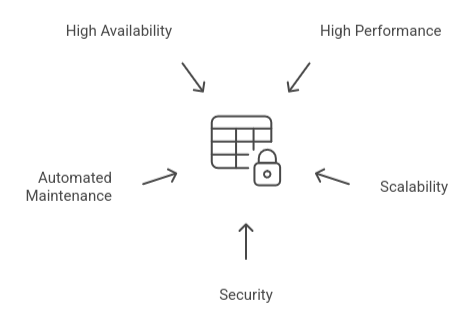
Benefits of DigitalOcean Managed Databases
The fully managed, high-performance clusters provided by DigitalOcean Managed Databases make database administration easier while guaranteeing scalability, speed, and security. They take care of maintenance, updates, backups, and setup so you can focus on development. They guarantee high availability and flexibility with automated failover, regular backups, and simple resource scaling. Furthermore, private networking and SSL/TLS encryption safeguard private information. As a result, DigitalOcean Managed Databases offer a safe, dependable, and affordable alternative to manual database administration.
Prerequisites for Redis Data Migration to DigitalOcean
- Billing is enabled on an active DigitalOcean account.
- Existing Redis instance with data that has to be moved
- Redis source access credentials (hostname, port, and password)
- Version-compatible and provisioned DigitalOcean Managed Redis cluster
- proper firewall/trusted source setup and network connectivity
- A Redis client or migration tool having access to both instances
- Knowledge of Redis persistence (AOF, RDB)
- Fundamental knowledge of Linux/server administration for file transfers and commands
How to Migrate Redis Data to a DigitalOcean Managed Database
Here is the step-by-step procedure to migrate Redis Data to a DigitalOcean Managed Database:
- In the DigitalOcean Control Panel, choose the plan, region, and standby nodes to create a Managed Redis Cluster.
- Configure firewall rules for port 6379 and add your source Redis IP to Trusted Sources to establish network access.
- For an RDB snapshot, export Redis data using the SAVE or BGSAVE command; if AOF persistence is being used, copy the AOF file.
- Use SCP or SFTP to import and move the data, then use Redis-cli or DigitalOcean’s migration tool to restore it.
- Update your application configuration with the new Redis connection information and confirm the data in the new cluster.
Check out our expert article to learn how to fix the Redis error “Accepting a Client Connection (null)?” quickly and effectively.
Understanding the Redis Migration Command
Establish a connection to the Redis instance.
- -n <source_database_index>
- -a <source_password> redis-cli The database index to be migrated is specified by -n. -a gives the source’s authentication password.
List of Migration Keys
- Keys are scanned from the cursor position 0 by scan 0.
Keys in a Loop Process
- | while read key; do… done reads and processes each key from the scan.
- Transfer Every Key to the Digital Ocean <source_database_index> redis-cli -n
- This is a <source_password> �target_host> <target_port> MIGRATE <timeout> <target_database_index> “$key” The copied password is <managed_redis_password>.
- A key is moved to the destination host and port using MIGRATE.
- COPY preserves the source key (optional).
- The target Redis instance is authenticated using AUTH.
Use SAVE or BGSAVE to create an RDB snapshot.
- Move the.rdb file to the intended location.
- To load the snapshot, restart Redis on the target.
Executing the Migration Command
To move keys to DigitalOcean Managed Redis, run the redis-cli migration command using your real database information. Make sure to appropriately replace placeholders such as <target_host> and <managed_redis_password>.
Examining the Migration
To verify migrated keys, connect to the destination Redis instance and use KEYS * or SCAN 0. For accuracy, compare the number of keys on the source and the destination.
Verifying Volatile Keys and TTL
Verify that TTL values match source settings using TTL <key> or PTTL <key>. After migration, make sure volatile keys still have their expiration dates.
Get step-by-step help to resolve ‘Redis Sentinel Failed to Resolve Hostname’ problems in our expert article.
[Need assistance with a different issue? Our team is available 24/7.]
Conclusion
In addition to lowering administrative effort, migrating from Redis to DigitalOcean Managed DB ensures excellent performance, security, and scalability. You may concentrate on creating dependable, real-time, and data-driven solutions by following the steps outlined to safely transfer data, maintain TTL settings, and guarantee seamless application execution.
In brief, our Support Experts demonstrated how to fix the “554 5.7.1 : Relay access denied” error.


0 Comments