In our role as Server support specialists for web hosts, we manage web servers with various control panels and billing portals such as WHMCS, Blesta, HostBill, etc.
Blesta is a customer management, billing, and support system for web hosting providers, which is being used by many web hosts nowadays.
See how we add value to your business!
Blesta has many plugins that helps to accomplish features such as support management. The plugins are usually installed under ‘[Settings] > [Company] > [Plugins]’ option, based on the requirement of the web host.
One such commonly installed plugin in Blesta is the ‘Support Manager’. It integrates a ticket system and knowledgebase to allow for clients to request support.
Here, we’ll see what causes the error ‘The file could not be written‘ in Blesta ‘Support Manager’ feature, and how to fix it.
What causes ‘The file could not be written’ error in Blesta
When end customers try to open a new ticket or ‘Add an attachment’ such as an image or PDF to a ticket, they may end up seeing an error ‘The file could not be written’, at times.
This happens usually do to the issues with the folders associated with Blesta and the Support Manager plugin. If the folders are missing or do not have adequate permissions, customers would end up seeing this error.
Blesta needs an uploads folder, which is writable by the web server. Support manager plugin requires a set of folders and sub-folders, which are again writable by the web server.
Now, we’ll see the folder specifications and how to ensure that the error ‘The file could not be written’ does not occur in Blesta.
[ Take care of your customers, before your competitors do. Get world-class support specialists to delight your customers. ]
How to resolve ‘The file could not be written’ error in Blesta
To resolve the error related to file writing, the ‘uploads’ folder and the plugin related folders should be present in the appropriate directories and with the right permissions.
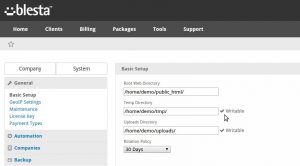
The settings for the ‘Upload’ and ‘Temporary’ directories for Blesta are set at ‘Settings > System > General’ interface.
The 4 main points to take care of, while creating these folders are:
1) The ‘uploads’ folder is created outside the “public_html” folder of the domain, for security purposes – say, /home/username/uploads/.
2) The uploads folder should have a 777 permission to make it ‘writable’ by the software.
3) The folder structure inside the uploads folder should look like this:
– uploads
— system
— 1
—– client_documents
—– download_files
—– invoices
—– support_manager_files
4) The “system” and a “1” directory in uploads should be writable too. Inside that 1 folder, there has to be a writable folder called ‘support_manager_files’, which is where the support manager upload the attachments.
Though these folders automatically gets created by the plugin, in case of ‘write’ errors, it denotes some issue with the folder permissions.
[ Focus on your core business without interruptions. Our tech support experts are here to manage your customers 24/7. ]
At Bobcares, our 24/7 server specialists constantly monitor all the services in the server and proactively audit the server for any errors or corruption in them.
With our systematic debugging approach for service or other software errors, we have been able to provide an exciting support experience to the customers.
If you would like to know how to avoid downtime for your customers due to errors or other service failures, we would be happy to talk to you.


0 Comments