


The WP Rocket cloudflare add-on for WordPress is one of the most simple and effective caching plugins available.
Bobcares responds to all queries, large and small, as part of our Server management services.
Let’s look at the WP Rocket cloudflare add-on in greater detail.
WP Rocket cloudflare add-on
To speed up our site, WP rocket provides one-click options for removing unused CSS, delaying JavaScript, and optimising caching. Cloudflare, on the other hand, is a free CDN that allows users to access content from the closest location. To improve the performance of our site, we should combine the capabilities of WP Rocket caching with Cloudflare CDN. Cloudflare and WP Rocket are completely compatible and complementary.
In most cases, using our Cloudflare add-on is a convenience rather than a requirement. Whether or not we use the WP Rocket add-on, once we’ve set up our Cloudflare account correctly, it will be active for our site. The add-on simply makes it easier to customise some settings. If we use Cloudflare’s Cache Everything feature, however, we’ll need to configure our add-on to sync the cache purging.
Adding our site to the Cloudflare account is the first step in using them together. Then Cloudflare is now our domain name servers.
While Cloudflare can minify CSS and JS files just as well as WP Rocket, WP Rocket also has the ability to combine files, which Cloudflare does not. To get the best results, we recommend turning on Cloudflare’s minification as well as WP Rocket.
WP Rocket’s Cloudflare add-on
Prerequisites
- We’ll need direct access to our Cloudflare account to get the API key information we’ll need to configure the add-on.
- We’ll find the Cloudflare add-on in the Add-ons settings tab. Activate the add-on.
- After that, select Modify Options. The Cloudflare tab will appear under the Add-ons tab.
Enabling Cloudflare Add-on
- Go to the WordPress admin panel and then log in.
- Then, go to the section “Settings > WP Rocket.”
- Go to the “Add-ons” menu.
- Then, scroll down to the “Rocket Add-ons” section.
- WP Rocket currently offers two add-ons: Cloudflare and Sucuri. All add-ons have their status set to off by default.
- By clicking the button next to “Add-ons status,” we can enable Cloudflare.
Setting Cloudflare with WP Rocket
To view configuration settings after enabling the add-on, click the “Modify Options” button. It has three sections where we can optimise our settings.
- Firstly, cloudflare credentials
- Cloudflare settings
- Lastly, cloudflare cache
Cloudflare Credentials
Allowing WP Rocket access to our Cloudflare account is required to use WP Rocket with Cloudflare. This is accomplished by entering our Cloudflare global API key, zone ID, and login email address.
Global API key
- Firstly, log into the Cloudflare account.
- At the top right, click the profile icon, then My Profile.
- Then go to API Tokens.
- The Global API Key is located there.
- The API key will be revealed after we enter our Cloudflare password. Copy and paste the Global API key into the WP Rocket settings.
Provide the Cloudflare account email address, not the WP Rocket or WordPress admin email address, for account email.
Cloudflare Settings
As shown below, we will have three options. Turn off Developer mode and the Related protocol options, then select “Optimal settings.”

Development mode in Cloudflare will enable development mode and disable caching/minification settings. We can test the changes in development mode without interfering with Cloudflare caching. Otherwise, simply disable this option.
When we enable optimal settings, Cloudflare will automatically turn on the following features:
- Enable CSS, JSS, and HTML minification options with Auto Minify.
- Change the default value of 4 hours for the browser cache TTL to 1 year.
- Turn off the Rocket Loader feature.
- Set the level of caching to standard.
The relative protocol option forces all static files, such as images, to use / instead of http:// or https:// in their URLs. Only use this if Cloudflare’s SSL status is set to flexible, according to WP Rocket. In our Cloudflare account’s dashboard, we can check the SSL/TLS status under “SSL/TLS > Overview.”
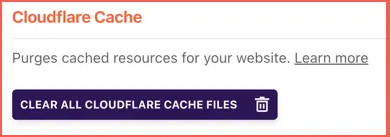
Cloudflare Cache
This is the final configuration, and we can only delete Cloudflare cached content by clicking “Clear All Cloudflare Cache Files.” This is the same option as “Purge Everything” in our Cloudflare account’s “Caching > Configuration” section.
To connect WP Rocket and Cloudflare after finishing the setup, click the “Save Changes” button. The summary of optimal settings in our Cloudflare account will change, and WP Rocket will begin preloading the pages.
[Looking for a solution to another query? We are just a click away.]
Conclusion
To sum up, our knowledgeable engineers explained the WP Rocket cloudflare add-on in detail.
PREVENT YOUR SERVER FROM CRASHING!
Never again lose customers to poor server speed! Let us help you.
Our server experts will monitor & maintain your server 24/7 so that it remains lightning fast and secure.


0 Comments