VScode AWS CodeCommit can be easily mastered with a little assistance from our end.
At Bobcares, we offer solutions for every query, big and small, as a part of our AWS Support Services.
Let’s take a look at how our AWS Support Team is ready to help customers with VScode AWS CodeCommit.
All About VScode AWS CodeCommit
Did you know that we can use Visual Studio to modify the code in the CodeCommit repository? Stick with us and you will learn plenty more useful information like this.
The AWS Toolkit for VS includes several features, including one that makes it easier and a lot more convenient to work with CodeCommit in VS Team Explorer. Furthermore, the toolkit works with Git credentials and an IAM user. It allows us to create repositories, clone repositories, and even push code modifications, and so on.
How to connect to AWS CodeCommit via VScode
The prerequisites for this include:
- Microsoft Visual Studio Code
- GIT
After downloading and installing VS code, it is time to open it and configure GIT by heading Terminal > New Terminal. Then. We have to set a GIT user and email as seen below:
git config — global user.name “Name1”
git config — global user.email bob@bobcares.com
We can verify whether the GIT has been configured correctly with the following command:
git — version
Now, it is time to set up the AWS CodeCommit repository in order to connect to AWS CodeCommit via VScode.
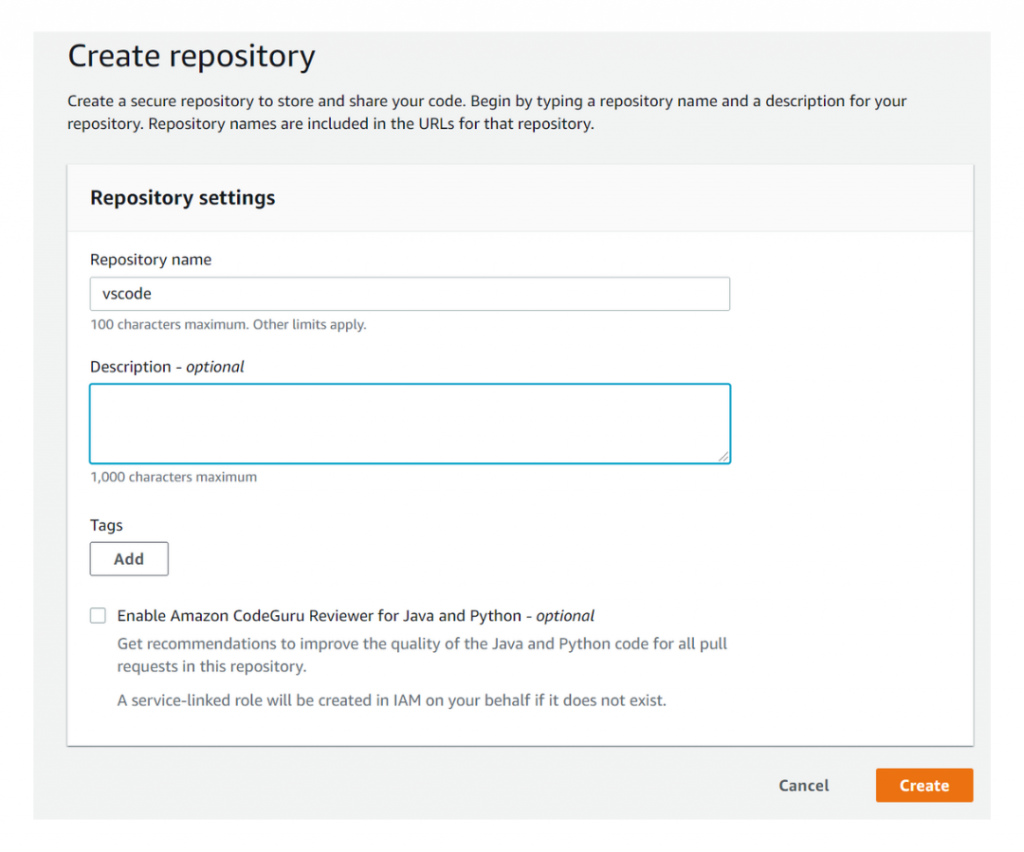
- To begin with, navigate to AWS management console > Service > Developer Tools > CodeCommit and select Create Repository.
- Then, enter a repository name and description before clicking Create.

- Next, we will create a user on AWS by heading to Services > Identity and Access Management (IAM) > Users.
- After that, click Add User and enter a user name and password and click Next.
- Then, choose the Attach existing policies directly and Attach existing policies directly policy in the Set Permission screen before clicking Next.
- Next, we can opt to add Tags or skip ahead to the next step that involves reviewing the policy.
- Finally, click Create user to complete the process.
After the above process, we have to head to Services > Identity and Access Management (IAM) > Users and select the new user we just created.
Then, select Generate Credentials under the HTTPS Git section. Now, it is time to download the credential file as we will require this later in order to connect from the VScode.
How to connect VScode and GIT
- To begin connecting to AWS CodeCommit via VScode, enter the following command in a terminal window to initialize the local GIT repository:
Git init
- Then, add the files to the repository with the command seen below:
git add — all
- Next, enter the following command to commit the code to the local GIT repository:
git commit -m <:commit comment>
We can verify the success of this step by entering the following command:
Git status
- After that, navigate to AWS management console > Service > Developer Tools > CodeCommit and select the repository we created earlier.
- Then, click on HTTPS to copy the clone URL.
- Now, it is time to connect to the remote repository with the following command in a terminal:
git remote add origin [Copied URL from AWS]
- Finally, it is time to push the files to the Master branch of the Origin with the command below:
git push — set-upstream origin master
Then enter the credentials when prompted.
- Now, we can see the updated files on the Master branch if we head back to the AWS CodeCommit repository we created.
If you run into trouble with any of the above steps, our Support Techs are here to help you out.
[Need assistance with a different issue? We are available 24/7.]
Conclusion
In a nutshell, our skilled AWS Support Engineers at Bobcares took us through VScode AWS CodeCommit.
PREVENT YOUR SERVER FROM CRASHING!
Never again lose customers to poor server speed! Let us help you.
Our server experts will monitor & maintain your server 24/7 so that it remains lightning fast and secure.


0 Comments